|
German Fast Attack Craft S-100 Class  |
|
|
|
|
|
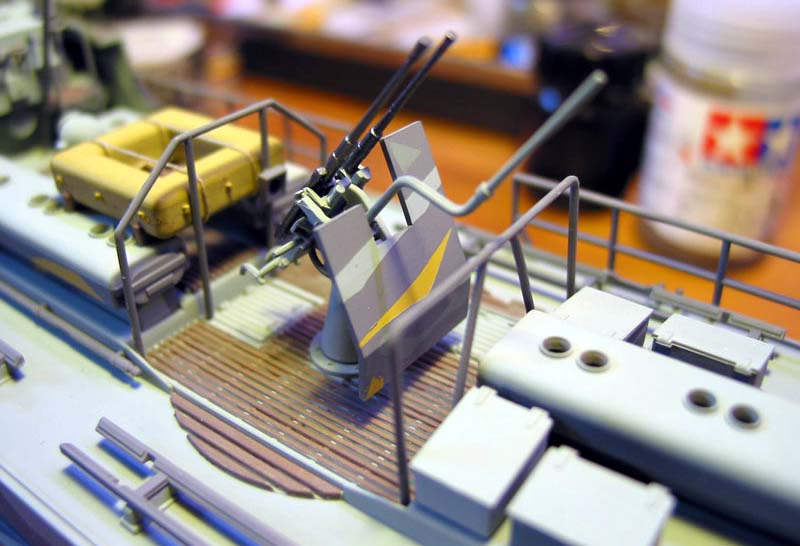
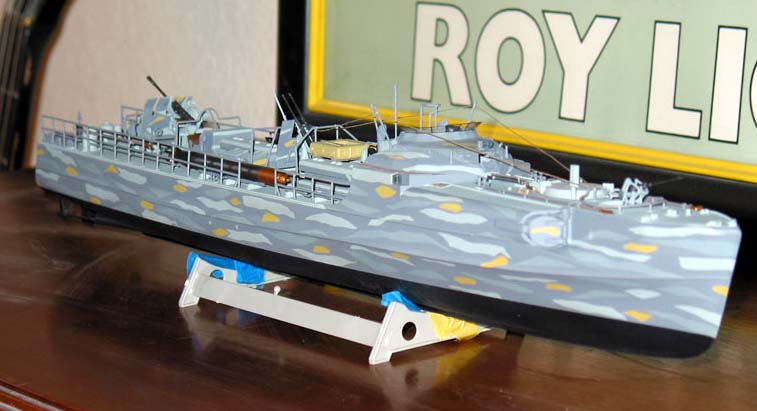
The twin 20mm twin AA-gun with armour plate on
mid quarter-deck I did just by the instruction. Even though its showed
properly in the menu, it took my a while to figure out that the right 20mm
gun was to be placed laying on its right side, while the left on is to
be positioned upright. (
thats what happened to you on late night modelling
sessions!). There was some cutting necessary to make the guns fit into
their bedding.
|
below to enlarge |
 |
|
 |
|
| The stern 37mm cannon supplied in the kit didnt satisfy me from the beginning. Given the large scale and the overall finely shaped and equipped rest of the model, the gun shows disappointingly little detail. Bugger! Shame on Revell for this one! As I had gone through most of the construction without changing and adding, I now felt compelled to search the market for a cheap way to upgrade this piece of junk. | |
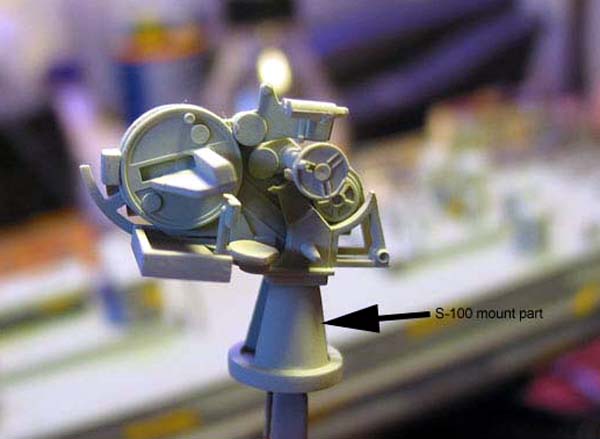
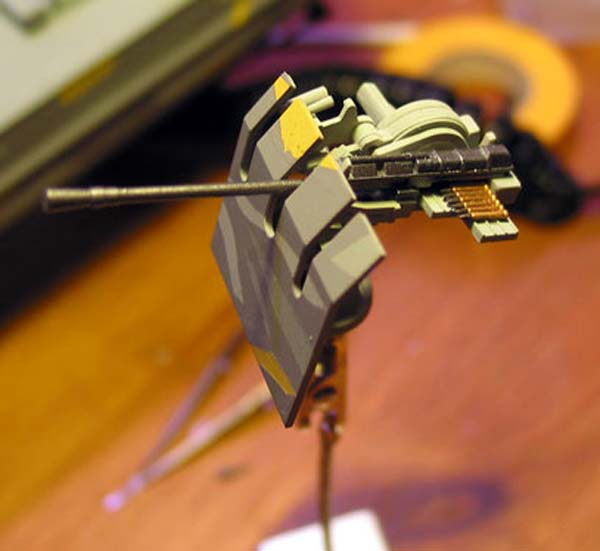
| Finally I found the Hasegawas 1:72 German AA-Tank Flakpanzer IV Ostwind equipped with a nice 37mm cannon. As the box was already preyed open, I got it for the kit for about US$ 3! Lucky me! So took the gun from this kit. (Picture 027) What a remarkable difference not even counting the beautifully cast gun mechanics, which fit right into the mount. (Picture 028) (Note the seat for the lead marksman) Having studied the various plans and pictures inside my reference book before, this upgrade would be historically accurate as well as impressive. To fit the mount to the shield was little trouble: I cut away the right positioning pin of the mount and placed the left positioning pin into the right positioning hole of the shield. | 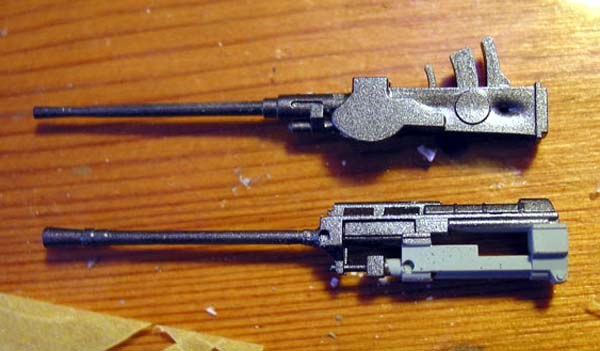 |
 |
|
| The only flaw about using this configuration is, that the lead marksman of the gun crew would be sitting very, very close to the edge of the shield. Only a little later I realised the ammunition supplied with the tank kit. That dried my tears about the position of the marksman seat pretty quickly. | 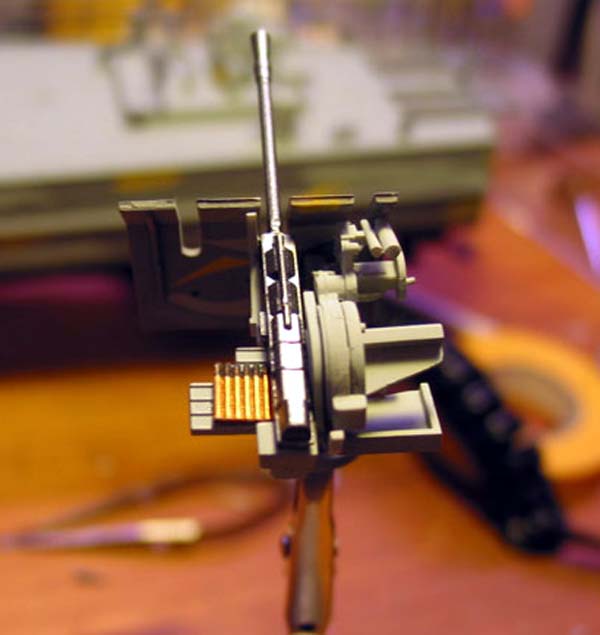 |
 |
|
|
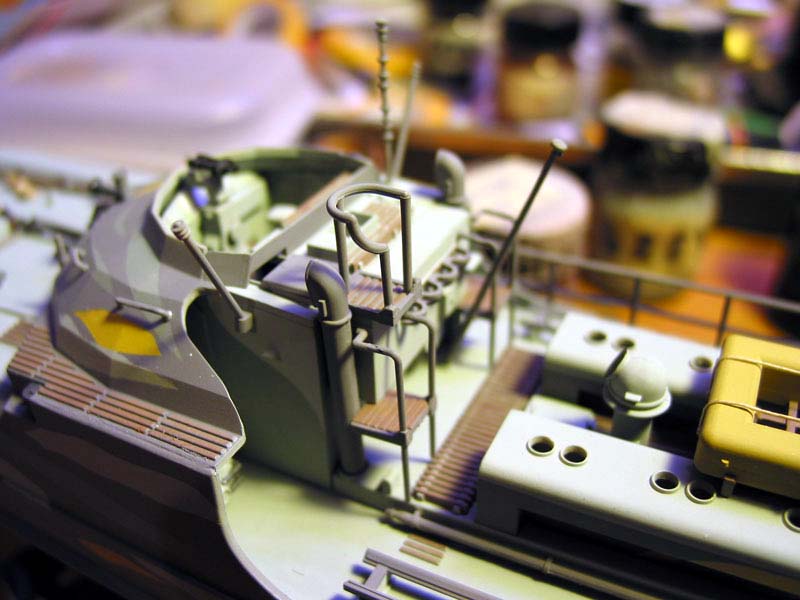
So I got to the finishing moves on the model: Adding antennas, platforms and air inlets to the back of the bridge. Attention: first to install are the platforms. That is important to make the air inlets lean slightly to the outsides in the next step. I messed that up, by gluing the air inlets first and so tightly, that I was afraid to damage the kit on removal. I had no choice but to cut away some part of the platform railing, letting the inlets perfectly vertical. Before I attached them I had hollowed out the heads of the inlets with my Dremel tool. I added at last the portside railings. the antennas, windshield and rigging as described in the construction menu. |
 |
 |
|
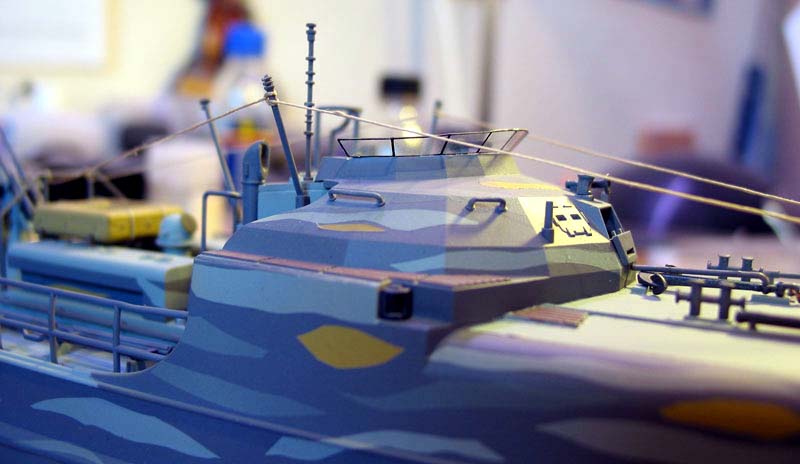
| I applied the coat and was
Finished!
As you may have realised I did not rig up the railing on either side of the vessel and stern. As well I has not yet installed the propellers and side/trim rudders. This is because I will set up a dry-dock diorama. Pictures are to follow! |
 |
| The last picture shows my S-100 along with Revells 1:72 Vosper MTB
to give you an idea how big the
S-100 is compared to other fast attack crafts of that time (Picture 034). |
|
|
Opinion:
I had a lot of fun with this kit. I ask myself, how long I will be able to resist, to build her again and using WEMs aftermarket product designed for this kit. Even though you can build it out-of-the-box and by the booklet, I strongly recommend novices in this hobby to gather some practice and experience, before tackling this kit. |
|
| Conclusion:
Lets face it: Revells Fast Attack Craft S-100 class is a mass-product.
In Revells home market Germany you can find their kits in literally every
Supermarket with a toy section, so theyll have to bow to the efficiency
rules for mass products in a price guided market and the limitations of
the injection mould technique.
Guido Hopp
PS.: Ill be glad to give information/help to everyone on the message board of this page. Back to menu
|
|

© ModelWarships.com