Building the Gneisenau
By Noel Carpio
Build-up review of Heller 1/400 Gneisenau with
Tom's Modelworks' 1/400 Scharnhorst/Gneisenau Photoetch Set

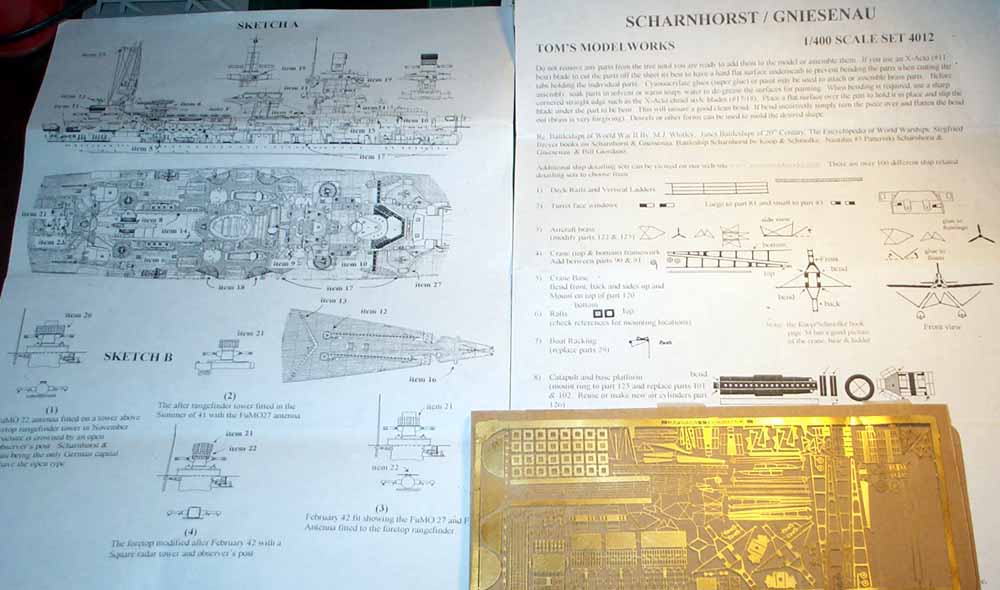
Tom's Modelworks' PE set for either the Scharnhorst or the Gniesenau
Heller kit is a pretty set as soon as you slide it out of the plastic packaging. The set
comes with kit instructions, a diagram of the ship indicating where each subassembly
should be located and the PE set. The PE set constitutes the PE parts and the railings.
This Tom's Modelworks PE set comes with an understandable instruction sheet. To further
assist the modeler, it indicates what parts from the original kit a specific PE part is to
replace and with the Kit's diagram, where it must be located.
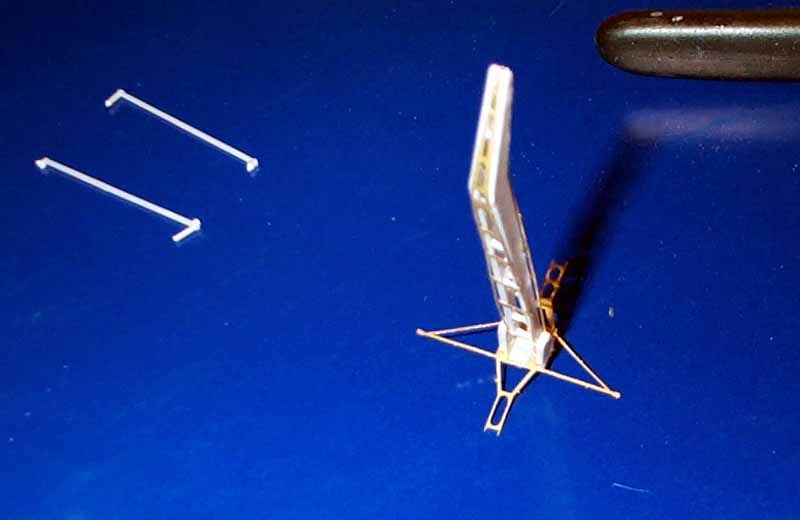
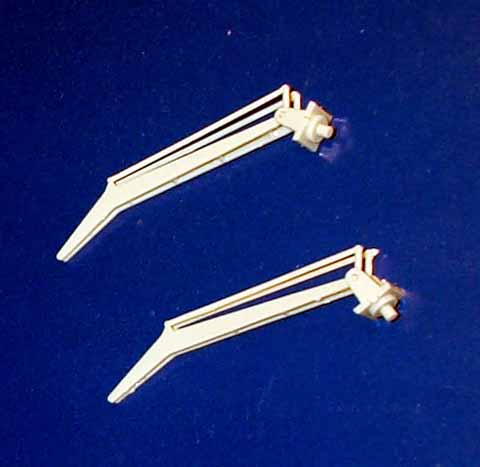
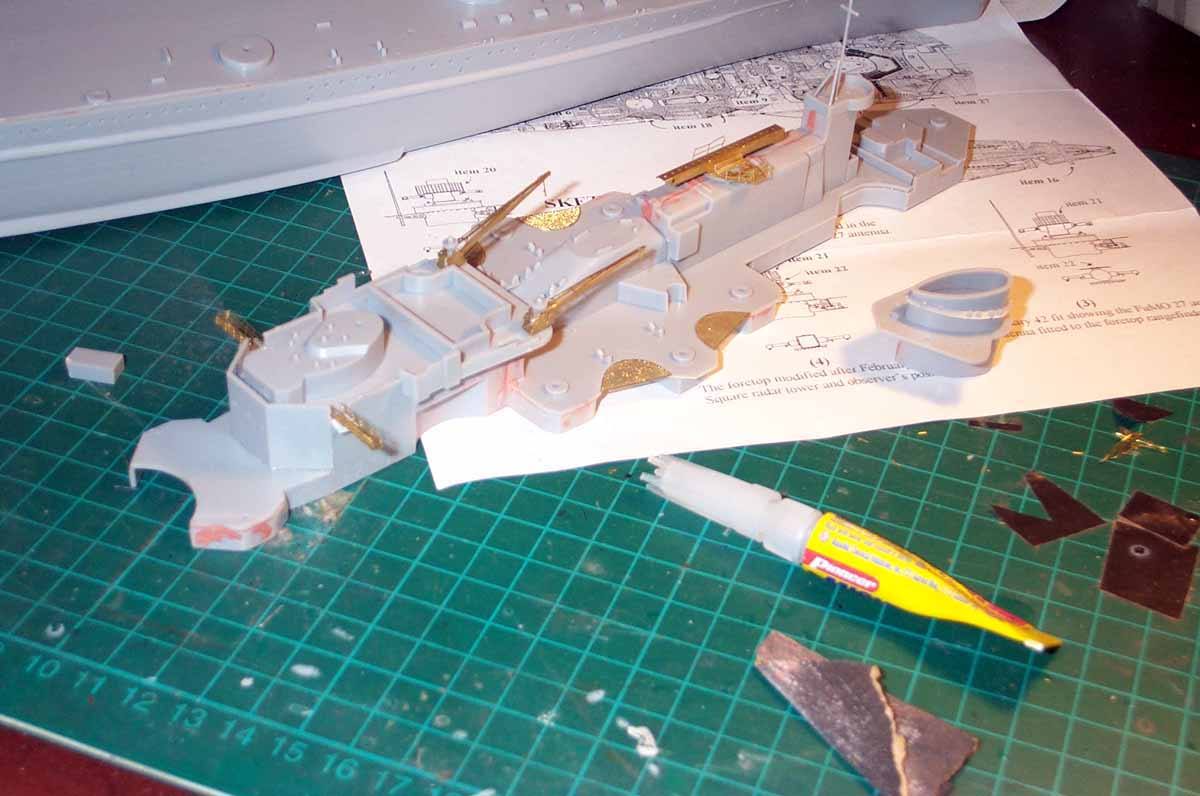
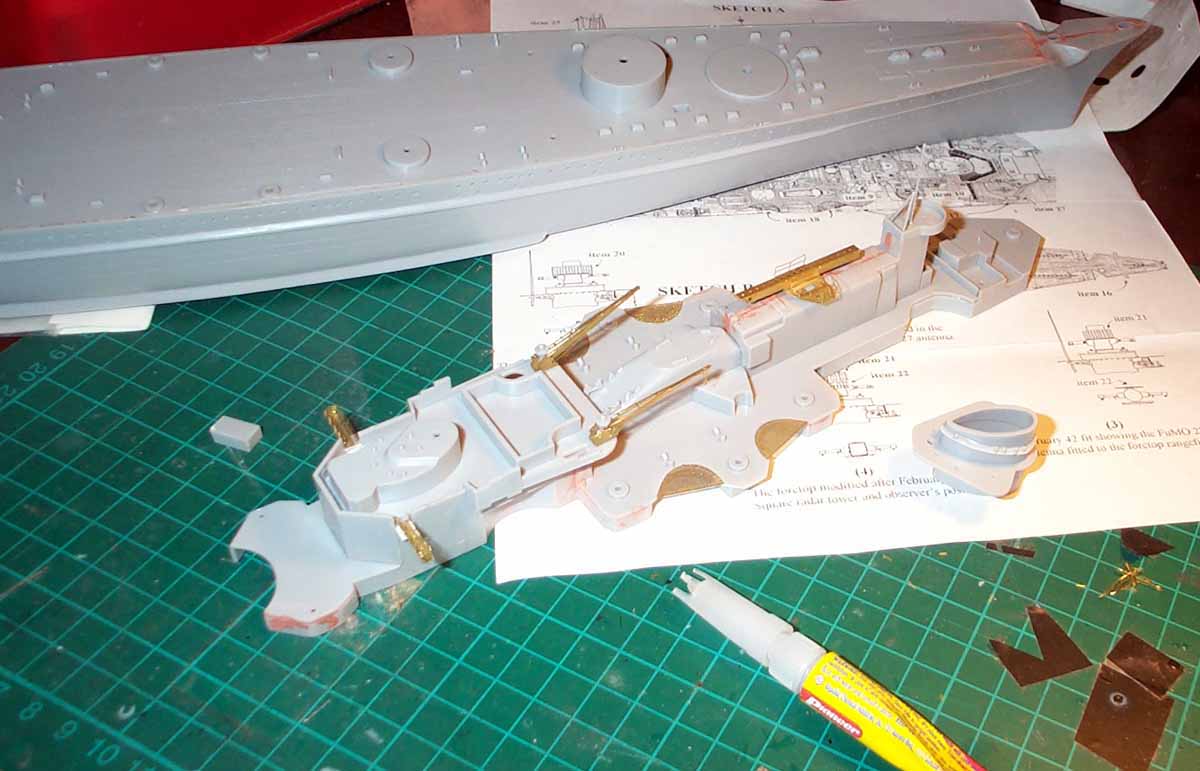
My favorite part of the PE are the radars and the cranes. You have three options for the
radars. It has the FuMo 22 (1939 fit), the FuMO 27 (1941 fit) and FuMo 7 (1942 fit
-Timor). It also has the FuMB4 (Samos) and the FuMB (Palau) included in the set. The
cranes have the cables as part of the PE therefore you never have to melt sprues for the
boat cranes. The fit-to-kit quality is superb but analysis and trial fit must be carefully
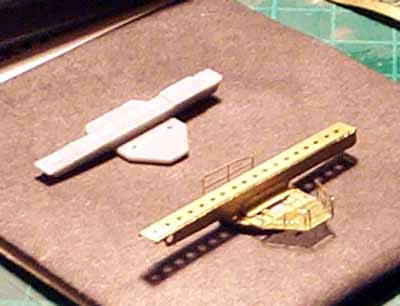
done. It has two PE sets for the seaplane though the Gniesenau only has one seaplane to
detail. An impressive catapult set with walkways is also included in this set. The other
goodies are riggings for the foremast, bridge and bow platforms, 01 Deck Netting, wash
rails, turret face windows, rafts, boat rackings, ladders andcapstan wheels.
I added some water tight doors from my other Tom's sets to improve the details of the
doors.
This kit will work well for your money and for the accuracy of your kit.
--------------------------------------------
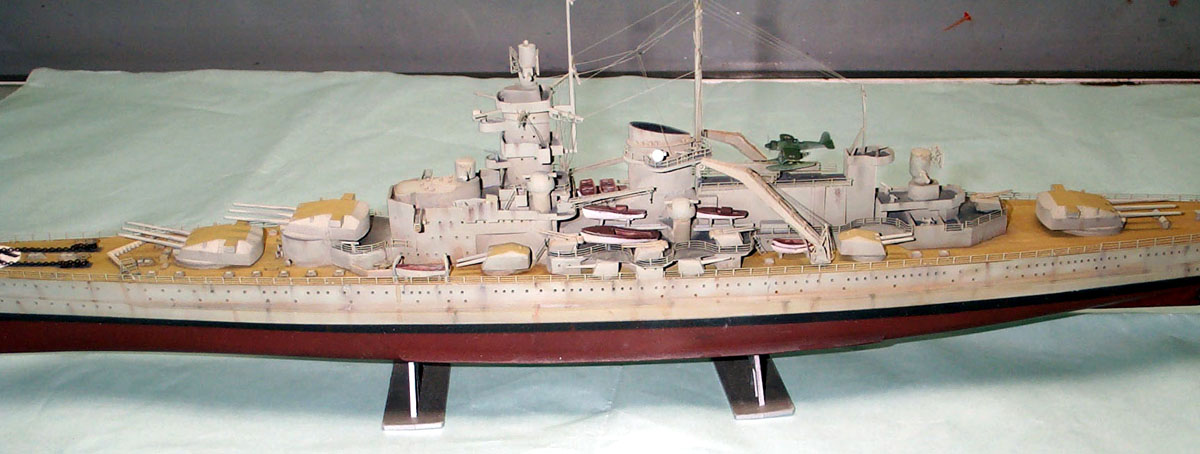
Heller model kits have a number of ships on their 1/400 scale line. This 1/400 Heller kit
of the Gneisenau is good value for your money. Besides the fact that it is superb if built
out of the box, one can further beautify this model with Tom's Scharnhorst/Gneisenau 1/400
PE set. The kit's fit is fine except for some gaps that you will have to fill and sand
specifically
on the bow and on some parts such as the gun directors, the funnel and the bridge. The
instructions itself needs improvement. If you are used to a well organized instruction
sheet like that of Tamiya's, be careful with a Heller kit. You have to anaylze it
carefully before gluing things. Also, if you intend to build this kit in subassemblies to
ease painting of hard-to-reach corners and PE placement, don't glue that the pair of front
gun directors. If you do this without installing the upperbalconies, it will be glue
things together later. Like I said, understand the kit's instructions very well and you
will not go wrong. This Heller kit, like those old version kits, has a huge box. When
opened, you will be surprised with the extra space inside.
I started this kit by drilling the port holes on the hull and the superstructure. Another
good thing about this kit is that it has a
one-piece deck. So no gap problems on the middle like a Tamiya 1/350 DKM Bismark Kit.
There is a brass chain supplied with this kit so making those 3D anchor chains will be
pretty.
I painted this kit with Model Masters Light Sea Grey. This color gives me a lot of room
for pastel weathering and makes it a lot closer to the exact color of the ship if you take
the "scale-effect" into consideration. (Other modelers may think otherwise
though) The hull was painted 70% Tamiya Flat Red and 30% Tamiya Flat Brown. This mixture
gives the flat red a little dark
shade but not as dark as say IJN-"hull red" and not as festive looking as plain
flat red. Flat black was used to paint the boot. Painting the deck is my favorite. I
wanted to simulate the planking on the deck. I used masking to do this. If you see the
recessed lines on the deck, you will get a good estimate of how wide the strips of masking
tape should be. Then cut these
strips into 1 inch or so length and start masking away. I initially painted the deck with
Tamiya Buff before masking. Then after masking, I oversprayed with with Tamiya Desert
Yellow. You will be annoyed by the combination of the the plank color. This will be
remedied by a wash of diluted Burnt Amber oil paint. I applied the decals and placed a
stroke of Solvaset to ensure
adhesion to the surface. I let the model dry for 24 hours ++.
When the arylics are fully dried up, I washed everything with diluted Burnt Umber oils.
Make sure it is very diluted as you wouldn't want your project to turn red! With this
wash, the deck planking will somehow blend making a nice depth of the planks. I also
washed the Starboard and Portside then wipe it off slowly with a smooth cloth soon after.
The deck does not need wiping so as long as you really placed a diluted mixture. Then I
mixed Tamiya Deck Tan, Light Sea Gray and Flat White. I wanted to get the Modelmaster
swatch on a lighter and less greener shade. Then I point-sprayed the ship to simulate
shadows and cover the sides of the ship where areas doesn't need to look too weathered or
rusty. Then with a final touch of pastels a solid overspray of Humbrol Matte Cote and I
was done!
This project was a long one since the instructions and the photoetch need extra study and
care. Some parts were broken or missing and needed to be scratch built. The mast too was
broken. Heller replaces broken or lost parts but I did not avail of this since I knew it
will take things longer sending it to the Philippines. The rigging was derived from Tamiya
sprues since Heller plastic liquifies immediately and is not suited for rigging purposes.
(I tried using Dragon/DML sprews and it was as bad)
It is a challenging project contrary to how I thought of it when I opened the box. But the
effort was worth it. I plan to do some more detailing on the boats later on and add some
oars and rope lines. I will also cut-off some railings for me to add accomodation ladders
as soon as the parts are with me.
Noel Carpio
Contributing Editor
Modelwarships.com