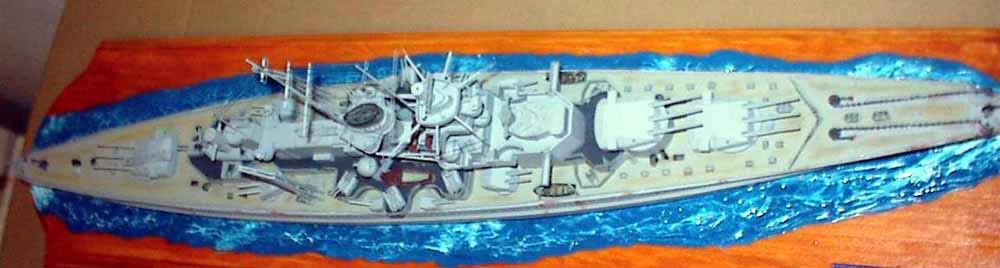
Heller's 1/400 scale battleship by Len Roberto
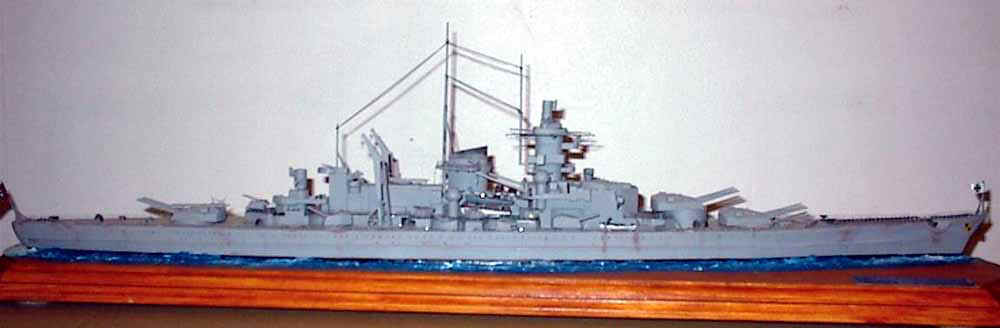
Heller's 1/400 scale battleship by Len Roberto
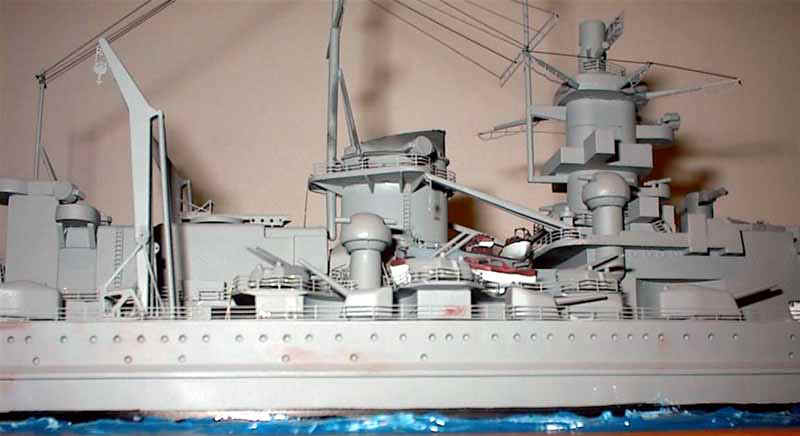
THE KIT: The Heller 1/400 series of kits are great starting
points- shapes are usually correct but details are rather soft.
This is why a brass photo-etched set is almost essential on these kits.
These are not Tamigawa kits; pretty much every single part needs some measure
of sanding to clean them up and most assemblies require some putty.
Yet they have a certain charm. They include real anchor chain and
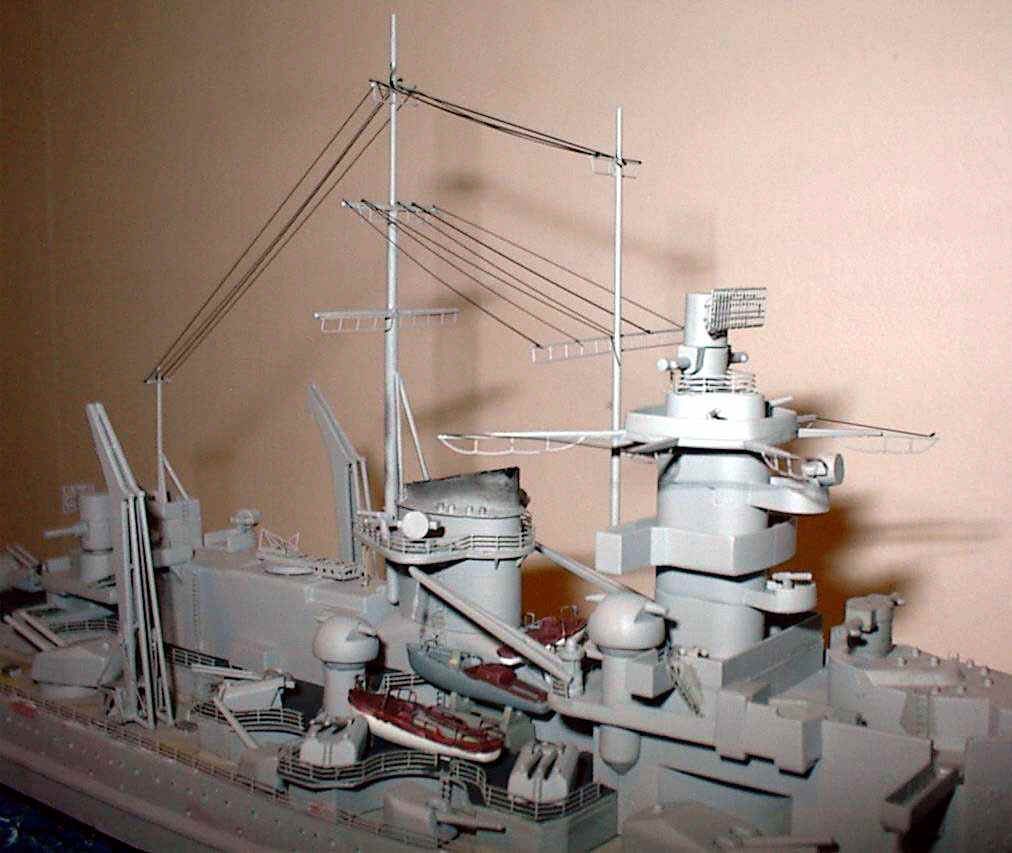
are a good value for their cost- especially when you can get them on sale! CONSTRUCTION My usual sub-assemblies method was followed, adding and replacing brass
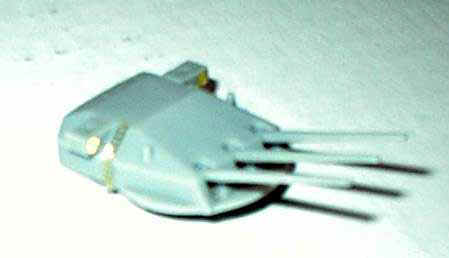
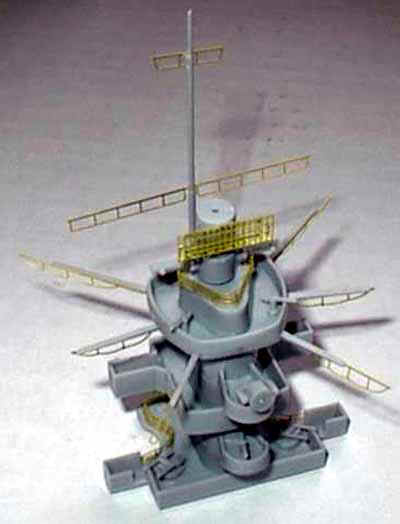
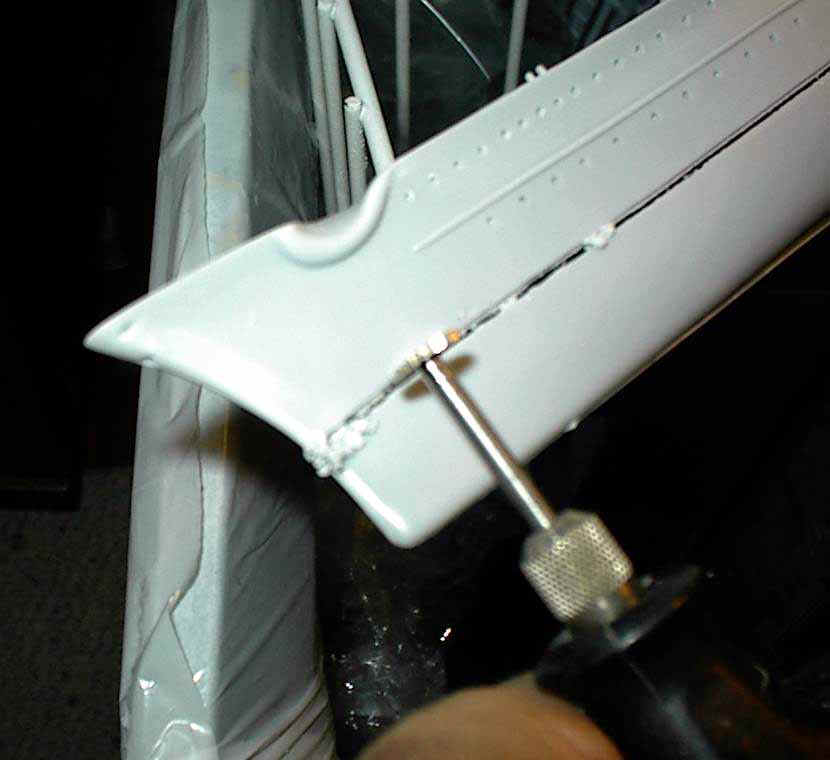
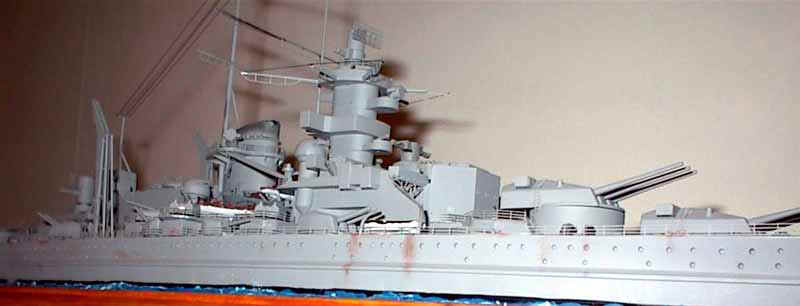
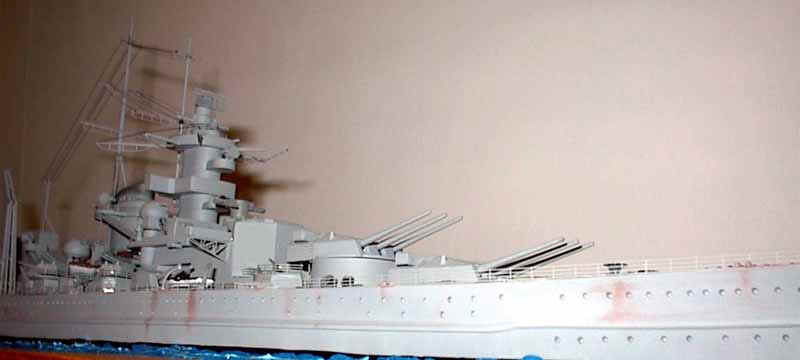
parts where applicable. MAIN GUN TURRETS: Brass ladders fitted to
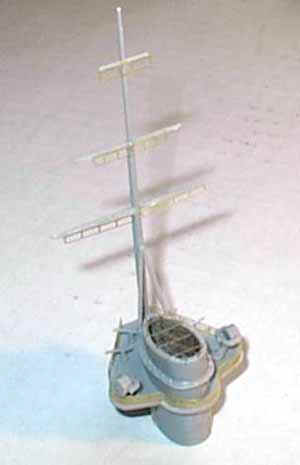
both sides of each turret and brass sight hoods added to each turret extension. STACK AND AFT MAST: brass footropes added
to yards, brass grill added to Stack, railing added around platform, and
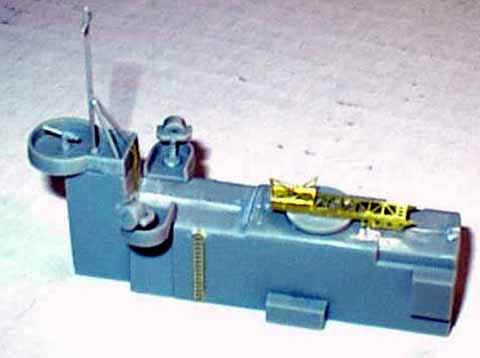
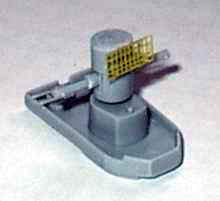
ladders added to stack sides. AIRCRAFT HANGAR AND CATAPULT: Had to get
creative hereI replaced the kit plastic cat and shuttle by cutting half
of the brass catapult supplied in the GMM set. Also added vertical
ladders for access to rear gun tub. BRIDGE AND SUPERSTRUCTURE: footropes added
to all yards, plastic ladders were discarded and replaced with brass inclined
and vertical ladders, various watertight doors added.
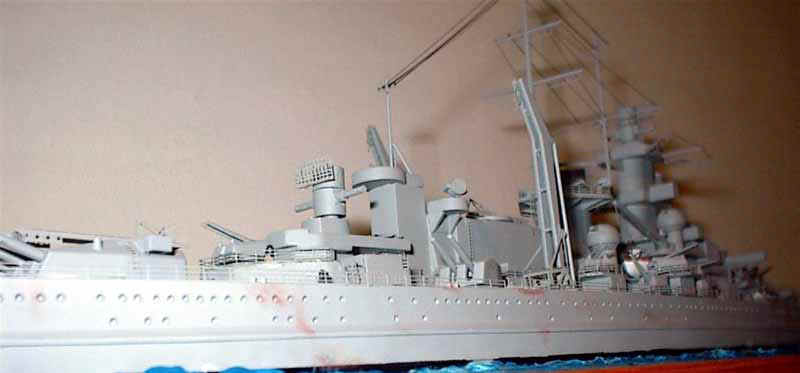
SECOND DECK LEVEL: added brass doors and
life rings- the rest was assembled as per instructions. The brass
railing all around this deck level was left off until the dark grey (non-skid?)
was painted on the horizontal surfaces. HULL Was assembled as per instructions then using my
Dremel cutter, the lower hull was cut off right in the middle of the boot
topping. I wanted a simple paint scheme for the ship mostly
because it has been below freezing for quite a while and my airbrush does
not like cold weather. (The wife makes me spray as far from
the house as possible) For the grey, I had various mixtures of grey ready
to match as closely as I could but imagine my joy when I went to prime
the model with some new can of primer I picked up at Loews
it was almost
a perfect match! So being the lazy modeler that I am, I went with
it. Various weathering sessions later on would blend and distort
this coat to make it acceptable for me. For the dark grey armored decks, I used Tamiya German Grey, which is
a dark, gunship grayish color that I thought matched well.
CONSTRUCTION CONTINUES After the relatively easy painting was done, I
added the various sub-assemblies to the hull. Had a bit of trouble
getting the second deck level on the hull. Heller provides massive
locating notches that the bulkheads fit snugly over. Of course my
fastidiousness of assembling the deck level made it a little too snug and
I had to stop gluing and cut off these locating nubs in order for the deck
to sit flush. As it was, I still had some gaps I had to work hard
at to close up
dont look to closely at the starboard side! A lengthy touch-up session to repaint the brass
areas marred during attachment followed. Black pastel chalk was gunked
up around the stack followed by a light black/ grey wash applied to cracks
and crevices especially on the secondary armament. Brass hose and
cable reels replaced the plastic blobs and I used some black clay to simulate
the hoses themselves. For rigging, I used black stretched sprue (no painting!)
and hot match tips to round off the overhangs and help strengthen the bonds. This was a fun and inexpensive project. The
model now sails alongside my Heller Bismarck in my ship case. The
GMM brass set, as always, adds immeasurably to the overall look of the
model and was easy to use. The Trumpeter Hornet is calling me from
the closet
REFERENCES For a fantastic website on the Scharnhost class ships as well as other
German warships, visit John Asmussens site at: http://www.scharnhorst-class.dk/index.html German Capital Ships Photo Feature: Bismarck,
Tirpitz, Scharnhorst, Gneisenau
More of Len
Roberto's ships

© ModelWarships.com