|
|
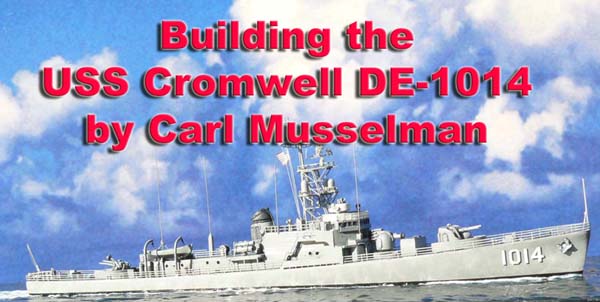
This is the first NIKO kit that I have built, even though I have about six NIKO kits in my stash. Although this isnt as pristine of a resin kit that it could be, over all I enjoyed building it and it fills an important and previously, unfilled gap in the post WWII USN surface combatant models in 1/700 scale. |
||||||||||||||||
| IN-BOX | ||||||||||||||||
| Hull Section:
Inspection of the model, right out of the box, revealed a nicely detailed hull piece with molded-in mooring bitts, splinter shields / gun tubs, doors, vents, and lockers. The bridge area looks crisp and sharp with the exception of a rough surface beneath the bridge windows. There are some rough surfaces on the bulkheads, port and starboard, forward of the stack and some shallow portholes. A couple of portholes are almost invisible, but they can be easily drilled out. |
 |
|||||||||||||||
 |
||||||||||||||||
 |
||||||||||||||||
| A few pinholes exist on the hull and on the decks, but these filled in by themselves with the primer (Mr. Surfacer 1200). There is a blemish of excess resin on the starboard bow near the stem. |  |
|||||||||||||||
| The hull piece is nice and straight and after sanding a
thin layer of excess resin from the bottom of the piece, it sits flush
with the desks top.
The hawse reel on the starboard, aft corner of the superstructure has
a blemish of excess resin at its base. The locker on the port side
of the stack is a little out of square and a little sloppy.
|
 |
|||||||||||||||
 |
||||||||||||||||
| Parts Sprues:
The photos, here, show a feather-like flashing on some of the sprue parts, but this was cleaned up easily with a gentle scraping with an X-ACTO knife and gentle touch with a piece of sand paper. Some of the parts are very, delicate and they survived the casting and packaging process. The center rods in the gun director radar dishes are still intact and even survived my assembly process. The same condition exists with the aft 3 gun radar dish. I am satisfied with the sharpness and detail of all of the small parts, with the exception of two of the 3 gun barrels being slightly curved. There is the option of using level gun barrels or elevated barrels on the twin turret. The option also exists, on the aft, open-mount twin 3 gun, to use a barrel with, or without, the radar dish, atop. These are nice options, to have. Besides the weapons parts, resin pieces are provided for hose and cable
reels, a winch, one whale boat, a two-fluke anchor, search / signal lights,
compass binnacle, depth charges and radar domes.
|
 |
|||||||||||||||
| Photo-Etched Brass Fret:
Except for being up-side-down, the PE fret is impressive. I like PE frets that have the part numbers on the brass, like this one. I tried to solely use the railings from the kit, but the three-bar railings run a little short (about 6 sections) for completing the whole model. I used 12 sections of railing from a separate after-market set, on my model. |
||||||||||||||||
|
A nice touch exists regarding two inclined ladders that run flush to their respective bulkheads. The ladders are in two pieces; the steps are one piece and the single hand rails are another piece. PE pieces are provided for the spray shields, the Danforth anchor, an
impressive number of pieces for the masts construction, radar arrays,
two-bar and three-bar railings, davits, special railings for the platforms
on the mast, anchor chains, yardarm, depth charge rack and even mooring
chocks.
|
||||||||||||||||
Instructions:
|
||||||||||||||||
| MY MODEL | ||||||||||||||||
| I built my model using mostly what came in the kit with
very, few after-market parts or material. I used about twelve sections
of three-bar railing from a different set of PE and I beefed up the yardarm
with a piece of .015 brass rod. I used .006 brass wire for the
whip antennas.
The Superstructure: After a light sanding of the more, accessible surfaces on the hull piece,
I attached the railings, the spray shields and the whale boat to the model
with CA glue. The spray shields needed a little putty (Testors white)
at their seams with the resin. I then air brushed Mr. Surfacer 1200
primer over this completed assembly.
|
||||||||||||||||
 |
||||||||||||||||
 |
||||||||||||||||
| The Mast:
The assembly of the PE mast was a delightful challenge. The framing of the mast bent nicely into shape. The method of placement for the lower platforms attachment, within the square framing, was not obvious to me, at first. After figuring out that I had to tilt the platform at an angle, from the aft side of the mast, it slid easily through the angled supports. At this time, I dont recall if the kit supplied any brass rod, but I used a piece of .015 brass rod. I also used .015 brass rod to strengthen the PE yardarm that was supplied with the kit. This makes it a little stronger for the way that I attach my rigging lines. Before the mast assembly gets too, far along, there are vertical ladders that need to be attached inside of the square frame. Square holes/hatches are provided in the mast platforms to depict access from one level, to the next, via the vertical ladders. This is a new detail feature, to me. I like it. Another nice detail on the mast assembly is the inclusion of V-shaped and square-shaped supports for the masts platforms. Often, on previous builds, I would have to make these supports with brass rod. The radar arrays are nice renditions of the real things, so I used the ones from the kit. The instructions mislabeled one of the PE pieces for the top pole on the mast; piece # 17 was depicted as piece #19 in the instructions. Having known this, beforehand, I still used the wrong piece for the this pole. But, I used piece #39. #17 and #39 look a little alike. Speaking of the instructions, piece #27 (an inclined ladder) is mislabeled in the instructions as piece #35. |
 |
|||||||||||||||
 |
||||||||||||||||
| Painting and Decals:
After allowing the primer to dry and with a very, light sanding with 600 grit sand paper, I air brushed the entire hull assembly and the mast with Model Master Neutral Gray. I then hand-brushed the decks with Model Master Engine Gray thinned with Testors/Model Master Universal Acrylic Thinner. The stacks funnel was painted with a base of Flat Black and a top coat of Polly Scale Grimy Black. I used Micro Krystal Klear to form the canvas covered railing atop the pilot house. When this dried, I used Model Master Flat White on the canvas. Photos of the real ship showed white canvas railings around the gun director platform, atop the pilot house, and I painted this resin piece white, instead of replacing the resin with PE railing. |
 |
|||||||||||||||
 |
||||||||||||||||
 |
||||||||||||||||
| I airbrushed the small parts while they were on their sprues
and then I attached the larger features to the hull assembly.
After airbrushing a coat of Model Master Acrylic Gloss Clear, which protects the acrylic paint from becoming discolored by the wash, I applied The Detailer black Ready To Use Washes with a small brush, to the various details of the model. On my 1/700 models, I use the same black wash on the bridge windows. This can take a couple of applications. The excess wash can be wiped away from the windows with a small, damp swab or Micro Brush. The same swab is used to adjust the amount of highlighted details throughout the model. |
||||||||||||||||
 |
||||||||||||||||
| A coat of gloss clear seals in the washs affect and then
the decals can now be applied without messing up the wash.
The only decals supplied with this kit were two sub-standard renditions of the US National Ensign. I used a different flag, than the ones supplied with the kit. There were no hull numbers for the bow or stern nor was a ships name decal provided. I used hull numbers from decal sheets found in my spare parts drawer. |
||||||||||||||||
| The Base:
Before adding the finishing touches to the model, I prepared the base of an IMEX plexiglass display case with a thin layer of Liquitex Gloss Gel and rested the model in its place. |
||||||||||||||||
|
After the model was completely finished, I attached the IMEX base to a wooden base that I cut, routered, and stained to match the other completed models in my collection. I then attached the two name plates from the trophy shop. Final Assembly: Once the Liquitex had dried on the water base and the waters finish
was applied, I completed the ship by attaching the signal flag halyards
using white caenis 20 den thread and then attached the remaining smaller
resin and PE pieces. I used .006 brass wire for the whip antennas.
|
||||||||||||||||
| SUMMARY | ||||||||||||||||
|
As a modeler who is attempting to assemble a one-of-each-class collection of U.S. Navy post World War II surface combatants in 1/700, I am most, grateful to NIKO for creating this nice little resin model. I feel like they made it, just for me, but Ill share. It was a must have model, in my case. |
||||||||||||||||
|
||||||||||||||||
| I am now looking forward, even more so now, to building the other NIKO kits in my stash and the other NIKO kits on my wish list. |  |
|||||||||||||||
More
of Carl Musselman's work.
Updated 2011

© ModelWarships.com


