I had the pleasure of visiting Pearl Harbor this past summer and while
visiting the USS Missouri Memorial, an Arleigh Burke class destroyer glided
in to Pearl and I vowed to find a kit portraying one of these beautiful
ships. I found no plastic ship kits besides a 1/700 Dragon/ DML offering
of the Burke class ships. I wanted a larger size and while browsing
through the latest Model Expo catalog (a great catalog for ship modelers!)
I noticed a sale on the Blue Water Navy 1/350 USS Winston Churchill DDG-81.
Despite having never built a resin ship kit, I took the plunge. Hopefully,
others can get a good idea of what this kit was like to build from my observations.
Rather than try and describe the Arleigh Burke class of ships, I can
direct modelers to a fantastic website devoted to the history, specifications,
and photos of this modern warship: DDG-51
ARLEIGH BURKE-class
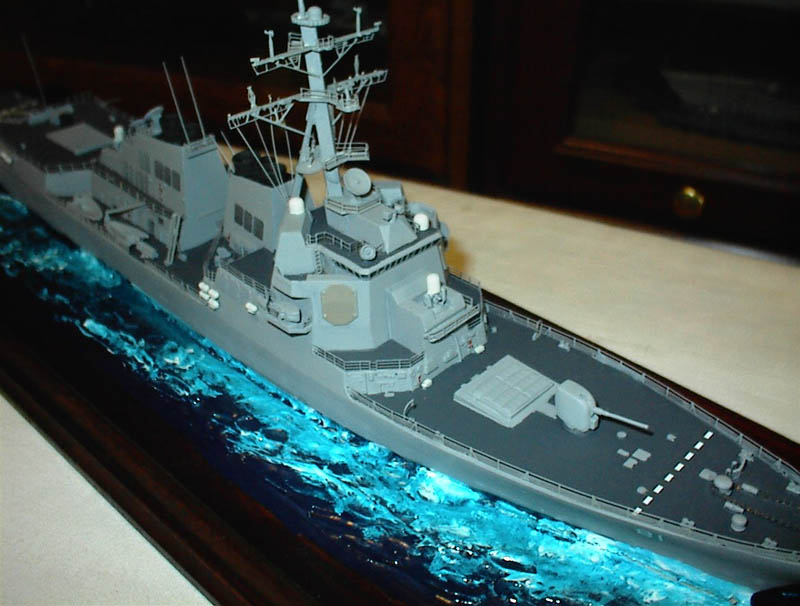
I love modeling ships in 1/350 scale. 1/700 is nice enough but I have always been a sucker for large, intricate and detailed kits. This ship is 471 feet long at the waterline and scales out to a fine model length of about 18 inches long. The kit depicts the newer Flight I Ia class of Burkes. The main difference between the new ships and the initial class (like the USS Cole) is the addition of a full hanger that houses 2 Seahawk helicopters. The previous ships had a landing pad but did not actually embark any helicopters.
to enlarge
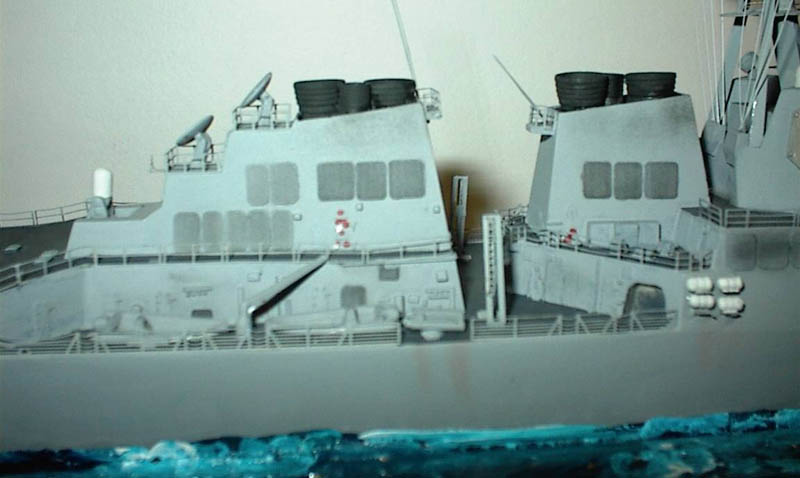
There are a handful of other resin pieces: the 5-inch gun mount, exhaust stacks, and assorted platforms. There is also a bag of small white metal parts: the 5-inch gun, communications gadgets, life raft canisters, etc. Besides the beautifully cast upper hull, the highlight of the kit is a superb photo-etched brass sheet of detail parts with railings, safety netting, antennas, etc. The kit also contains a sheet of thicker brass, which is used in constructing the intricate mast. It even includes a white metal SH-60 Seahawk which uses a handful of photo-etch parts for the rotor, stabilizer, and tail rotor.
Master ship modeler Rusty White wrote a fine review of this kit at: Rusty's review of the Churchill
One of the things he raved about was the instructions. I have nowhere near the talent he has but I found the instructions to be lacking in certain areas. First of all, the sheets are photocopied and some of the close-up pictures of the model during construction are not clear and very hard to discern the detail it is trying to illustrate. Parts are labeled easily enough: resin parts are numbered with an R then a number (R5 for example), metal parts with an M (M6), and photo-etch with a PE (PE25). There were a couple of parts that I could not for the life of me identify in the instructions but I know they were in a picture here or there. One part number I believe was mistakenly identified. I would counsel the modeler to use caution and carefully study each diagram.
I worked slowly and did a few railings at a time. The resin stacks and platforms are easily removed from their casting blocks and were sanded and affixed. I used a paintbrush handle to put a slight bend in the cargo nettings. Leave off the delicate antennas until later.
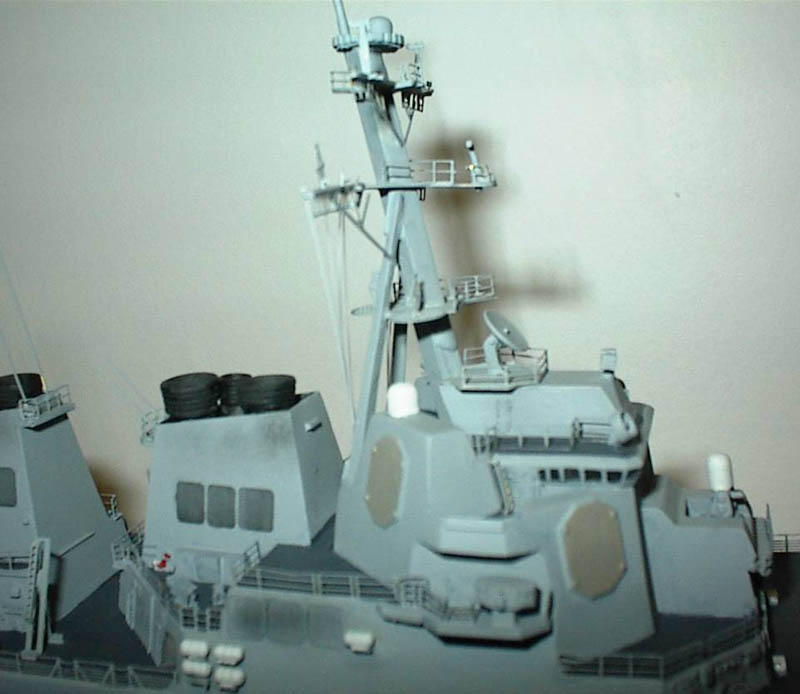
By far the most tedious part of the model was constructing the
mast. There are about 75 brass parts, 2 metal supports and the main
resin lower mast used to build this area of the kit. Once again,
the instructions illustrate by level the parts to be used. I used
a Dremel sander drum to smooth out the brass parts. Take it real
slow and pay attention to the illustrations. Before you put the mast
and supports in place, dont forget the brass platform the fits on top
of the bridge roof-the instructions remind you of this in bold letters!
After the mast was up and the ship was painted, I used stretched
sprue for the rigging. Just a dab of Zap on the mast and the flag
bags is all you need.
to enlarge
I purchased Model Shipways paint set compiled for this kit.
It includes Haze Grey, Outer Grey, Black, White, Deck Grey, and Hull Red.
These paints are acrylic and can be thinned with water. It is always
a challenge to find the right color paints for ship models, especially
for modern US Navy warships. It usually involves mixing your own
concoctions because the major paint manufacturers do not have exact reproductions
in their lines.
I substituted Tamiya Gunship Grey spray can paint for the non-skid
deck color. I sprayed directly down onto all horizontal surfaces
not worrying about overspray. I then airbrushed the Model Shipways
Haze Grey over the lower hull and shooting from below the deck level, I
got as much as I could of the superstructure sides without messing up the
deck grey. Rusty White explains this technique in his build-up review.
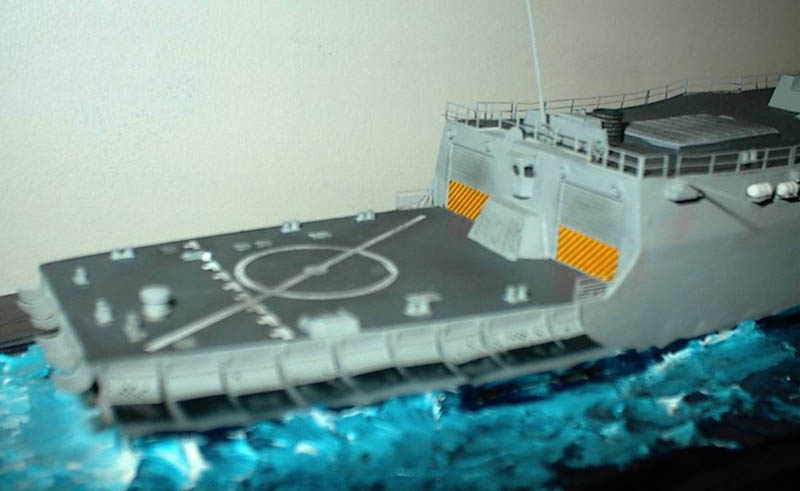
A shortcoming of the kit is the lack of decals. This may be nitpicking but for $150.00 how much more could it cost the manufacturer to include a set of markings at least for basic decaling? At any rate, I had a set of Gold Medal Models 1/350 Modern Ship Decals left over from a past project and proceeded to use that sheet for the ships numbers, landing pad markings, hangar door warning stripes, and other details.
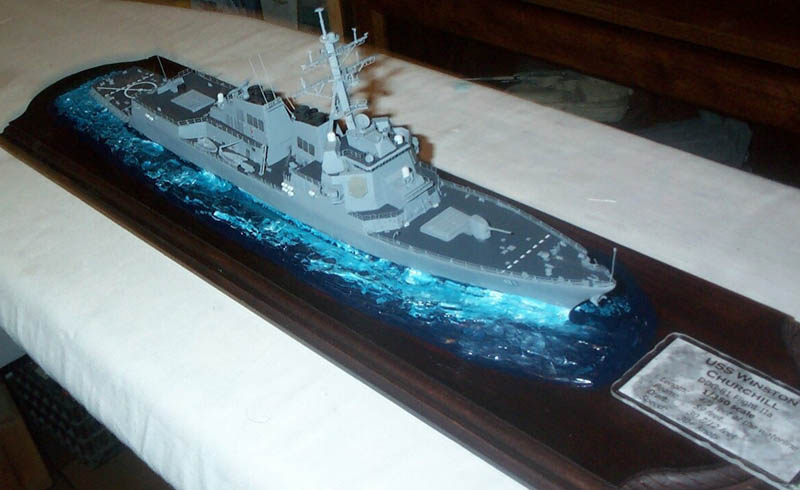
I will go into detail in a future submission about the presentation but to summarize: I use hard pine sign boards for the base, modeling paste and acrylic gel for the water, and use Liquitex acrylic colors to pain the water. The colors used are: Pthaocanine Blue, Pthaocanine green and Titanium white. When touched up and completely dry, slowly brush on a coat or two of Future Floor Finish.
to enlarge
I was very happy with the result of my first resin ship model and was
even more satisfied with my work on the water presentation. I have
tried so many different techniques on creating realistic water this one
came out the best. The kit is beautifully cast and the materials
are first rate. The photo-etched sheets are well done. Close
attention to the instructions and an aftermarket decal set should turn
this kit into a fine model. I would recommend the kit to modelers
of intermediate skill. Resin and photo-etch experience would be helpful
but not essential.
Blue Water Navy DDG-81
page
Gold Medal Models
Arleigh
Burke class reference page
