 |
|
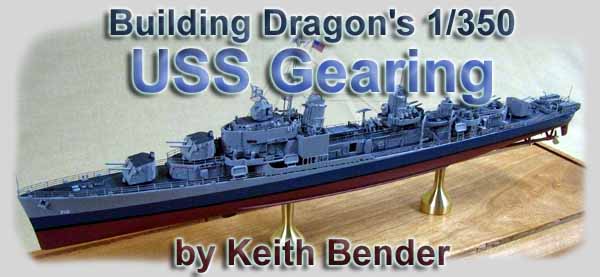
| Like many I been waiting
for this kit a long time. Upon opening the box I was not disappointed at
all. The same quality as the Dragon Buchannan
and Livermore.
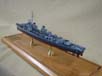
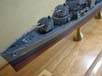
I think the thing I am most impressed over is the fact that they cambered
the main deck. For those who need to know what camber is, well it is how
the deck is raised down the center line which makes it look round rather
then flat. This lets any water run off with ease.. The smaller the vessel
the more the camber stands out. Believe it or not but even the LPH class
ships had a camber on their flightdecks. I've seen it first hand being
a crew member of the USS Inchon. Well enough on camber.
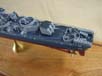
Dragon has included many extra parts that are used in other DD kits. For instance spru (K) has many unused parts. Just hang on to them for other builds that lack good quality parts. The 5" twins are very nice. I did remove the molded on ladder on the left side of each gun and replaced it with PE. The twin and quad 40mm guns are very good and clean. The kit supplies
single and twin 20mm. We use the twins on this model so again save the
singles for another day.
|
|||||||||||||
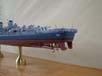
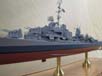
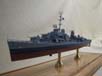
| I built the MK37 director but wasn't 100% happy with it so I decided to go with a L'Arsenal unit but this does not mean you shouldn't use the kit supplied one. Once I had most of the small subassemblies done I started on the main superstructure area. This went together very easy, just pay attention to the directions. Next I moved onto the hull. Dragon gives you the option of full hull or waterline. I always build full hull and this was an easy tasks. Just glue the top and bottom together and little filler at the waterline seam to cover it up. Then I applied the shafts and struts. The kit supplies three bladed props. This is correct for an as built model. But a few months after Gearing was in service the three bladed props were replaced by four bladed ones. A few different sets were tried until the proper pitch (no Pun) and diameter was found to work best with less vibration. Most of the Sumner's and Gearing were built with four bladed props due to the fact that the vibration problem was figured out right away. | 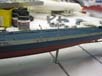 |
||||||||||||
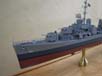
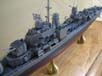
| I like the way Dragon makes all the bitts and chocks a separate part rather then mold them right to the deck. This makes for easy painting. After I painted the deck I decided to put the superstructure deck on. This is the only problem I found in the kit that made for some extra work. I found that all the lower ends of every bulkhead on parts A6 through A13 were sucked in. This meant that when I put the structure on the deck there was a gap all the way around on both sides. Since the structure sits into a recessed area on the deck I decided I had to push out the bulkheads till they fit properly. I used .040 plastic sheets on most of the bottom which spread out the bulkheads to what I needed them to be. I'm not sure what caused this to happen. I believe it was stress in the plastic where the 01 deck meets the bulkheads with glue. Like welding steel this kind of work will be sucked in. | 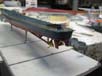 |
||||||||||||
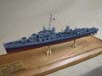
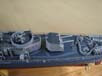
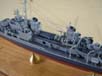
| The bridge deck and superstructure is a little beauty in itself. Take a look at the bridge bulkhead when you purchase this kit. Look at all the details that are tooled into the molds. Some machinist has allot of time on his hands to do that. This model was finished in MS 22 with no deck pattern which makes for an easy paint job as well. Here is where I will confess with my #1 bone head maneuver of the year. I pretty much had the entire model together less mast and rigging of course when I decided to put all the neat little antiskid decals on the deck. Please do yourself a major favor and put these on before you add any details and subassemblies like guns and platforms etc. So what happened was I had to place all these decals around everything and it took me basically three times as long to do while trying not to break any gun barrels and other little things that are in the way. However when done those little antiskid decals are a great addition to your model. | 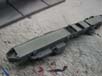 |
||||||||||||
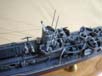
| Next thing was the mast. This piece is very thin so becarefull not to snap it in two or three pieces before you even get in on the model. In this case I would suggest using stretched spru to rig it due to pulling on the mast with thread will yank it out of alignment. But! I like a challenge and will never say never so I rigged it with silk thread just to show it can be done. Like a real ship it must have all the mast stays up before any rigging can be done. The stays are just the main wires that support the mast and prevent it from severe swaying but they have been lost in storms and high winds on these little ships. | 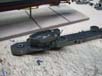 |
||||||||||||
| The photoetch that the kit provided is useable but I would suggest using aftermarket PE. The Dragon PE is kind of heavy. I used about 75% of the kit PE and used GMM railing and ladders left over from other GMM sets. Now that GMM has a PE set out just for this model your all set to build. I didn't use the kit plastic floater nets either and went with GMM PE baskets and filled them with my own custom nets. | 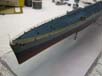 |
||||||||||||
|
|||||||||||||
 Links: Links:
|
|||||||||||||
More
of Keith Bender's work.
Updated 2009

© ModelWarships.com