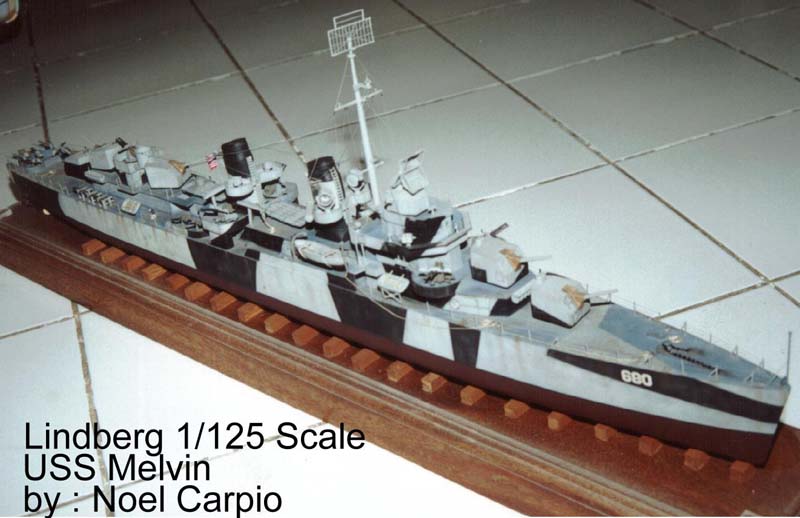
USS Melvin DD-460
| This 1/1/25 scale USS Melvin "Blue Devil" Destroyer was given to me when I was 14 years old by my Grand Mother. Of course, being a young and excited modeler then, I finished the kit in one day, with lunch only as my break. So imagine the kind of job I did..something you would want for target practice. | |
| Eighteen years later, I was inspired to rebuild the ship. So I pulled it out from my dusty shelf and started disassembling it. Since I glued the parts so well, I couldn't salvage much of it. So I called Lindberg and they told me that I can order the parts. They sent me almost everything except the hull which all cost $35 when the complete kit was $50. The difference is what I call "The Sentimental Value" ( Thanks Granny!! ) | click images
to enlarge  |
| Seriously speaking, the kit is huge but is no more than a toy to describe the details and accuracy. I first cleaned all parts from the sprews and started cleaning the deck. I used ordinary Break Fluid to remove the paint of the deck and the hull. Pretty primitive huh...but it darn works!!!! And it never hurts the plastic. Just use a glove to protect your hands and do it outside your house where there is good ventilation. Do not do this near your Dad's car or you'll be looking for another place to live in. I washed the deck and hull with detergent soap and warm water and wiped them to dry. Then I applied a thin coat of Acrylic Primer (gray) on these parts. Since I did not have any intention to making this an RC, I did not bother to put the parts underneath the deck that connects all the turrets together. Then I assembled the turrets. I applied a thin amount of putty to remove the gaps on it. If you don't do this, the gaps will show when the paint is done. After assembling all turrets, I set them aside. Then I assembled the bridge, the smoke stacks, torpedo tubes and gun directors. I did not use the kit's SK Radar that looks like a miniaturized Fly Swatter. With a little research on radars and stretching plastic sprews, you can make one yourself with ease ( since this is a pretty large kit ). I also added some wire gauze and some stretched sprews to make the MK 12 Radar more realistic. I drilled holes on the exhaust pipes and the barrels using my pin-vise. The depth charges and racks to me was added to my scratch building list so I finished a set of those to make it look better. Then I added rigging bars on the smoke stacks and mast to prepare them for rigging later on. | 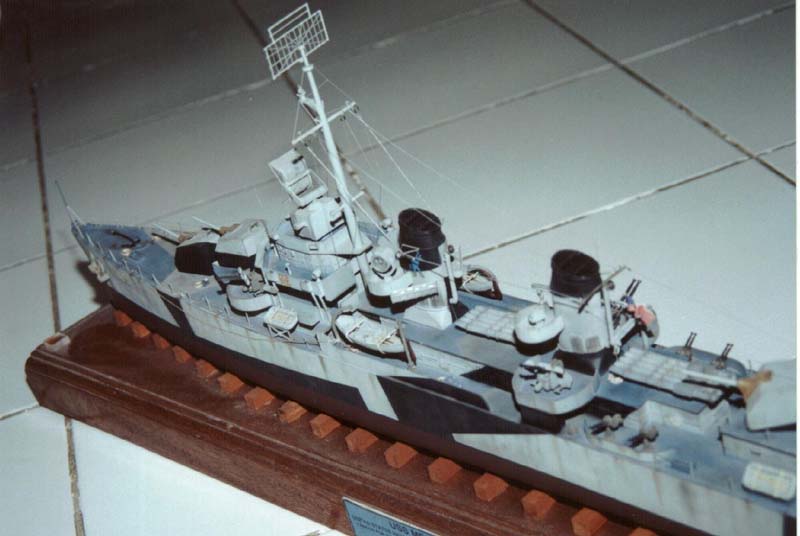 |
| After finishing the subassemblies, I chose a paint scheme from the references I got. I start masking the ship's main deck to prepare it with a faded Deck Blue. I mixed Sea Grey, Medium Blue, and a little Light Gray. After finishing with that, I painted the deck with the second deck color which is Light Ocean Gray. From this masking guide, it was not the hull turn for masking. I continued the Deck Blue's pattern from the deck and followed in down the hull using masking tape and my paint guide as a rule. I then painted this with Matte Black ( Tamiya Flat Black with 2-3% of Light gray ) to make it a little faded. Then when this was dry, I now turned to the ocean gray pattern from the deck and masked downward and painted these areas with Light Gray. I mixed 3 parts of Tamiya Light Gray and 1 part Flat White for this. Then when everything was totally dry, I masked the hull bottom and painted it with hull red. I now turned my attention on the subassemblies (turrets, stacks, bridge, etc. ) and painted them with the same light gray mix I had. At this point, I now placed (not glued) all subassemblies on their respective areas of the deck to determine how to mask them to make them jive with the deck's masking and with my paint guide as my rule. I then sprayed the correct patterns with Matte Black. Now, the ship is finished for basic painting. | 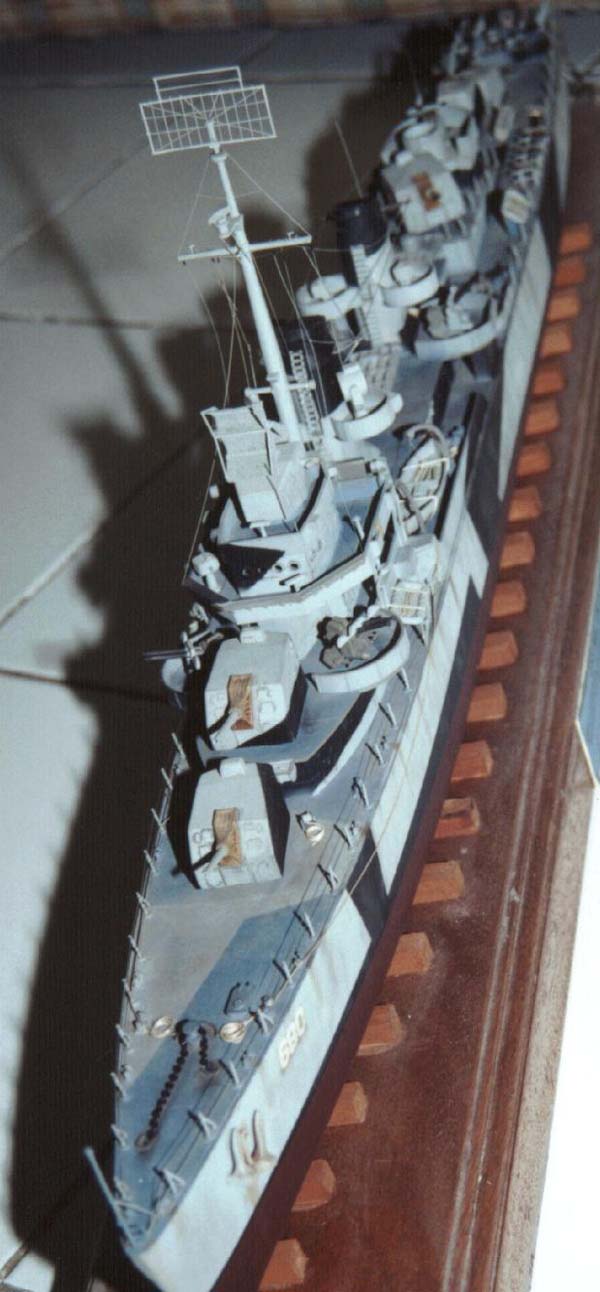 |
| To me, the most exciting part in building this huge model is applying pastels, I started with the ship's hull. A combination of Umber, Black, Dark Gray, Light Gray and White using a thin dry paint brush will do the job. Do not overdo this and make the ship look like a tank!!! Just apply enough colors on the railing bars to express the rust and paint wear build-up on these areas. Do this also below the anchor and the area where the depth-charge racks are. Then I over-sprayed it with a thin amount of Humbrol Matte Coat so that the pastels will never be erased when touched during the assembly. The nice thing about the Matte Coat is that it makes the pastels evolve into wash-like paint or weathering. | 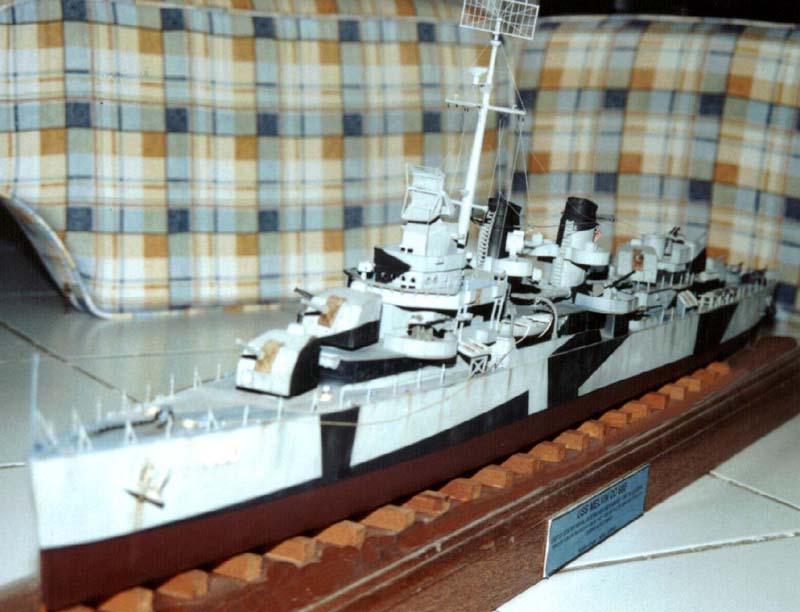 |
| Then I got the subassemblies and washed them with diluted black oil paint to emphasize the corner details. I let dry for 30 minutes and wiped them with tissue paper. Since the subassemblies were not glued to the deck, it is easy to apply pastels and weathering. After they are all done, I glued them to their respective places. After this I sprayed an even amount of Matte coat on the entire ship to make all finishing even. After this, I glued the painted and weathered AA guns and other parts in place. I removed the molded glass frame of the signal lights and replace them with transparent plastic styrene cut to shape. I also inserted a small piece of plastic rod that would replicate the bulb and painted it together with the surrounding inside part with silver. After that I sealed the signal light with the transparent plastic. I started putting some little details like ropes and retouched the guns with lead from your ordinary pencil. | |
| After this is all done, I started assembling the kit-provided railing bars and used nylon thread for the ropes. I also added enough rigging and installed the US flag to finish the job. | 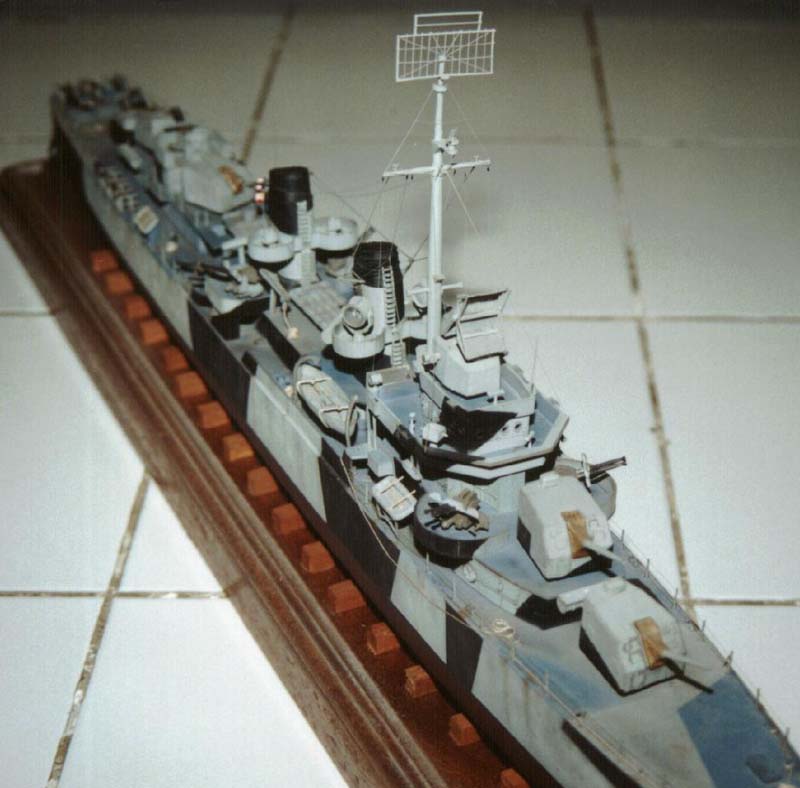 |
| This kit won 2nd place in the Ship's category during our annual plastic model building contest. Second only to a scratchbuilt 1/76 scale USS Ticonderoga Aegis Destroyer!!!! Well, at least competition was really a tough one. | |
| More of Noel's work on this site | |
