| Igor: Abby Someone.
Victor: Abby Who? Igor: Abby Normal¼.. The title of this piece and that little snippet above from Young Frankenstein along with parts from at least 5 kits, four aftermarket sets, leftovers of four PE frets and a bit of Evergreen stock pretty much sums up turning Trumpeters latest USN kit into something resembling what it purports to be, a square bridge Fletcher class destroyer. Those of you who read my rather scathing review of the kit and saw the photos will understand how bad the base kit is. By parts count the finished model is at best 10% Trumpeter, Ill identify sources for specific parts as we go. Other kits that donated parts are Tamiyas USS Fletcher, WEMs USS Reuben James and HMS Kelly, BWN/YMWs USS Gearing, USS Farenholt, USS Atlanta or USS Houston. Aftermarket sets were Corsair Armadas 5-38 turrets set; LArsenals Mk37 director, 20mms and twin 40mms. PE is mostly leftovers from two GMM Fletcher frets, GMMs watertight doors and hatches set and bits leftover from the previously mentioned BWN/YMW frets. The ONLY Trumpeter parts used are the hull, rudder, props, decks, deckhouses, 20mm RSAs and K-guns. The only unmodified Trumpeter parts are the rudder and 20mm RSAs, even those needed a touch of putty. The props were reshaped by filing and sanding so the blades dont look like squared off chunks of armor plate welded to a hub. The K-guns had the impulse charge port cut off and aa .039 diameter disc of .020 Evergreen stock glued in the correct position. All details except the piping on the aft deckhouse, torpedo tube mounts and deckhouse locators were sanded completely off the Trumpeter parts and all the mounting holes filled with styrene rod. The model represents DD-656 USS Van Valkenberg in her Measure 31/9d pattern, mainly because my wife likes the Escheresque false stairs look of the camouflage. Paints were Model Master Acryl over Alclad primer, Polly Scale night black for the boot stripe and clear coats. The props are Vallejo bronze with some SNJ bronze powder rubbed on. Weathering is an oil wash of Paynes Grey, titanium white and Mars black. Camouflage colors are straight from the bottle 5-H haze grey, 5-O ocean grey, 20-B deck blue and Polly Scales grimy black for the 82 dull black. Halyards are 6X tippett painted with Vallejo Iraqi Sand and .007 stainless wire painted with Model Master Metallizer titanium, also used for 20mm barrels, 40mm springs and muzzles. I freely admit this is not my best work but at some point you just say hell with it sometimes. What you see is approximately 85 hours of work, which is flat out ridiculous for a 1/350 destroyer kit. |
|
|
No, I didnt really glue a bolthead to the hull. You can see the little block and clear piece of styrene the bolt head is glued to slid under the hull. |
 |
| Assembled hull and deck with all detail sanded off. The two holes fore & aft of the deckhouse locators are the centerpoints for the 5 turrets. The only as molded locator hole not filled with styrene is for the 20mm tub on the stern. | |
| Line up the stern as shown and youll get the best possible hull fit on this kit. | 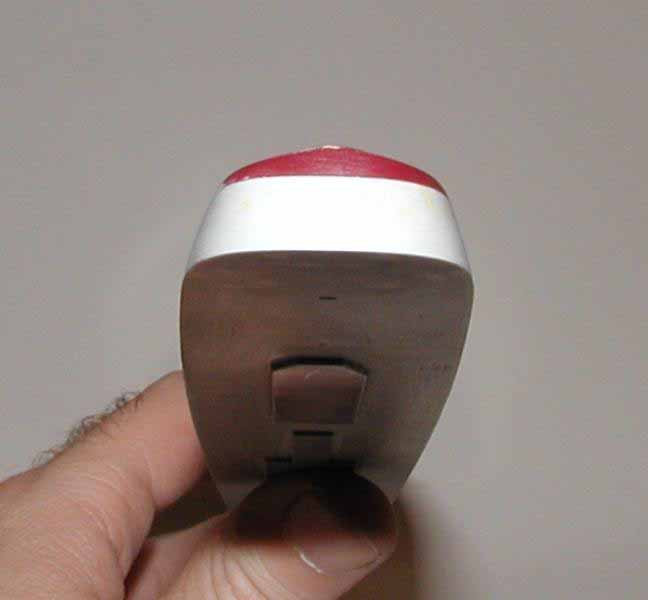 |
| The bow fit is going to suck as it will be about .015 too short on the lower hull. The shortness and some sinkmarks require a fair bit of putty to correct. Spies-Hecker Permacrom 7715 is the yellow putty which I used over the Tamiya silver grey putty. I prefer using multiple colors of putty so I can see what Im doing easier. | 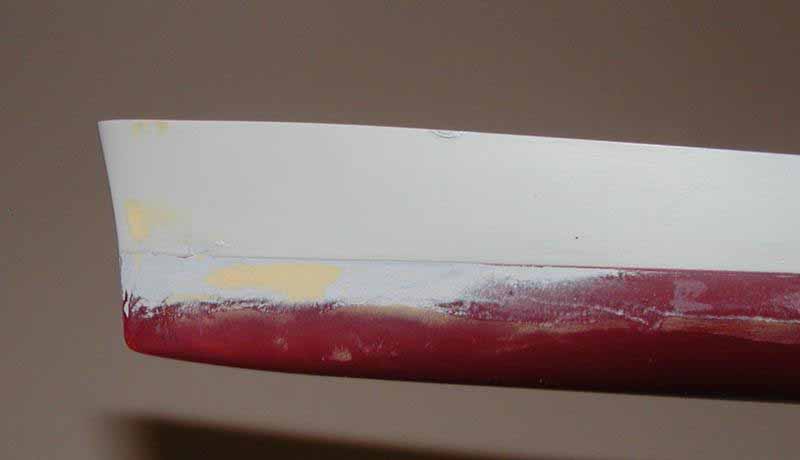 |
| Detail of deck showing filled locator holes. The magenta circles are around pairs of .015" holes I drilled through the original oval deck hatches, by drilling the holes along the long axis of the hatch I can replace them in the right orientation later. I did not have to drill holes like these for the WT doors on the sidewalls because sanding left a ghost of the original door as molded.\ | |
| Same thing but you can see the centerpoint hole for the 5" mount and the locator hole for the 20mm tub. I left that locator hole since the tub fully covers it. | |
| Bridge with WT doors in place. The flag bags were trued up with a file. | 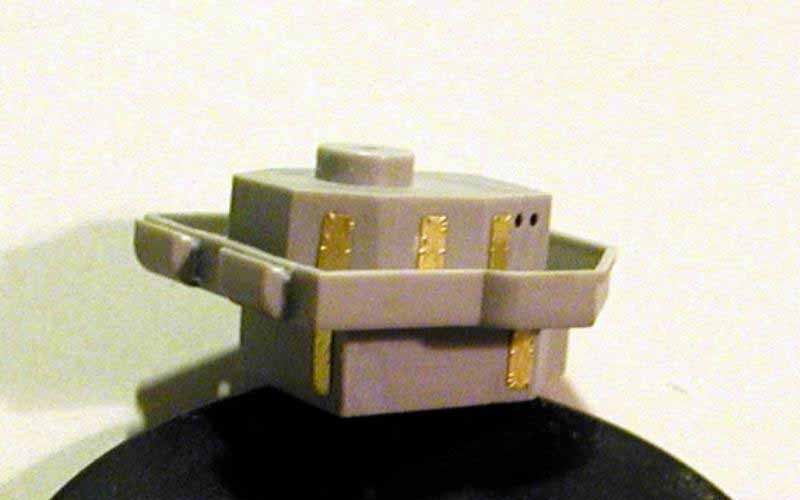 |
| Bridge from the top, not the greatest fit but putty fixes it. Locator holes left since the parts will cover them. | 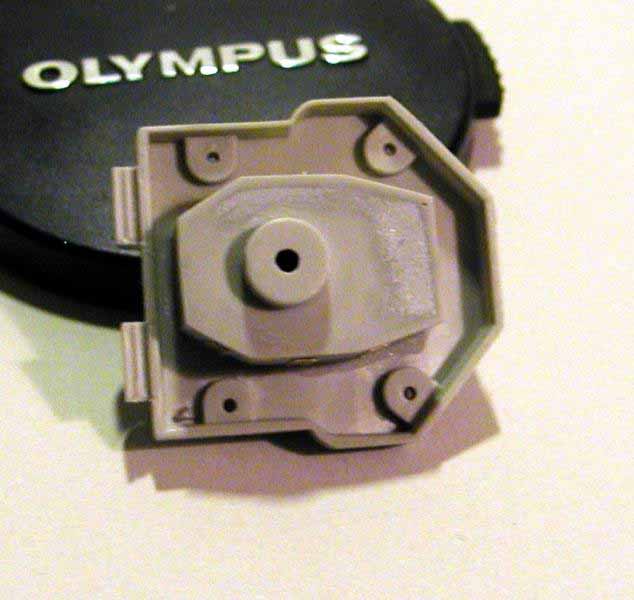 |
| Top of middle deckhouse sanded smooth except torpedo and stack mounts. WT doors in place. | 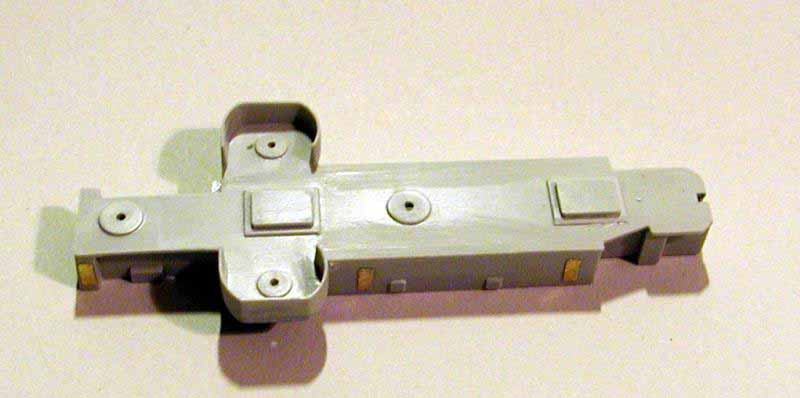 |
| Aft deckhouse, as molded piping detail left in place, I didnt feel like redoing it for better depth. WT doors in place and deck sanded smooth, that extension was oh so fun to sand. The bracing around the platform will eventually be sanded off as DD-656 did not have it. | 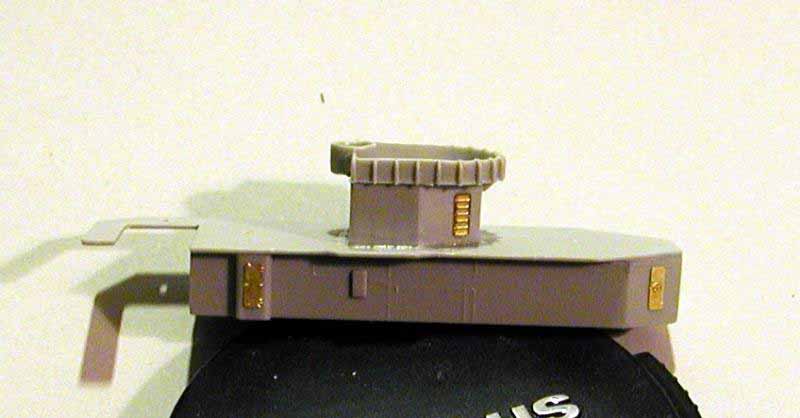 |
| Forward deckhouse, it took some custom cut sanding sticks to clean up the mold mess on the deck. The 5 mount was sanded flush after the locator hole was enlarged. I left the 40mm holes since the LArsenal guns cover them. The fit is fair at beast and every joint on the base kit needs putty somewhere. | 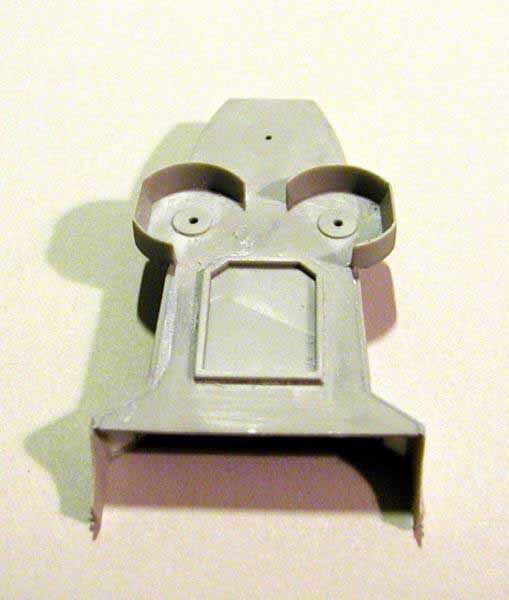 |
| Forward deckhouse, garage door openings filled with .030 Evergreen, filled with CA and filed flush. Putty is needed to fix mold misalignment on the base of the gun tubs. PE WT doors added, they dont look like 2-5 foot thick armored doors as the ones Trumpeter molded do. The bulwark extensions will get cut off later to graft the Tamiya part on. | 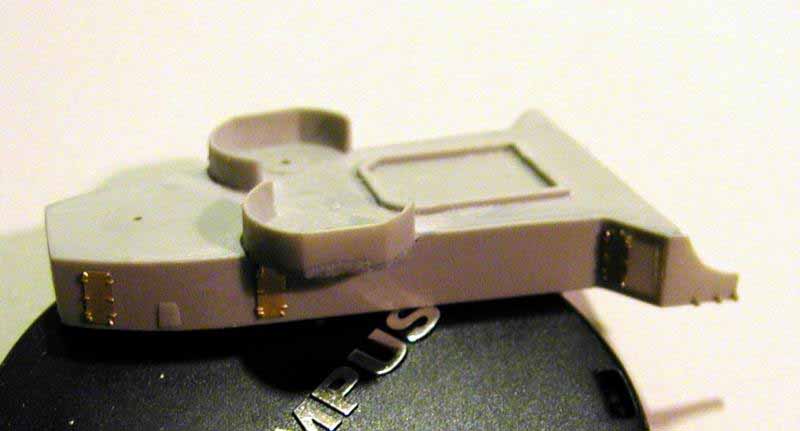 |
| Forward deckhouse, backside of overhang showing filled garage door openings and PE doors. Notice the outer doors on this side that match for forward face doors. | 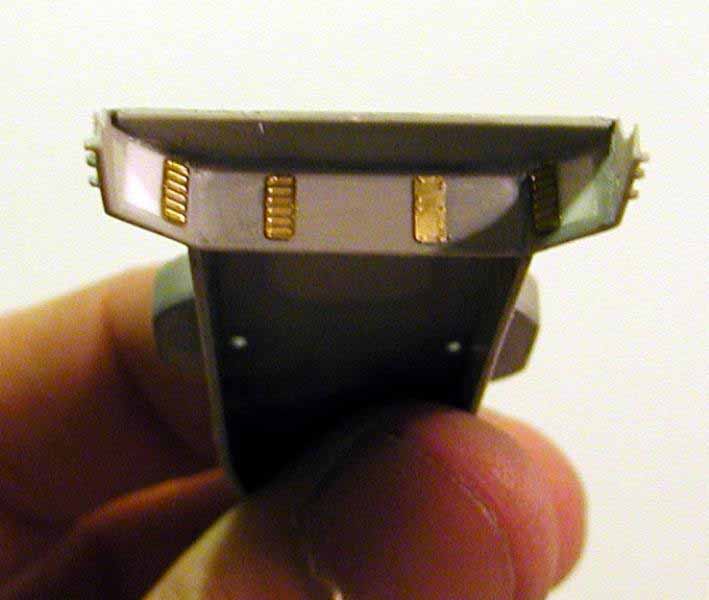 |
| Major assembly complete. Details fore to aft: Corsair Armada gun mount rings, PE oval deck hatch, PE doors, bitts made from .010"X.060" Evergreen and .020" dia. Brass rod, Tamiya bluwark grafted on with scuppers opened, Tamiya funnels with an Evergreen platform on the forward one and 8-piece storage lockers under the midships 40mm tubs. I built the boxes out of .020" strip and added two internal braces so they wouldnt collapse when sanded. The lockers main purpose was to store the expended brass from these mounts. If you look really close you can see little strips of Evergreen between the deckhouses on the 01 level, there are gaps of .015" to .020" that need to be shimmed. | |
| Bow, better view of bitts and gun mount. The deck side hawse pipes were cast in a quick clay mold from the Tamiya deck with Smooth-On 300 resin. The hull side hawse pipes are just slices of Evergreen 3/32" tube that was rounded over first. The black marks are based on the center of the chock openings in GMMs railing leftover from a Tamiya Fletcher (probably the one in my gallery here that I built back in 1996, yes Ive been here that long). | |
| View from above showing the forward funnel platform. The Mk37 Trumpeter molded is about 1/500 scale and the mount is grossly undersized, in order to keep the LArsenal director I used from looking silly I slid a piece of Evergreen tube over it and sanded it down later. | 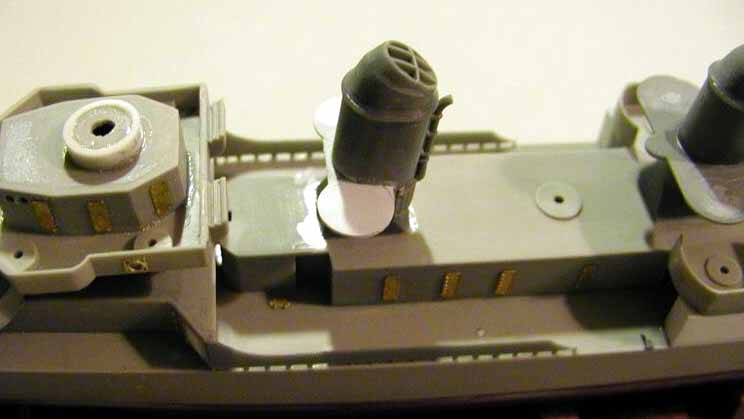 |
| Tamiya prop shafts and brace used to replace the Trumpeter parts. Can you tell this about the point Id had enough of fixing problems? | 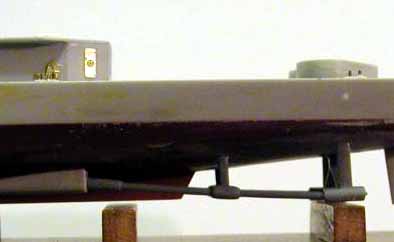 |
| A better view of the shim between deckhouses and Tamiyas bulwark grated on, becareful I fractured both those areas at least twice while masking. The midships 20mm splinter shields are also from the Tamiya kit. At this point the bracing was sanded off the aft 40mm tub. | 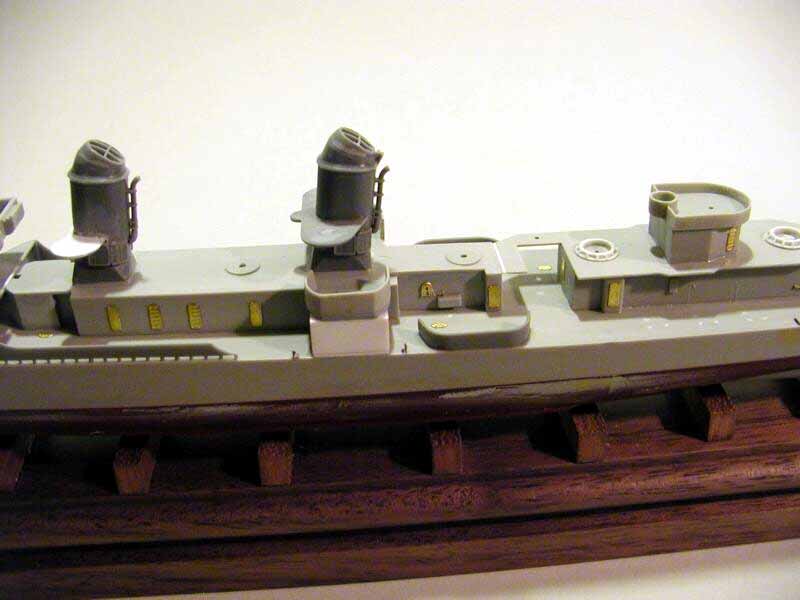 |
| Overhead view.......lots and lots of little fixes and replacements. | |
| LArsenal Mk37 in place, Corsair Armada turrets prepped and primed, large deck hatch made from styrene strip and PE door in place. Hull has been primed, boot painted then masked and the red shot then the hull mounted permanently on its base (scrap walnut with scrap cherry keel blocks). The next step os to tape a skirt of paper over the lower hull and base then prime and paint. | 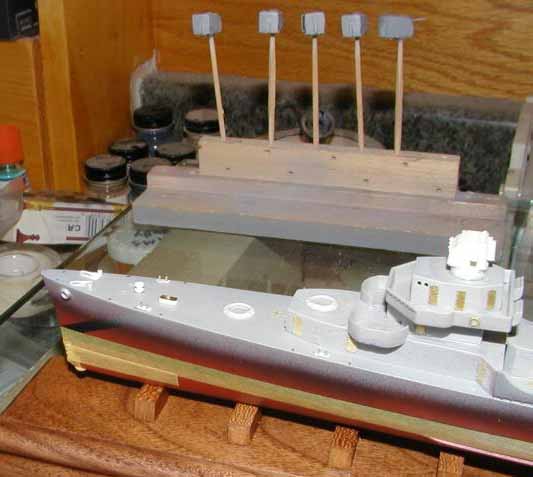 |
| Same thing showing the aft large deck hatch. | 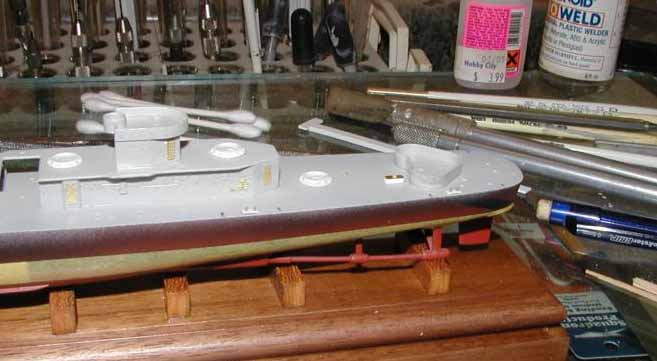 |
| Detail of bow with large deck hatch and capstan made of styrene disks in place and ready for priming. | |
| Finally all the masking is off and I can start adding PE rails & other details. | |
| Overhead showing deck pattern and why I like the elevated glass work surface (mine is ½" thick safety glass). The little with blobs are chocks made by rounding over the corners of .060" Evergreen channel and slicing about 60 with a Chopper. Make a lot more than you think youll need, they fly from tweezers really well. Two are circled with magenta. I added them after masking and painting because they are not attached al that strongly. | 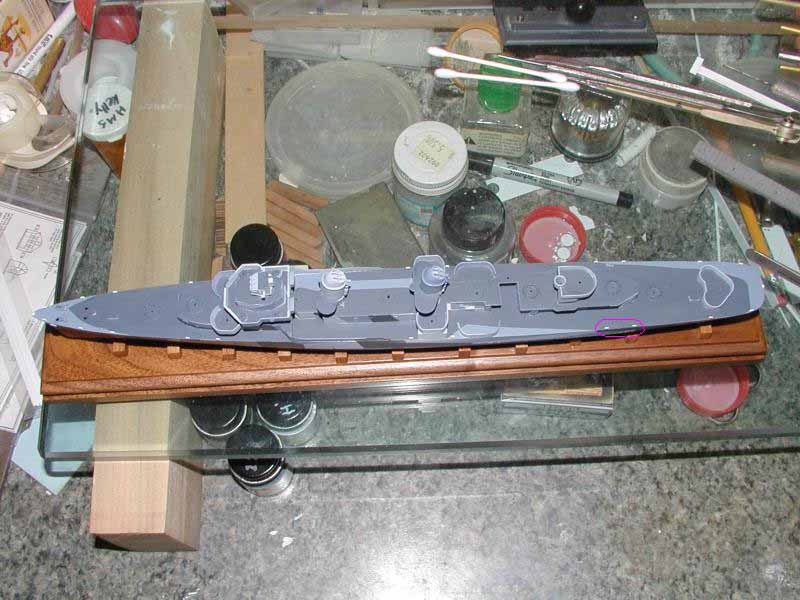 |
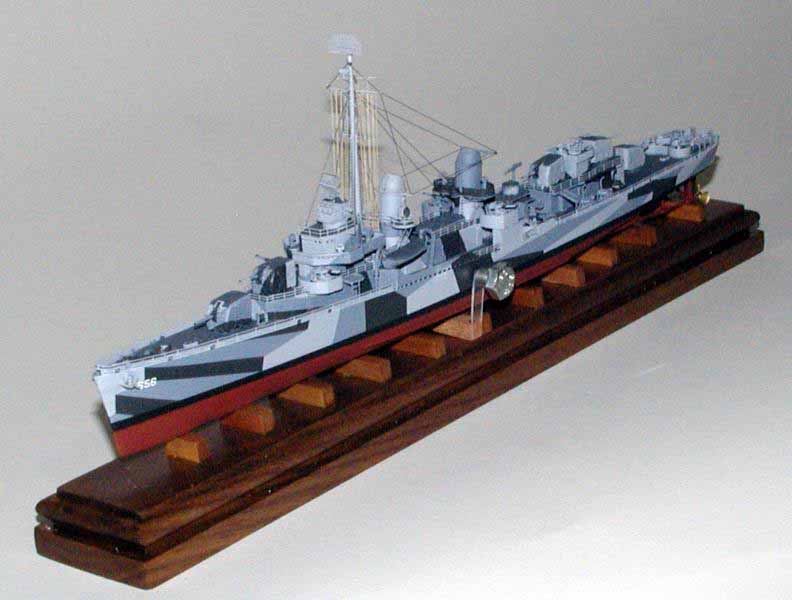
| Broadside view of the finished model. Decal are model Graphis dry transfers rubbed onto clear film and applied as water slide types. | |
| The other side, I screwed up the forward most black section and just didnt feel like fixing it. BTW- the anchors are from Tamiya. | |
| Bow on view, brass mast with brass yard soldered on then GMMs yardarm CAed in place. I know the radar on the Mk37 and mast arent straight but this was just a build for giggles. | 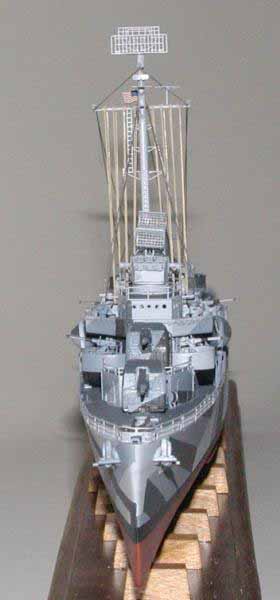 |
| Off the starboard bow and you can see the false stairs effect of the scheme better. | 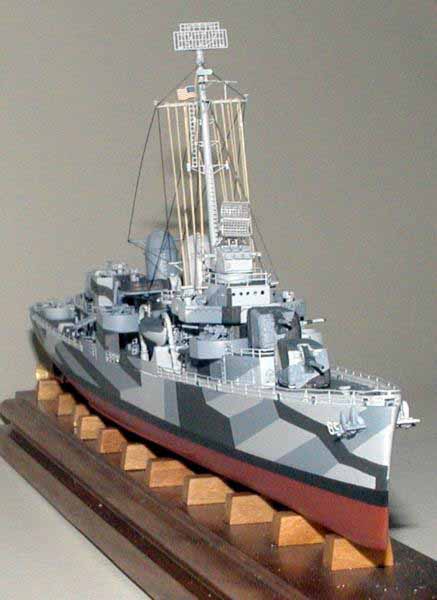 |
| Off the port bow, you can see the false stairs effect of the scheme better. | 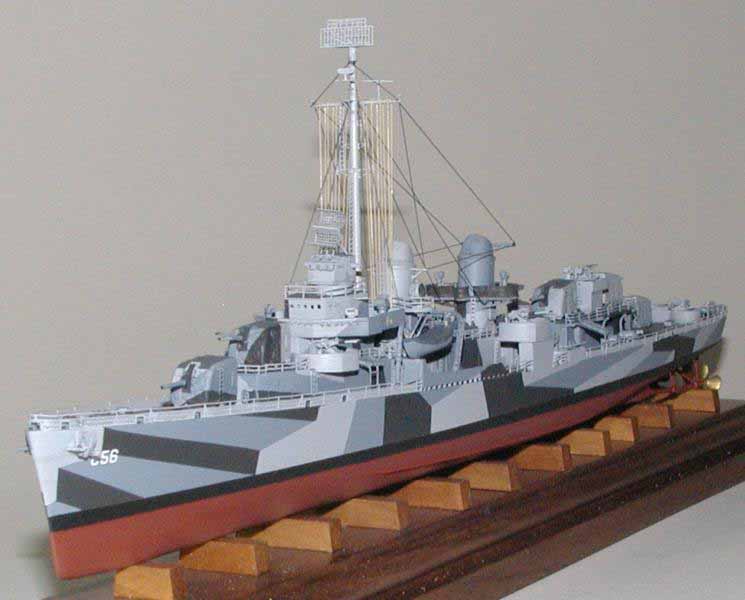 |
| Starboard stern and the bow error doesnt look so bad. | 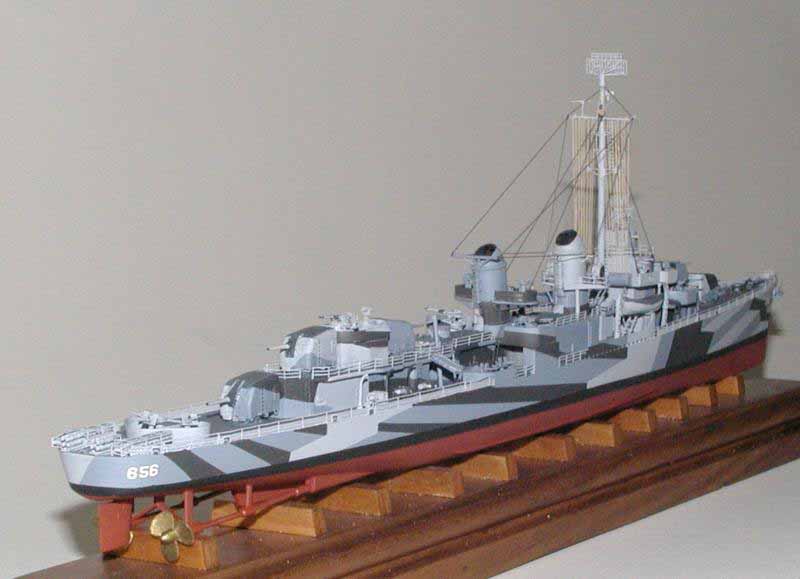 |
| I like how thr igginf looks in this view. | 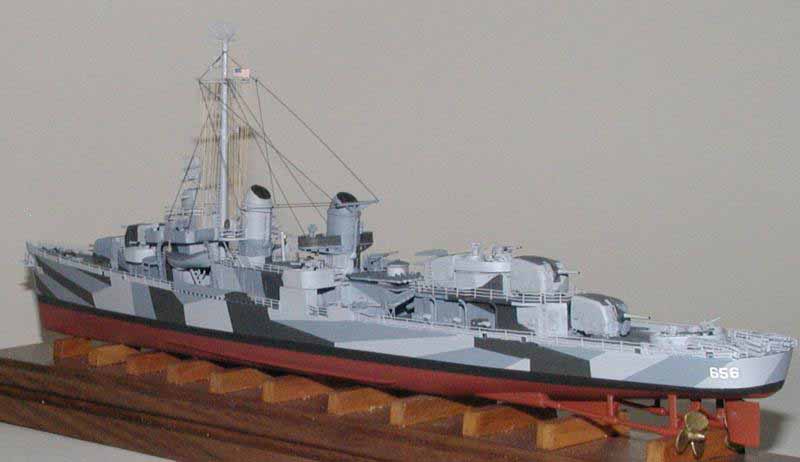 |
| Hose reel from the spares box, Tamiya boats & davits with tissue boat covers, rafts from either WEM kit I mentioned (both kits had spares). | 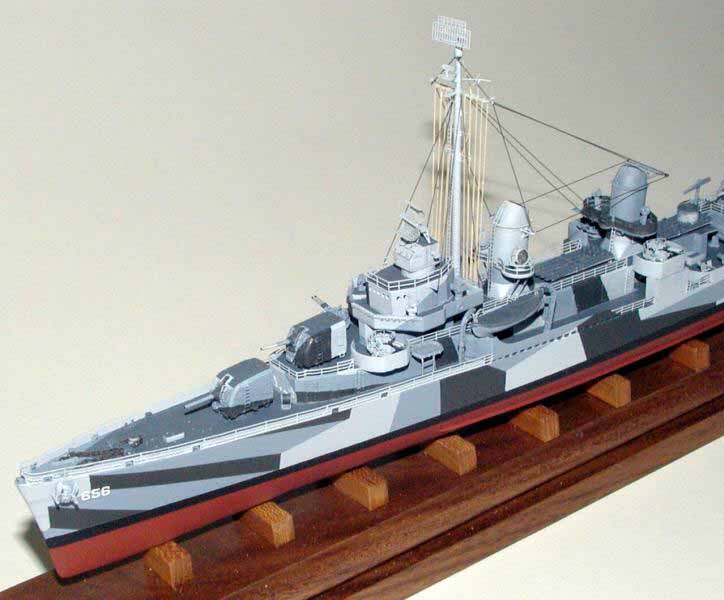 |
| Close up of bridge and rigging. Rigging standoffs on bridge and forward funnel made from .015" dia. Phosphor bronze wire. | 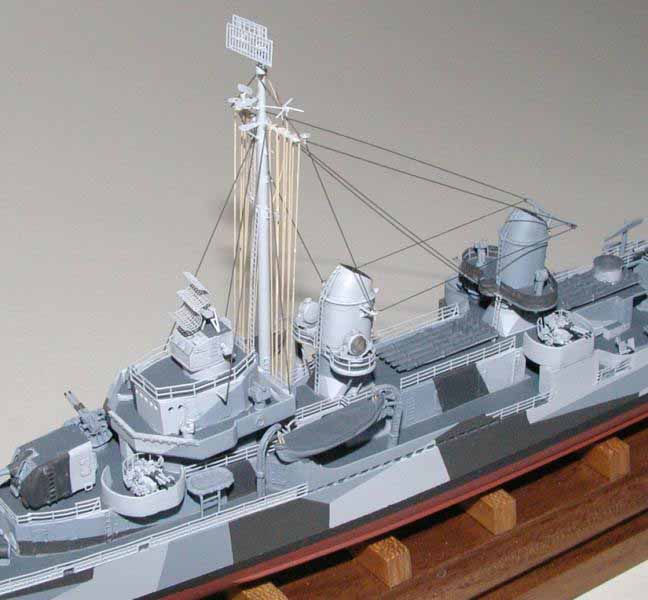 |
| Searchlights from one of the BWN/YMW kits mentioned as is the doghouse on the aft tubes and the Mk51's, Tamiya torpedo tubes, Evergreen torpedo cranes | 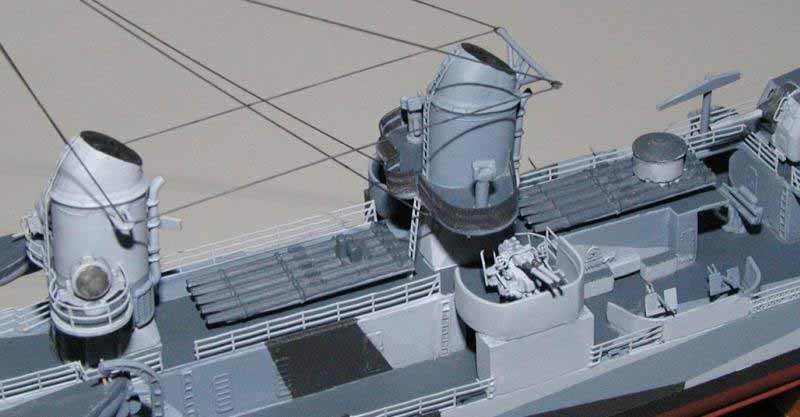 |
| Tamiya depth charge davits, GMM racks, BWN/YMW 5" practice loader and styrene rods DCs. | |
| Tighter view of the same area. | 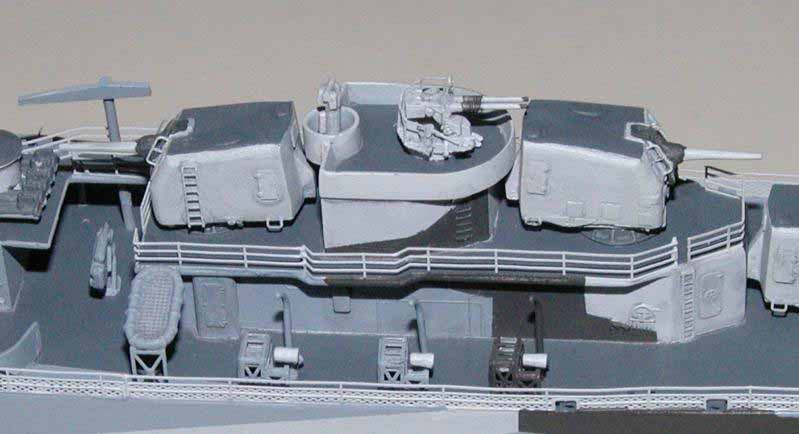 |
| Stern detail, Tamiya smoke generators, GMM DC racks, styrene rod DCs. | |
| Ron Smith is the owner of
AA
Military Research and produces a line of Reference photo's on CD-Rom.
|
|
![]()
© ModelWarships.com
