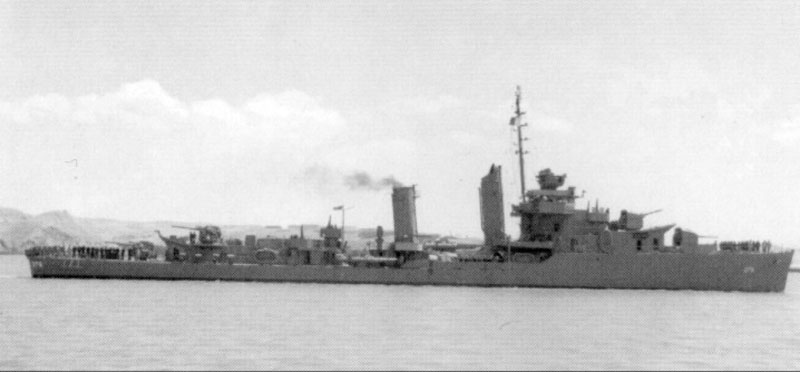
| One of the older Destroyers in the US navy was the Mahan Class, though
they showed their years they fought in virtually every major campain in
the Pacific Theater, and had a strong presence in the South West Pacific,
during the struggle for Guadalcanal. When the war started Cushing was at
Mare island undergoing a refit that changed her appearance slightly from
that of her sisters. To build this kit you will need to get the Kobo-Hiryu
resin kit of the
USS Drayton that
we reviewed previously. The ship is a sister ship and has all the basic
components that you will need to build the Cushing. The illustration on
the right shows the minor differences between the two ships. |
Click to enlarge
 |
| There are no other kits on the market at this time of a Mahan Class
destroyer in 1/700 scale. So this kit will havve to do. Begin by cleaning
up the over pour on the casting and filling the bubble holes in the resin.
Remove the molded on propeller guards and touch up the details on the deck
with a file. |
 |
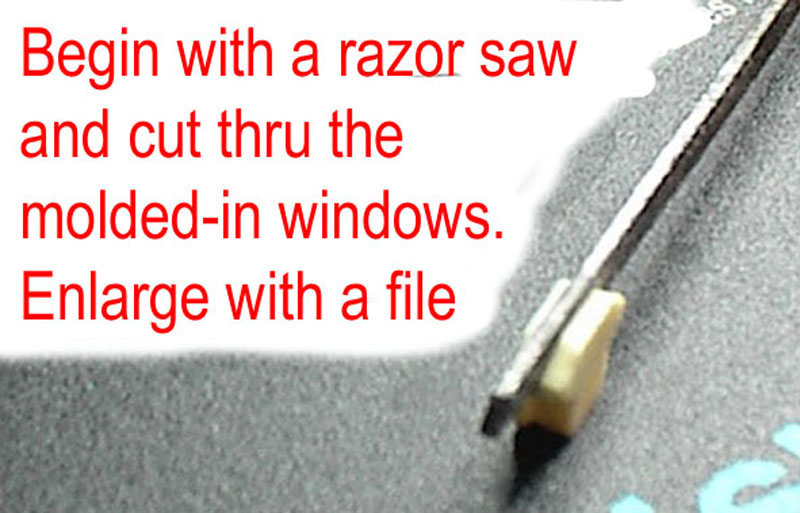
| The superstructure parts were very rough and need to be touched up
with a file. The bridge windows looked like they needed a little work,
so I decided to replace them entirely with new ones. This is a technique
that I first saw Lester Abbey use with his USS Patterson article on NavisMagazine.
Begin with a razor saw and cut right through the center of the molded in
bridge windows. Then carefully enlarge with small flat file. |
 |
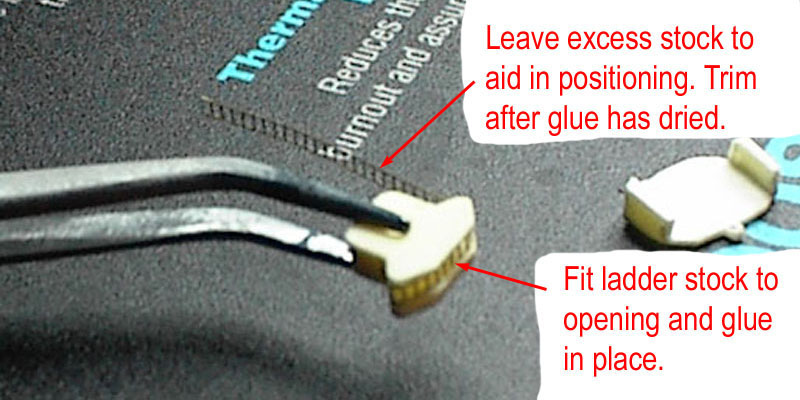
| Using 1/350 ladder stock form it around the window portion of the bridge
structure. I like to open the slot for the window to the exact size to
let the ladder stock fit snuggly. Apply a little pressure to the top and
bottom of the bridge to pinch the new window frame in place. I leave one
end long to act a s a handle during the placement process. Apply superglue
to hold in place and trim the excess stock away. Add putty to fill the
seams between the parts as you put them together. Setting the bridge aside
for now, we can attack the two deck levels to the hull. The fit is fairly
good and positioning is aided by mounting pins and holes |
 |
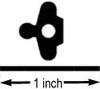
| After studying the plans a little closer, I noticed that there were
some significant differences on the back side of the ship. first there
were platforms added around the rear funnel for the new 20mm guns. The
searchlight platform was lowered as well. Please refer to the template
on the right to make a new platform for them. You should be able to print
out the template as is and attach it to a piece of sheet styrene and cut
around the outline of the part. A 1 inch line is included incase your printer
is not calibrated exactly right. The hole in the center is for the funnel.
On the rear superstructure you will need to add two 20mm gun platforms.
The aft steering section was lowered after her refit and you will not need
to add that portion of the kit. I picked up a set of plans
for the Cushing from the Floating Drydock that are quite good. |
 |
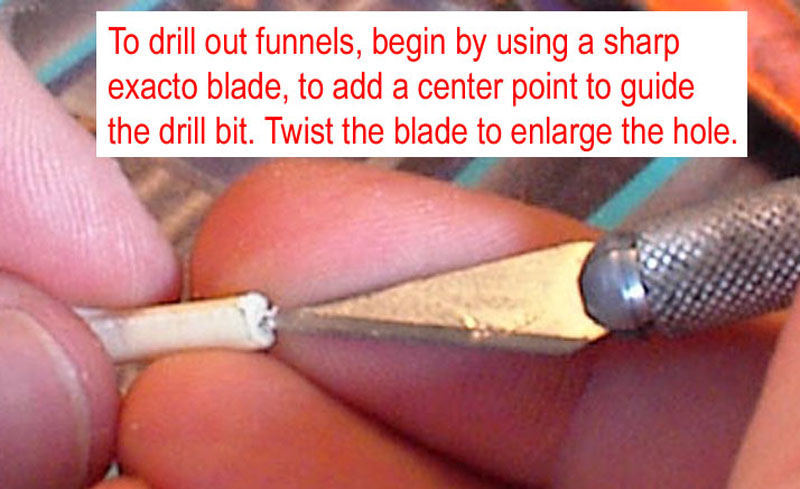
| I drilled out the portholes on the superstructure and the few doors
I wanted to model open.Remember not to get carried away with opening every
hatch, unless you are modeling your ship in port. Mine will be in the midst
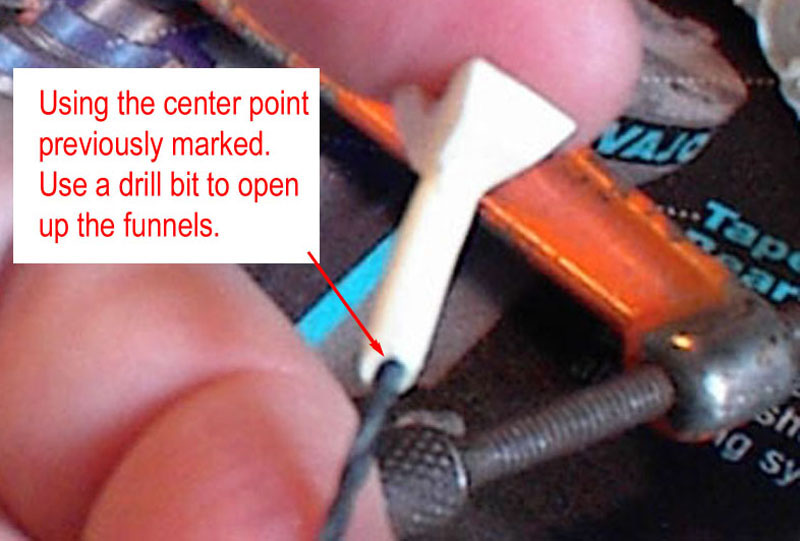
of battles so only a select few doors will be opened. The Funnels were
sanded down and cast on piping was removed. I drilled out the funnels to
give it a more realistic affect. |
 |
| Piping will be added later using a variety of materialsUsing the plans
for reference I added the piping that runs up the funnels. The ladders
and various other parts were added as well. If you are going to add rigging,
this would be a good time to drill any holes for mounting brackets. Attach
the rear funnel to the new platform that we cut from styrene and add the
railings now while you can still get to them. The two 20mm guns and the
searchlight can be added as well. |
 |
| The forward 20mm platform had the space under it enclosed during her
refit and turned in the clipping room for the 20m guns. The kit needs to
have this space filled, refer to the illustration on the right for once
way to enclose the space under the platform. Attach the completed structure
to the deck and fill and sand the seams as necessary. |
 |
| Cushing was originally built with five 5" guns, two forward in semi-enclosed
mounts, three astern mounted in the same fashion as the fletcher class.
As with many other destroyers that had extra anti-air craft guns added,
the number three turret was removed. The guns that are included with this
kit require a lot of cleanup to be usable. I spent considerable time sanding
and trimming the front gun turrets but never achieved the a realistic look. |
 |
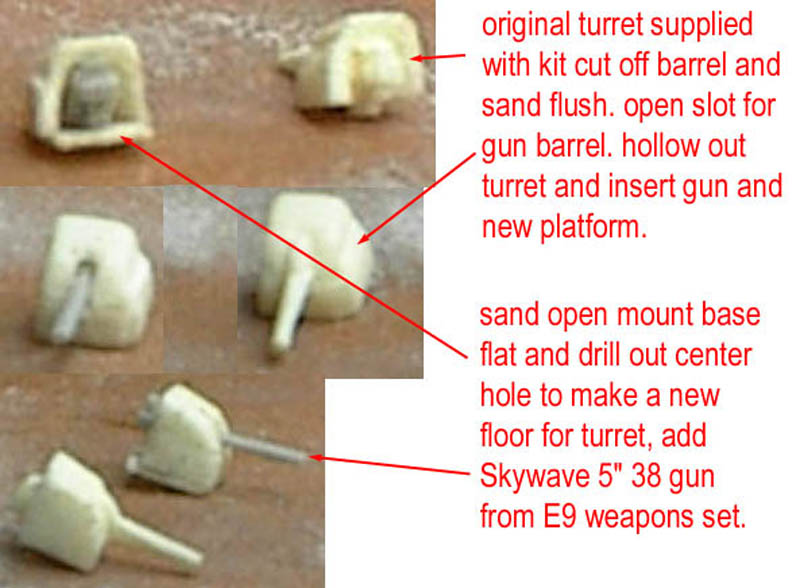
| I had decided to replace the rear open mounts with
those 5" 38cal guns in the Skywave
E6 weapons set anyway and decided to try to modify those included in
the kit. I began by cutting away the gun barrel and hollowing out the turret
housing. Be very careful as resin is relatively soft and if you use a dremel
tool it is easy to get carried away. Once you have hollowed out the housing
carefully cut out the slot for the gun turret to fit thru. The real turret
has a floor so I sanded the original resin open gun bases down flat and
drilled out the center hole to allow the Skywave gun mount to protrude
thru. Lightly sand your new turret and set it aside for later. The open
mound on the rear are built up with the Skywave 5" 38cal open mount parts.
Drill out the base of the mount to allow for the gun to fit thru it or
else your gun will be too tall. |
|
Next after I have rested my eyes we will add the photo-etch railings
and other details, as well as adding the rigging. Stay tuned.
|