 |
|
|
| This will be the last part in a 5 part series on the USS Gambier Bay. I hope with these photos and text that I have shown that scratch building is not that difficult. All you guys that are apprehensive about it take note, You CAN do it!!! All you need is the time, the reference material, the supplies, and most important, the will to accomplish, not in that order of course. If I can do it so can you. Scratch building is really fun! Much more satisfying than a kit. At least I think so. Don't get me wrong, as I enjoy a good kit too. One must do something big at least once in their modeling career. The only way to do BIG is to scratch build! I have been building models for about 40 years. I have to say that CVE-73 is the high point of my modeling skills to date. I am pretty proud of her and I am not tooting my horn. There are many others out there who scratch build who would blow me away! I have seen their stuff and it is a hard act to follow. I'm working on it! On to the photos. | ||
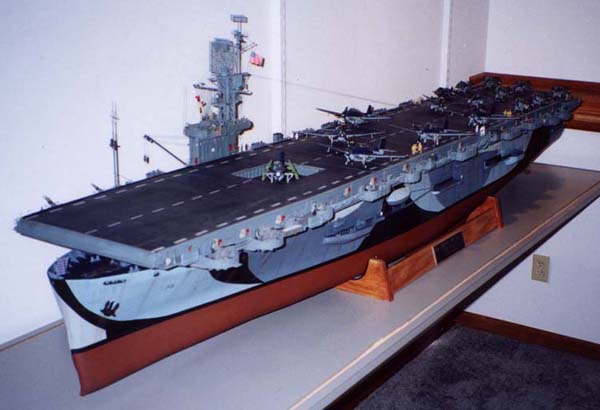
| In the photo above a nice 3/4 view of the port side of
the ship. Notice that I have fabricated a large display board which the
ship and stand rests on. The groove you can see will accommodate the Plexiglas
case which will cover the whole works. A must due to dust and other stuff
like probing fingers! This whole thing is about 220 lbs. Not easy to move.
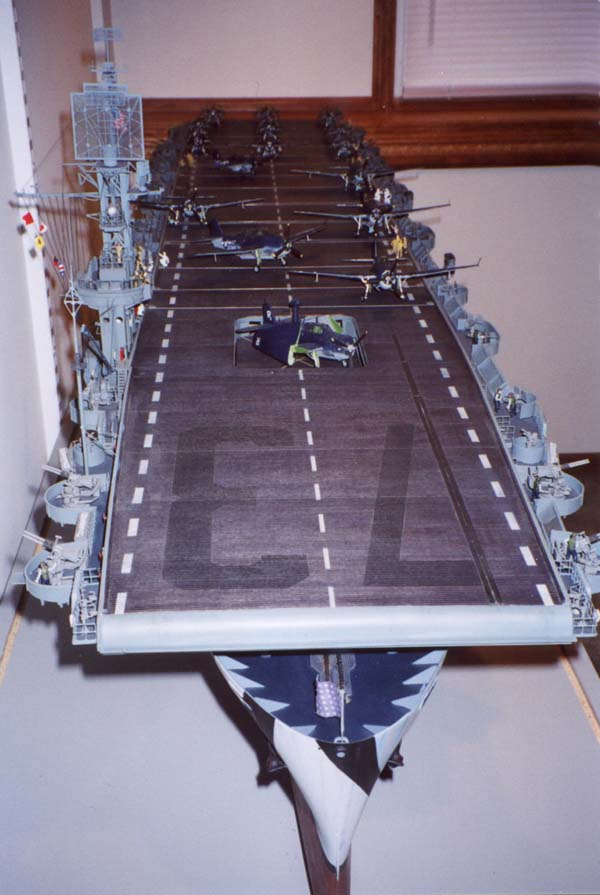
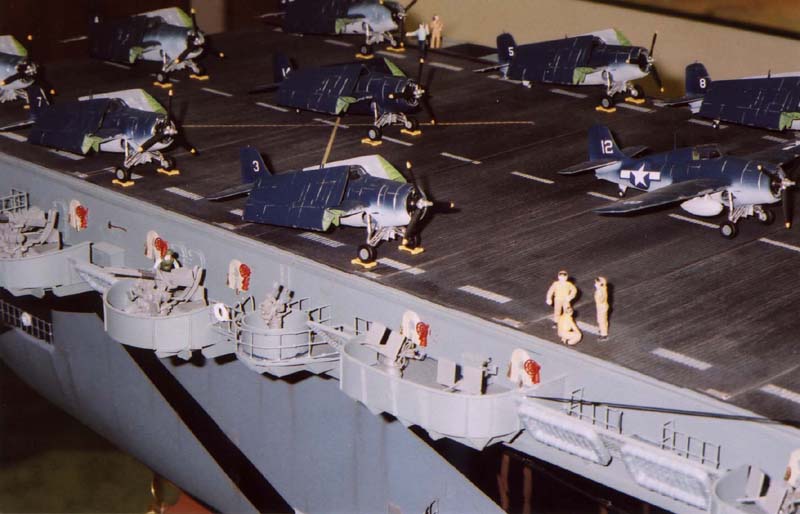
A pretty good bow shot although I wish it would have come out a little clearer. I am not the worlds best photographer! You can see all 16 a/c. Gambier Bay and her sister ships carried a total of 30 a/c each. 18 F4F Wildcats and 12 TBF Avengers. I chose to show only 16. Note the sole catapult on pt. side. I cut a groove in the flight deck and then surrounded it with sheet styrene. |
 |
|
|
Click images
|
to enlarge | |
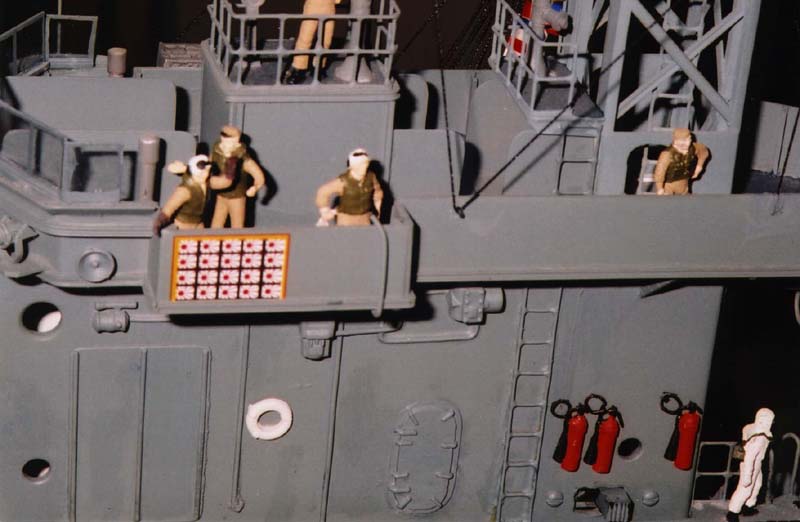
| A couple of shots of the island looking from the port side of the ship. I decided to add figures as an afterthought. I had the a/c but there was something missing, CREW! There is not a whole lot available as far as USN figures of the WW2 era. I modified some modern Naval figures for this purpose. They are from Hasegawa and Fugimi. Leave it to the Japanese. I wish some American manufacturers. would get on board! Note all the small fittings. In the 2nd photo you can see the switch below the fire ex. which operates the main SK Radar. | 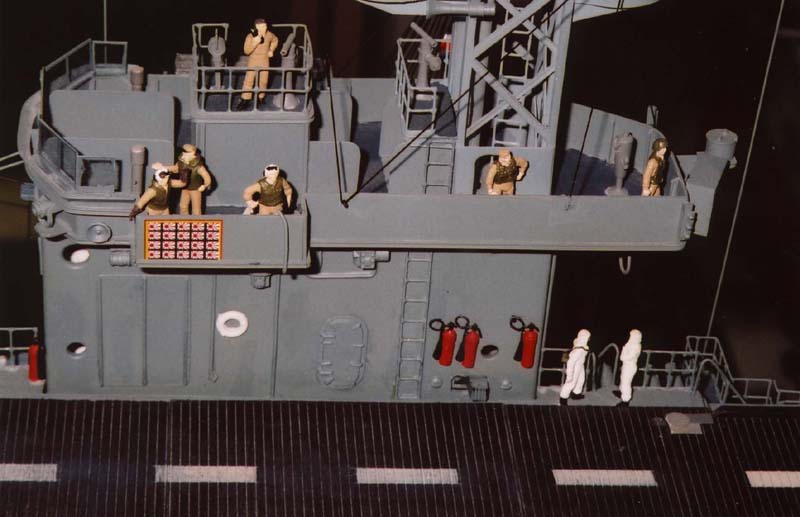 |
 |
| Again we see shots on the port side. Pilots and deck crew readying for a mission. A/C are TBF Avengers by Hasegawa. I airbrushed all the a/c and used better decals than the ones supplied with the kits. Decals are getting scarce. |  |
 |
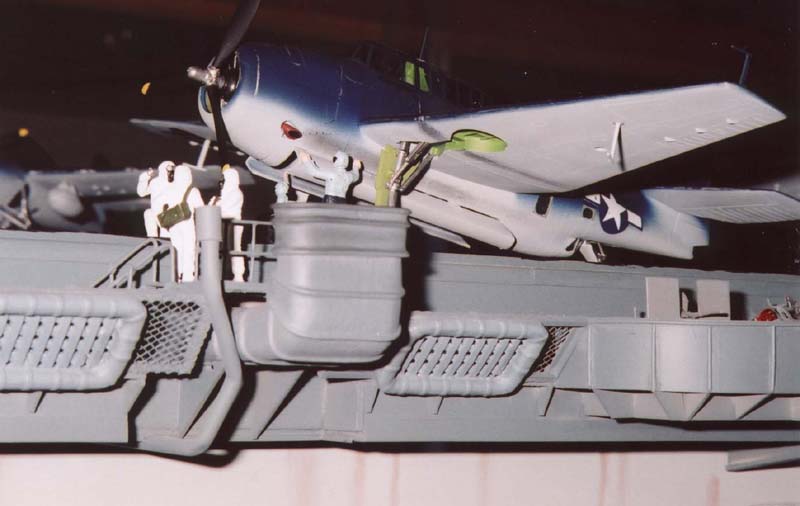
| Good shot of the aft part of flightdeck. However there is a major flaw. If you look at the a/c in the background (F4F Wildcats) with the folded wings you will notice that the grey side is out or the underside of the wing. This is incorrect. I did not catch this little fact till I had all the a/c done! Needless to say it was a stupid mistake which has been corrected. Never rush anything as you will screw it up! It took me 60 hours. to build and detail the a/c and another 10 to fix the problem. Hindsight is 20/20! The second photo shows a TBF Avenger. Note the figures in the white suits. These guys were known as "hot poppas". Emergency fire fighting crew. The suits they wore were made out of fire resistant asbestos material. I placed 4 groups of these fellows on the ship. | 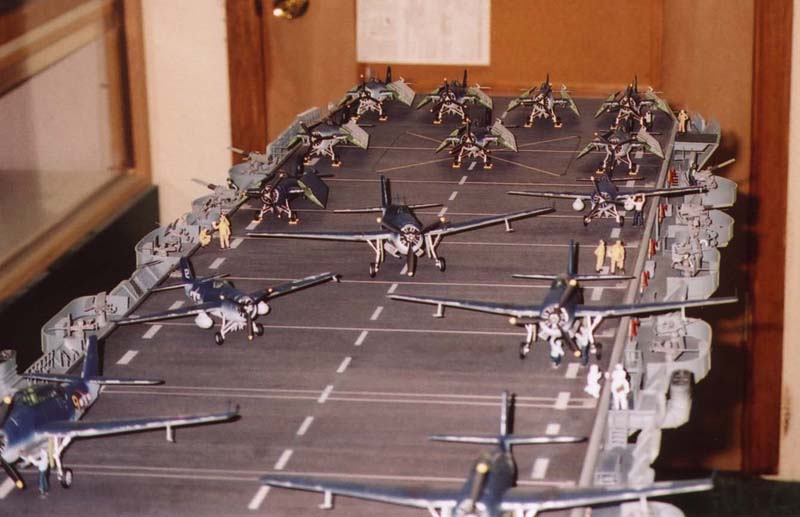 |
 |
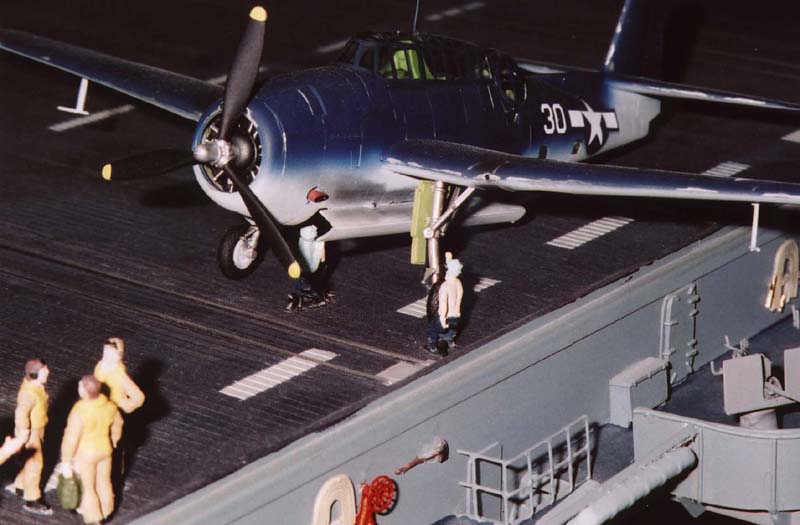
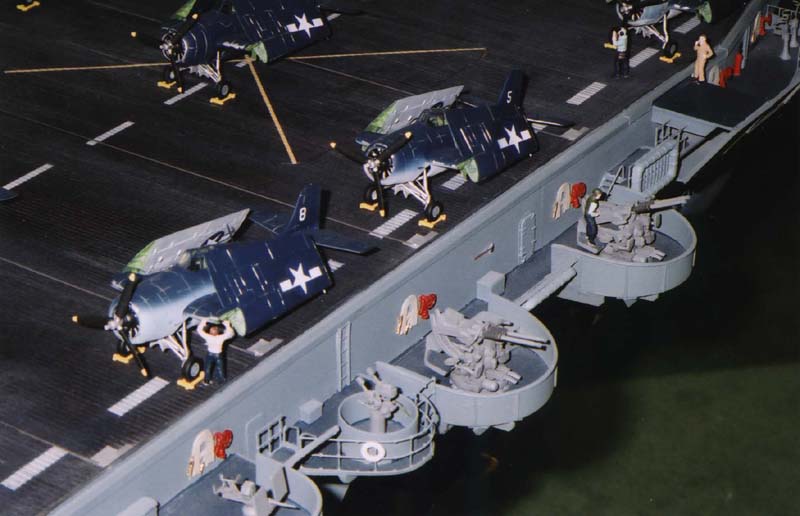
| Starboard. side. A line up of F4F's. Note the wheel chocks in yellow. The F4F Wildcat kits are from DML Dragon, another Japanese mfg.. Each kit has about 50 parts and are a challenge to build in their own rite. The wheel chocks came with the kits, one less thing to make! Second photo again shows a TBF Avenger. Note a/c engine detail. Pilots are in the foreground discussing tactics I presume. | 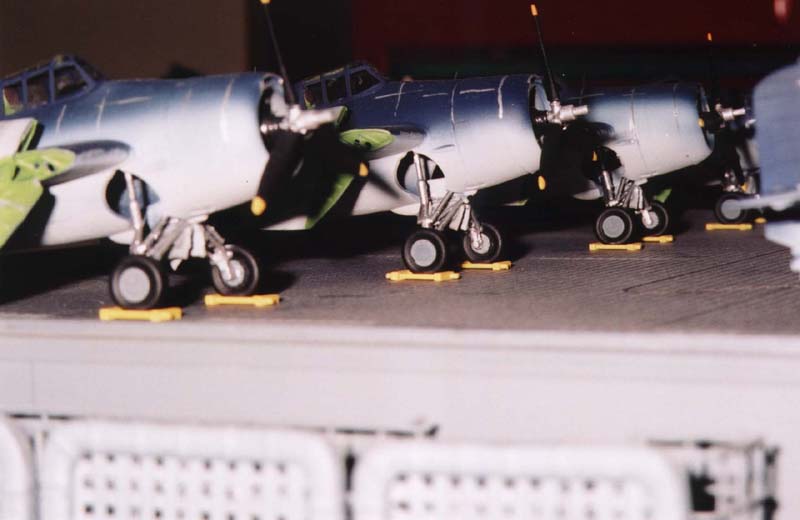 |
 |
| Here's another shot of an Avenger torpedo bomber, this time from the port side. The second photo shows a great shot of the starboard. side. Note the Wildcat folding wings are now in the correct position. (duh!!) Wish I would have spotted that sooner! Check out all the other stuff. Also note wear and tear on a/c. | 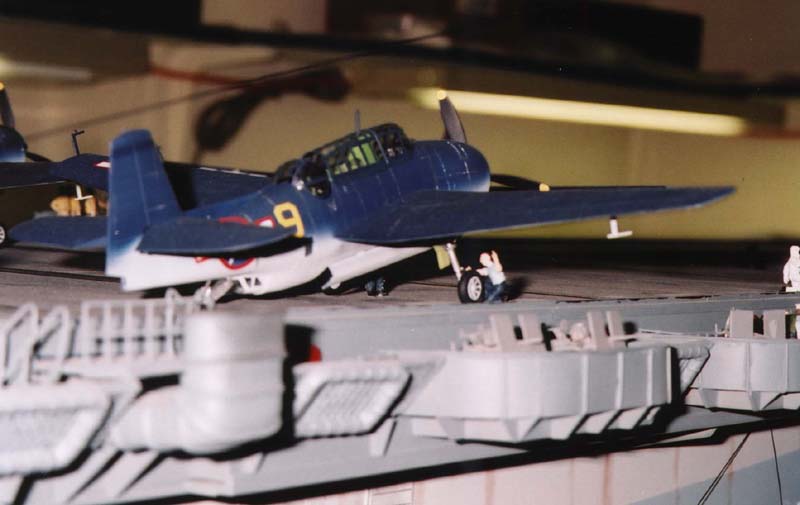 |
 |
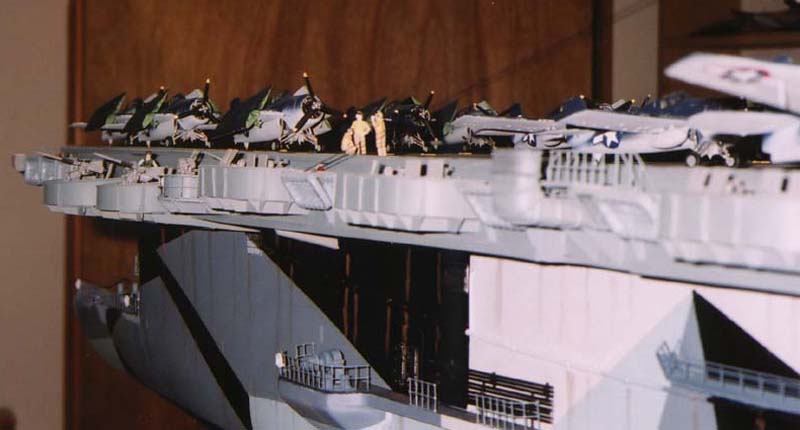
| Portside aft. flight deck view. Second photo is starboard. amidships looking aft. Note hull weathering. I think that the a/c and the figures really bring the model more true to life. Would you agree? | 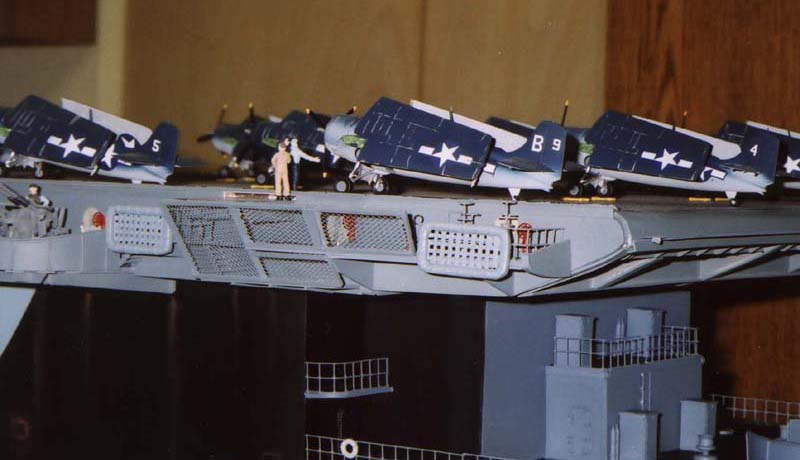 |
 |
| A TBF Avenger coming up from hanger deck on fwd elevator which is operable. Note the radome assy. on the TBF. This is hypothetical as no a/c carried this type of radar. I did this to hide the screw drive for the fwd, elevator. Pretty convincing though not accurate. In modeling we sometimes have to do what I like to call, "improvisational engineering". Otherwise known as wing it! Second photo shows flight deck by aft. elevator. Again note the small details. Lots of cast metal parts on the ship, most from HR Products. Their stuff is pretty good but requires some TLC on the modelers part. Mostly clean-up, flash, nubs, etc. Nothing major. All in all I would buy their stuff again as I was happy with it despite the small problems. | 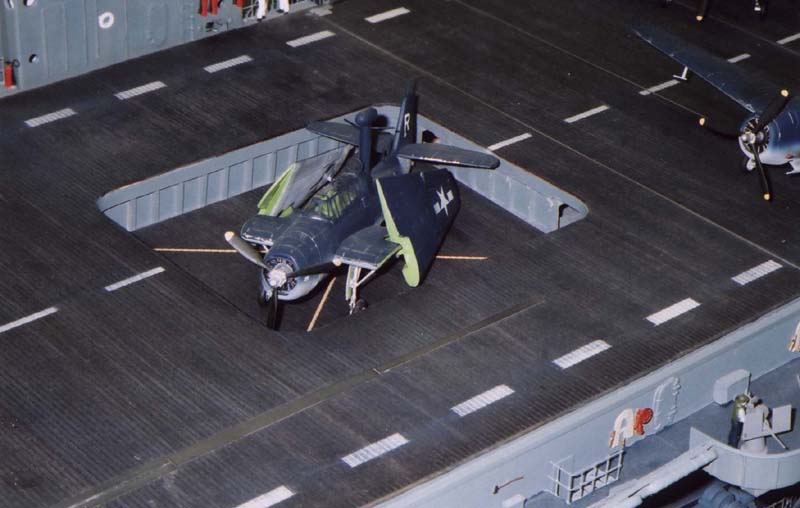 |
 |
| Nice shot of the island looking from pt side. I give this one a salute every time I see it. I.E. The Flag! God Bless America and her Fallen Heroes. Many brave men lost their lives on these small carriers. The term CVE was considered by many to mean, Combustile, Vulnerable, and Expendable. Pretty scary. The guys who had the real balls were the pilots. Imagine landing a 3 ton aircraft on a piece of steel and wood only 500 ft long in the middle of the ocean at dusk! Bigger balls than mine. If I was the Navigator I would seriously think about a barf bag!!!! Brave men all, indeed. | 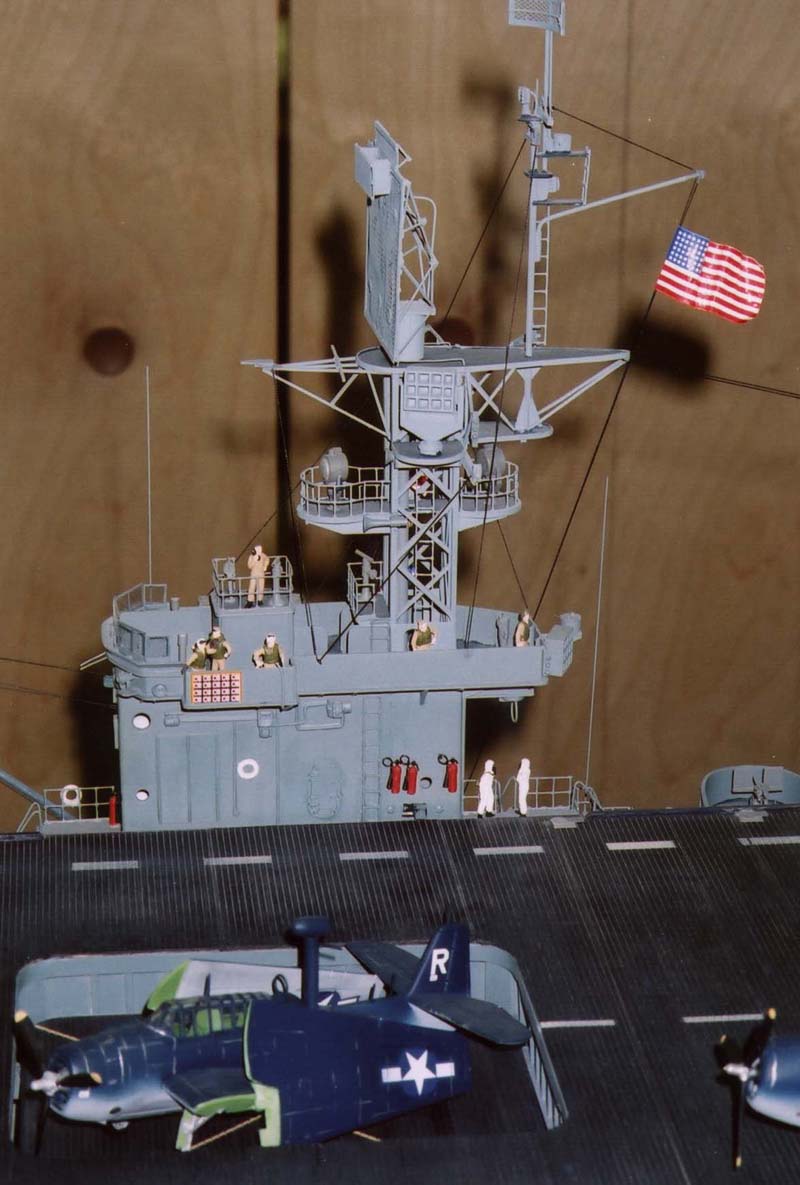 |
|
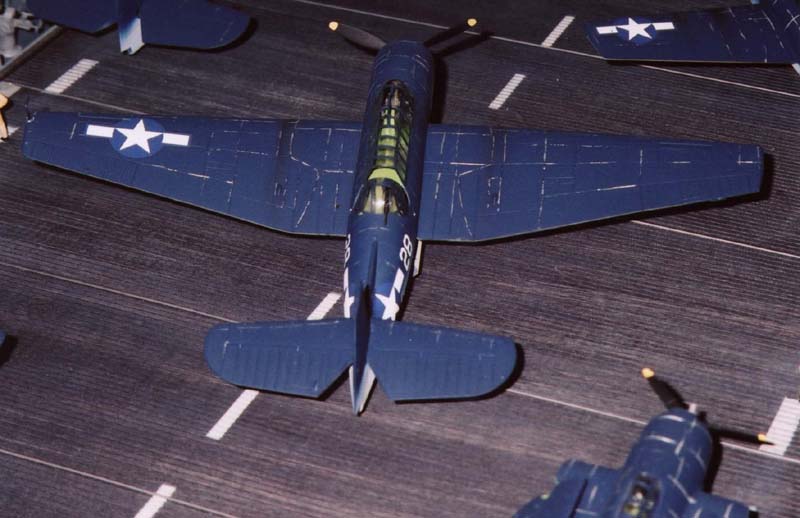
| Another shot of pt. side aft. Note railings on aft. deck. Made from galvanized steel wire. Photo #2 shows a good overhead view of a TBF Avenger. Again note weathering on the a/c. |  |
 |
| Here is a pic of the pt. side. Another one which I wish would have turned out better. It is hard to get the whole ship in a photo and still preserve the detail. Like I said, I'm not a photographer. | 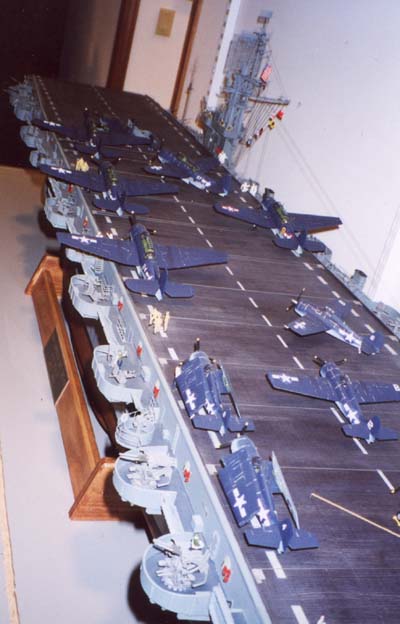 |
|
| Pretty good pt. side bow shot. Again notice hull weathering. I used pastel chalks and light washes of paint to do this. Also note the wings of the TBF's sticking out over the flight deck. I saw one of these aircraft close up at a recent air show and you have now idea how big it really is. Hard to believe they operated from these small carriers. Next photo is a pt. side shot of the whole ship. Not a real good photo I'm afraid. Too bad. A little brighter and clearer would have been nice! | 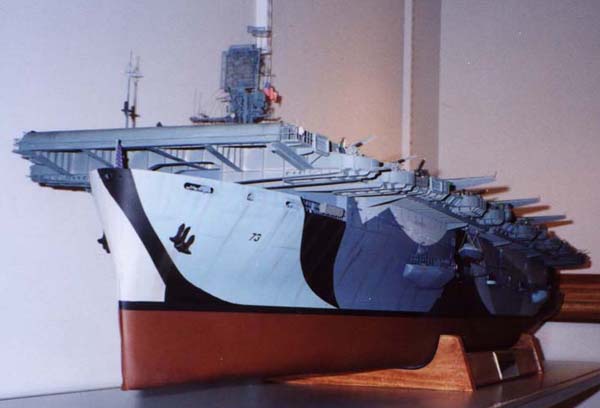 |
|
| Well here is yours truly! This was taken at a recent model
contest that I entered. We won't go there. Just kidding. I took 3rd place
in ships. Not real good. Oh well. I must have done something they didn't
like. Don't matter cause I like it!! Ha, HA!
Epilog; --- Well that's it! On to another project. I would like to thank Tim Dike and this site for giving me the opportunity to show my work to all of you. His work presenting this to you all is 2nd to none and he should be applauded would also like to give a big thanks to Loyalhanna Dockyard, a company based out of Bergen, N.Y. Their assistance in obtaining parts for this project was instrumental in its completion. Good people to do business with and I recommend them highly whatever ship stuff you are doing. Also thanks to HR Products and The Floating Drydock. See you all again soon with another project!! Happy Modeling! Any questions anyone has or if I can be of any assistance, please feel free to e-mail me at bjsww@earthlink.net. Bill Waldorf
|
 |
|
|
|
||

© ModelWarships.com