| |
| Deck view of hull under construction. Making a deck is pretty simple: cut the shape from flat stock and scribe any markings you need into it. The Ranger deck above was done the same way. You can see theres a joint, though you can pick up stock long enough to do it in one piece. My first attempt at the island is also visible. | Click to
Enlarge images |
 |
|
| Side view showing how the pieces from the Enterprise kit were used to fill in the side |  |
| Port view of the side showing the flared section of the hull. The flared hull increased the hangar deck are and counter-balanced the island weight. I added a piece to the hangar deck to build it out to the right dimensions, then filled with Apoxy Sculp and sanded the flare to shape. |  |
| Starboard side view at this stage of construction again with the first island. |  |
| View underneath showing where the hull was shortened. Wasp is 82 feet shorter than Enterprise, which is 1.4 inches in 1/700 scale. Beam is only 2.1 feet difference, or .03 inches in 1/700. That is lose enough I decided not to replicate it. | 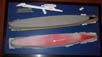 |
| One more Port view to illustrate the hull flare again. | 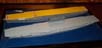 |
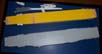
| The Island: I didnt like how it was shaping up using the kit pieces, so I decided to build it up. I found Evergreen the right height for a level and right width. Here are the pieces I collected from the kit plus the Evergreen. The stack is the red splotch. | 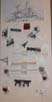 |
| Basic island construction in the process of being filled. Gray bits are from the kit. | 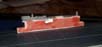 |
| Island with stack on the deck. | 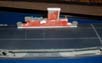 |
| Same stage of construction, top view. | 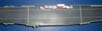 |
| Inboard view of Island. Toms Modelworks hatches added. Ladders from spares box. |  |
| Outboard view. | 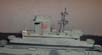 |
| The Wasp had a unique deck edge elevator. This was a feature I wanted to show on the model. | 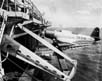 |
| Picture of the elevator. The finished island and all the small bits are in the box. | 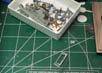 |
| Close up of finished Elevator with Dauntless. I used a couple of catapults to make the arms of the elevator, which are too thick. At this point, I just decided to go with it. | 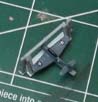 |
| Elevator mounted on the hull. |  |
| Some final test fits while I was installing the railings. |  |
| Test deck spot of the Spitfires. | 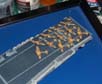 |
| Another view of the test fit. Good view of the deck markings. |  |
| Deck markings were laid out on the computer and printed on decal film. The while lines become clear on the decal, so the deck is painted that color. |  |
| Finished model with Spitfire clearing the deck forward and one lifting off near the island. | 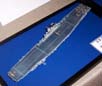 |
| Starboard view. You can see the life rafts, ships boats, cranes all added. | 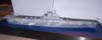 |
| Port view, lower angle. |  |
| Finished model with the Trumpeter Yorktown hull and deck to show the difference in size between the two. | 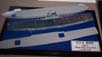 |
More
of Don Joy 's work.
Updated 12/5/2014

© ModelWarships.com