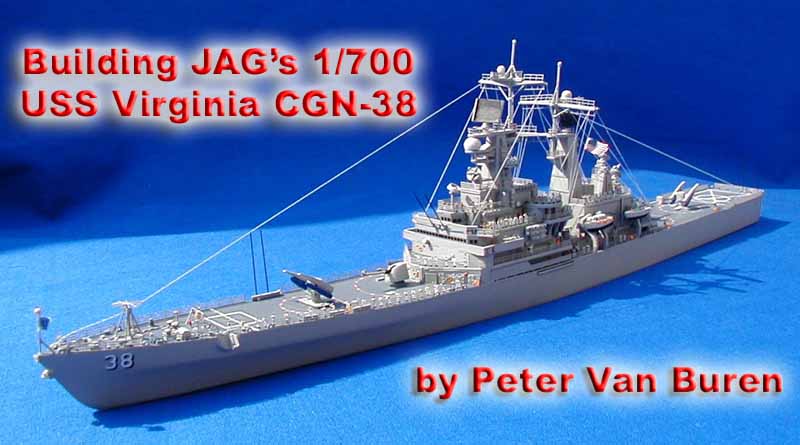
by Peter Van Buren
| JAG has again turned out an outstanding
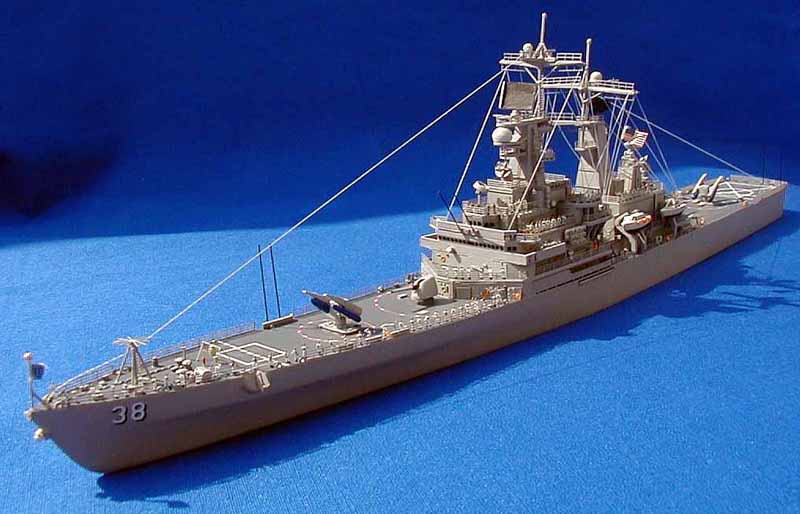
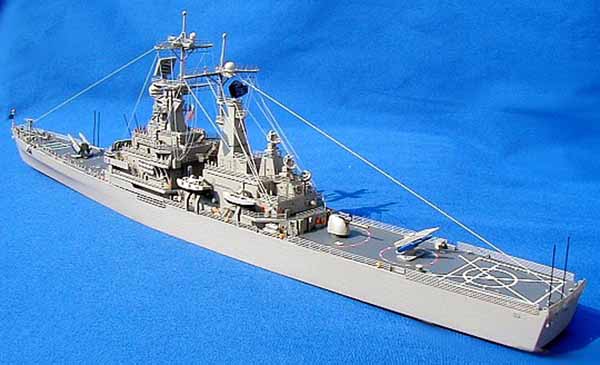
kit, this time of Cold War ship USS Virginia, CGN 38.
The quality of the resin casting is the kind of work we have come to expect from JAG: dead flat hull bottom, no pin holes, little or no flash, few parting lines, seams, etc. The standout thing here is that JAG cast the entire superstructure-- the decks, platforms and supports as one single piece of resin. Though the modeler has some pleasantly challenging tasks ahead on this kit, the basic "body" of the ship is almost ready to paint as it comes out of the tube. |
|||||
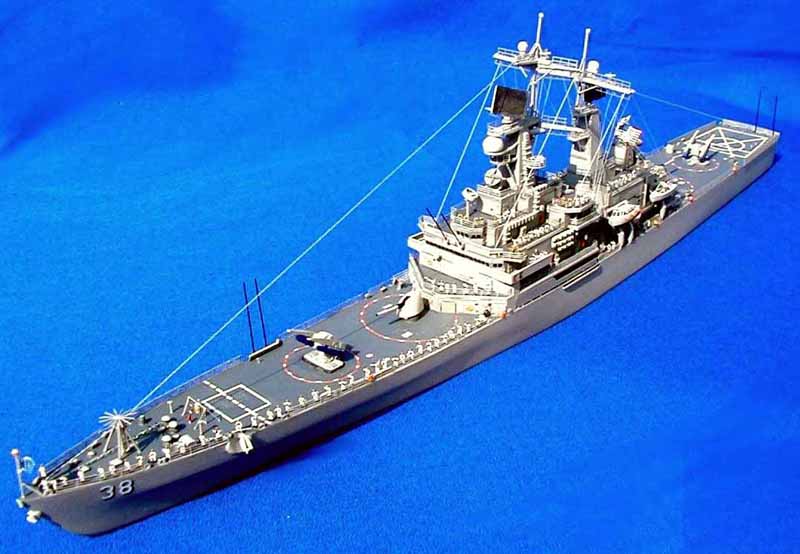
| Background: CGN-38 Virginia Class
The four Virginia class guided missile cruisers were equipped to fulfill multiple tasks in all warfare mission areas. The ships were equipped with two twin rail missile launchers for AAW with ASROC capability; two 5" .54 caliber gun mounts for AAW and ASUW; two three barrel torpedo launchers for ASW; and a LAMPS helicopter for ASW. Two pressurized nuclear reactors were capable of propelling the ship at speeds in excess of 30 knots, providing the endurance and capability to operate with other conventional and nuclear ships over extended periods of time and great distances. During the 1980s the ships were was outfitted with the Tomahawk Cruise Missile System, the Standard SM2 (MR) Missile System, and the AN/SPS-49 Air Search Radar. Planned Refueling Complex Overhauls were canceled in the early 1990s due to the expense of maintaining the nuclear propulsion components, and the ships were all decommissioned after a relatively brief period of service averaging somewhat less than two decades. Thus the CGN-41 was commissioned in 1980 with a life expectancy of 38 years, though it was retired in 1997 after only half that period in service. |
click images
to enlarge |
||||
 |
|||||
 |
|||||
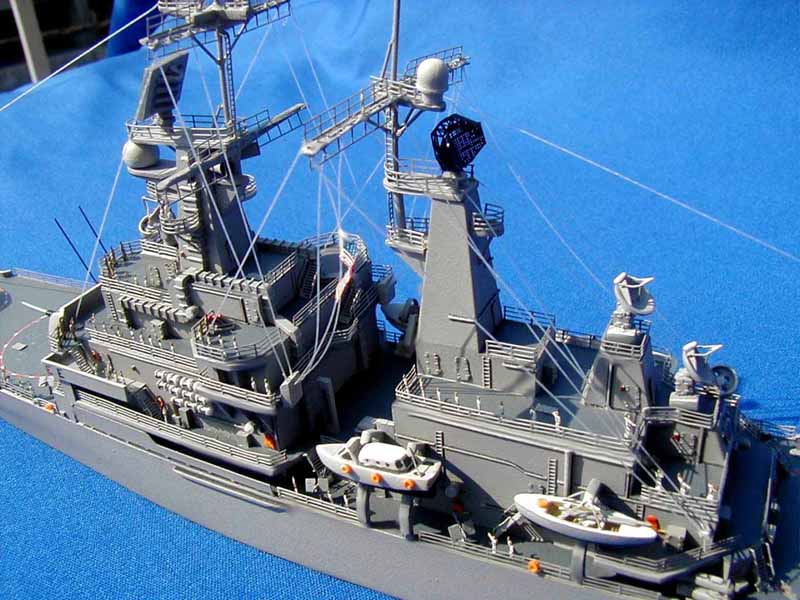
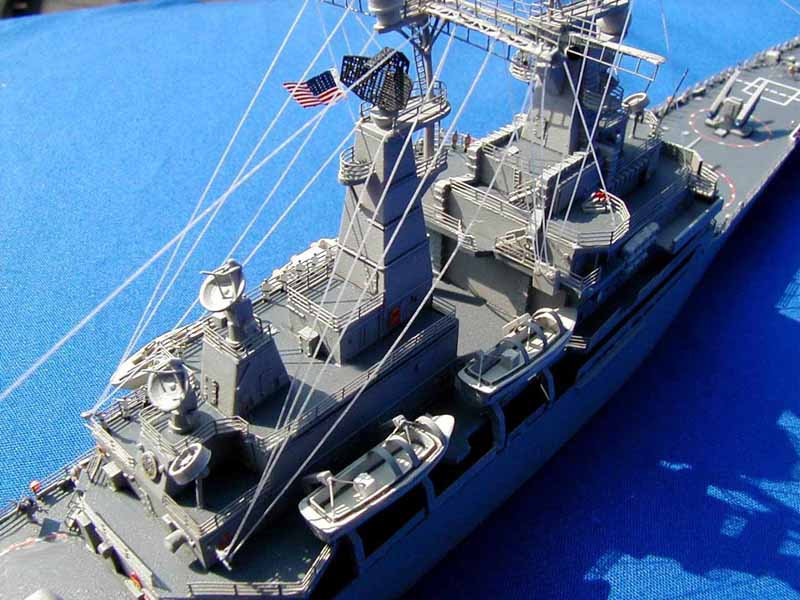
| The ship's two masts and attached radar's consist of some
23 resin, styrene rod and photo etch (PE) pieces. These are among
the more challenging parts of this kit. You will have to work with
both sides of the instruction sheet-- the exploded parts view and the 1/700
scale top and side views of the ship-- to measure and cut the multiple
diameters of rod to size. With all the parts ready, the modeler must
work very deliberately to build the "stack", in other words, align the
rods and platforms so that they are even, centered and aligned.
I choose the following method. I carefully drilled shallow holes in the bases and platforms to seat the rods, using the measure thrice, drill once plan. I did not drill the holes all the way through the platforms but rather *almost* through so that there was material for the rods to butt up against. I then started stacking the pieces, using thick, jelly type super glue. The jelly type gives you a good 10 seconds or so of wiggle time, though is thick enough to hold the parts upright before drying. I'd place a part then quickly look at it from above, the front and the side, adjusting as needed. Once I had it in place, I used a tiny drop of super glue accelerator to freeze the part before moving on to the next level. It is easier than it sounds, but don't start too late at night. Because the yard arms stick out quite a bit, I left them off the masts until I had done most all of the other assembly. Otherwise I am certain I would have snapped them off by accident while working on other parts of the ship. As it is they did pull a bit as the rigging shrunk. |
 |
||||
 |
|||||
 |
|||||
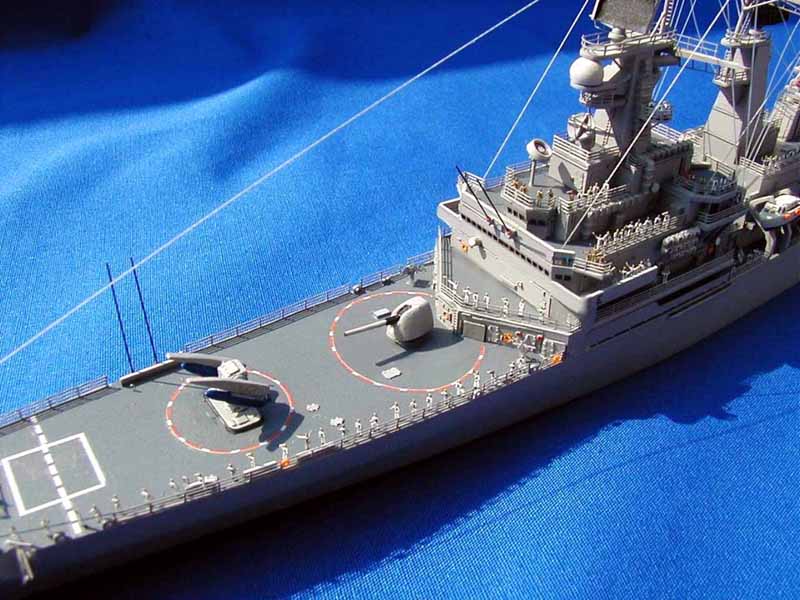
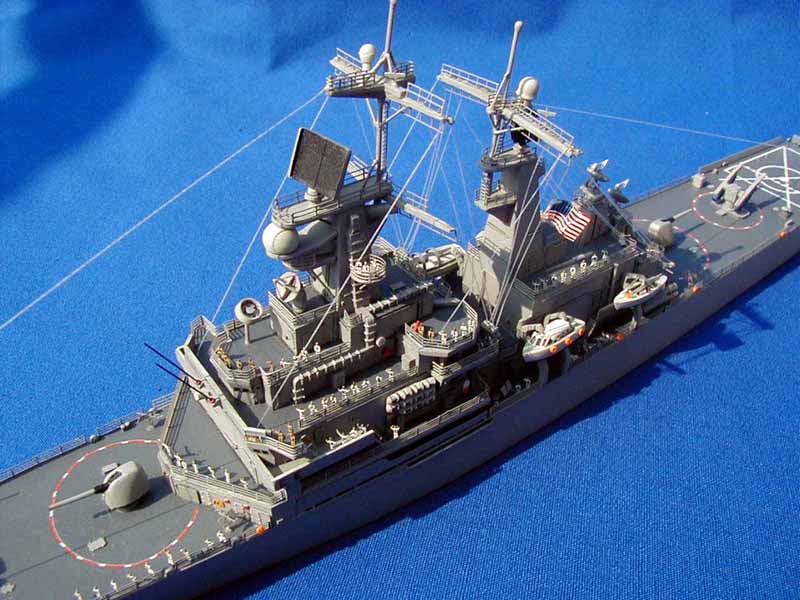
| Painting/Masking
As mentioned, JAG did an amazing job of casting the entire hull and superstructure as one piece. This can in a way complicate your painting and masking, as since the pieces are not separate, you have to mask every level and platform. This takes some time, and demands a flexible, thin masking tape. I used Tamiya brand orange tape, but you may prefer something else. I don't think regular tape will work well in this role. After spraying the ship with the chosen gray, I started with the ambition to mask the entire thing and paint the darker deck color all over in one go. This did not work, as it was quite difficult to place the tape everywhere without ending up places I did not want to remain the hull's gray. I found it easier to mask a section, cover the rest of the ship with tape/paper, spray and then move on. Obviously if you prefer brush painting this is not applicable. |
 |
||||
 |
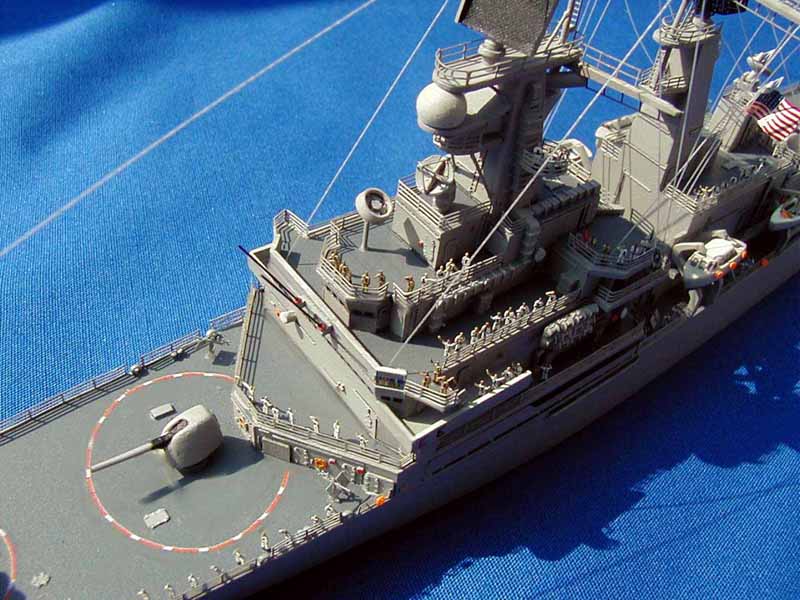
|||||
| Speaking of brush painting, this may be one ship that you need to reconsider on. JAG has molded some very delicate details on the superstructure, such as hatches, ladders, life rings, hoses and the like such that you do not need to add PE replacements. That's the good news. This does however commit you to laying down a very thin coat of paint so as not to obscure these details. That argues strongly in favor of an air brush or spray can. | |||||
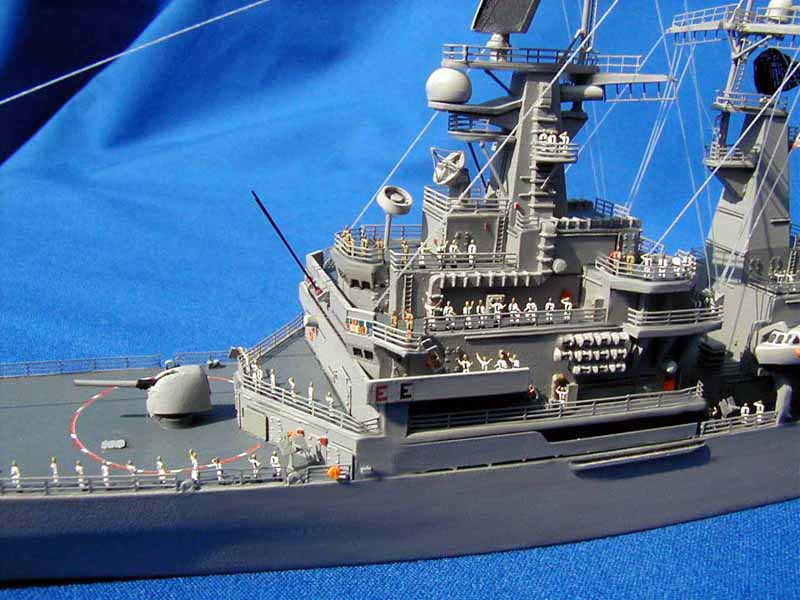
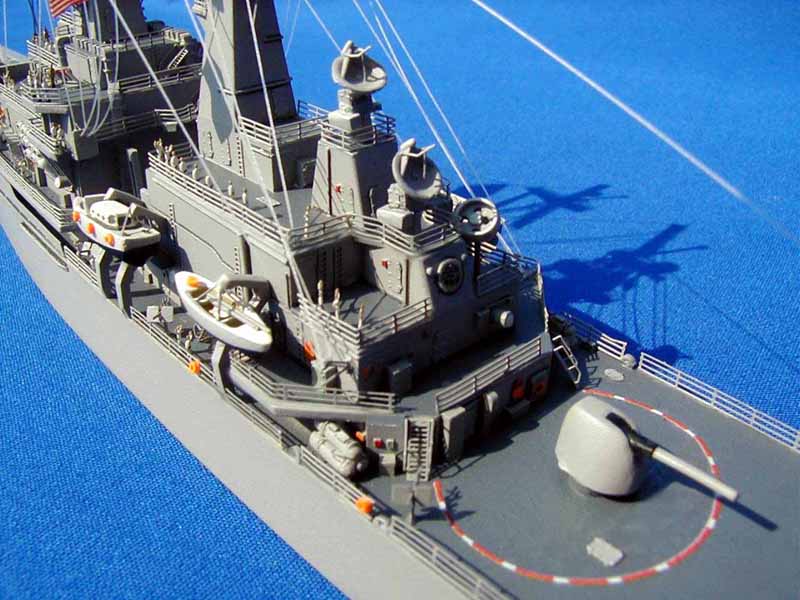
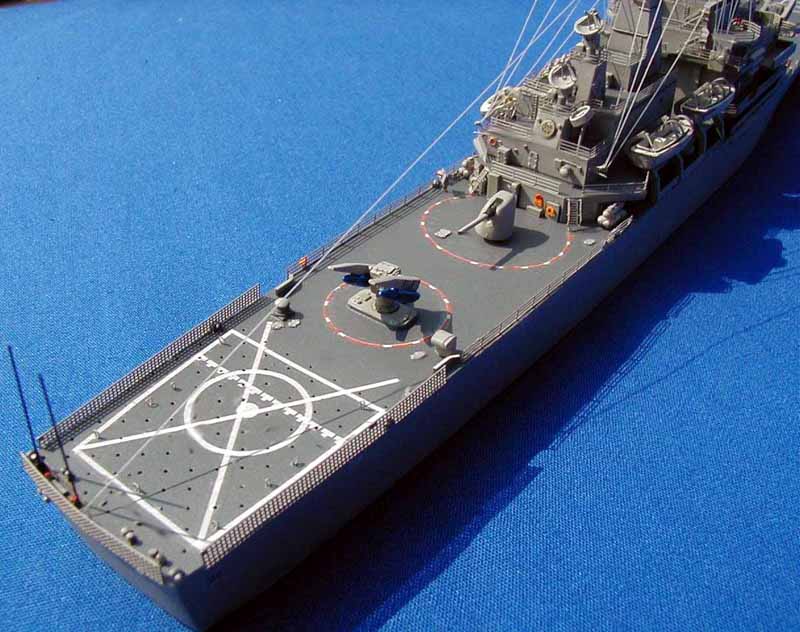
| Decals
JAG provides a complete decal sheet. You get hull numbers and ship's names for the entire class, as well as a choice of "fruit salad" battle ribbons and Battle E's to add to the bridge shields as you see fit. All the warnings circles and helo deck markings are included. JAG also includes the warning line decals needed if you were to convert the Cold War version of the Virginia into her 1980's fit with Tomahawk launchers at the stern. Thoughtful touch. The decals are very thin and responded well to Mr. Mark Softener. If you are used to standard Skywave type decals, go slow at first with these, as they are very thin and need to be handled with care. As is typical for resin kits, the decal over coating covers the entire sheet, so you will need to cut each design out and trim it carefully. I found that the helo deck line decals tended to crack when I used scissors, which bent the paper a bit. When I switched to a sharp knife and straight edge everything worked fine. The rest of the decals were fine and went on with no trouble. Some may wish to substitute dry rub on transfers for some of the white helo lines. This would cut down on some of the work needed to trim the decals. |
 |
||||
 |
|||||
| Photo etch (PE)
As is their custom, the JAG folks supply ship specific PE. This includes for the Virginia just about everything you will need except some ladders and all the railings. One important note: the instructions indicate the location of PE parts with letters (A, B, C) instead of the numbers used for resin parts. The actual PE shape is not drawn on the exploded parts view, so it would be easy to leave off some part. While the usual rule of "keep modeling until there are no parts left in the box" would apply, the actual assembly of the ship is such that it is easier to apply some of the PE at different steps in the build, as waiting until the end and gluing on whatever is left over would be more difficult. |
|||||
| The Figures
There have been a few questions about the figures. The figures are from Gold Medal Models. You get about one hundred per set. They are *very* small. The way I paint them is as follows (others may have better ideas):
|
|||||
| Assembly Sequence
While every modeler will approach a kit like this is his/her own way, my rough sequence of assembly was as follows:
|
|||||
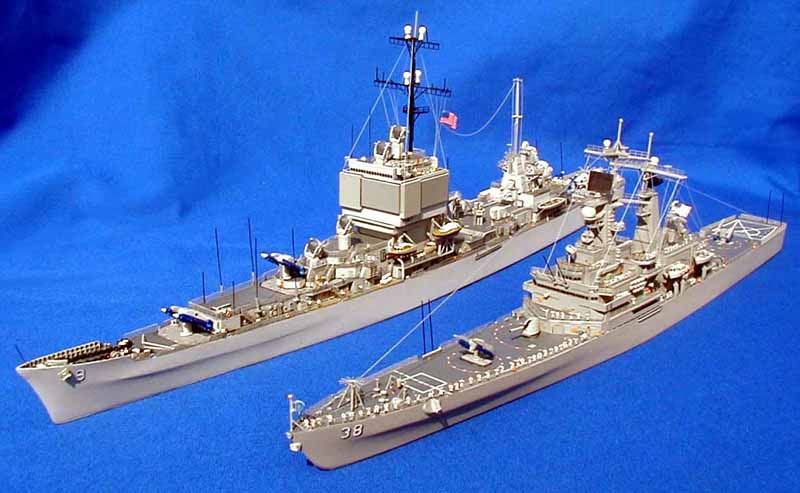
JAG's USS Long Beach in company with the USS Virginia |
|||||
| Conclusion I think that in most cases, this would not be a good kit to start into resin and PE with. While the parts count is low, the painting and masking can be challenging, and the modeler needs to think through the assembly sequence to maximize the kit. If your experience has been mostly with pre-determined assembly sequences as is common with most injection molded kits, this may be a more difficult than necessary place to start into resin kits. | 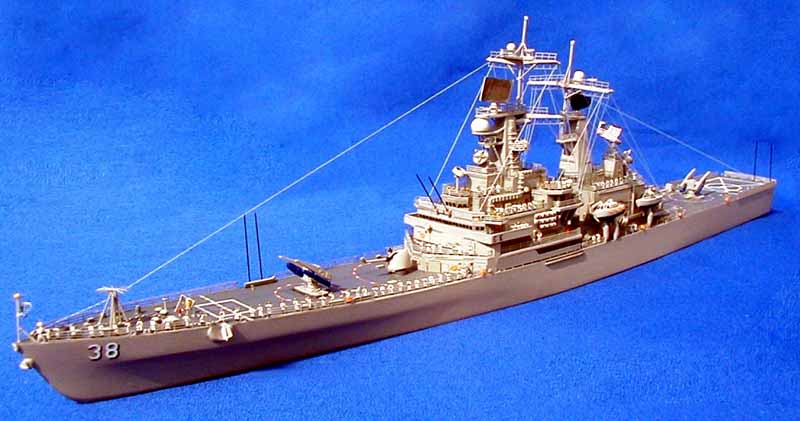 |
||||
| That said, for those with some resin and PE experience
and an interest in the Cold War navy, this kit is a great project.
I enjoyed this project a lot and unlike some kits, I was actually a little
sad when I figured I was done. Some of the fiddly things of working
with resin are not present, so you spend more time detailing and less time
gluing deck layers together. I like a bit of color against all that
gray, and so the decals included make it easy to build a very attractive
model right from the box. I felt that I was working to highlight
the amazing job the pattern maker did in creating the kit, rather than
sanding and filling to help cover up some of the things the pattern maker
did that he shouldn't have done.
JAG has once again stretched the envelope on what can be done in 1/700 scale, and a moderately experienced resin builder will enjoy this kit. |
|||||
| Conversion
The kit comes to you as the Cold War variant of the ship. One person posted the following information on the Steel navy board: Posted by Bill Oreto on October 4, 2002: I'm planning on upgrading JAG's Virginia to a more modern era and I thought some might be interested. Thankfully not much scratch building is required. An E-1 and SW-32 weapons set will be needed. I'm using my old Sealine instructions as a guide. It seems the additional deck extension for CIWS will have to be scratch built port and starboard. Satcomm dishes, CIWS guns, Harpoon Launchers, Tomahawk Launchers, Chaff Launchers, SPS-55 radar, a couple of SLQ-32 ECM antennas, additional aerials and vert-rep square on the stern will have to be added as well. Bill Oreto-NJ |
|||||
| Online Resources
USS Virginia Home Page http://ng.netgate.net/~huston/cgn38/
Global Security http://www.globalsecurity.org/military/systems/ship/cgn-38-gallery.htm
FAS (Federation for American Scientists http://www.fas.org/man/dod-101/sys/ship/cgn-38.htm
USS Virginia Association A few color photos. A close-up of the missile launcher is of real use to the modeler. NAVSource http://www.navsource.org/archives/04/040138.htm
Out of the tube review of this kit |
|||||