 |
|
| A brief history
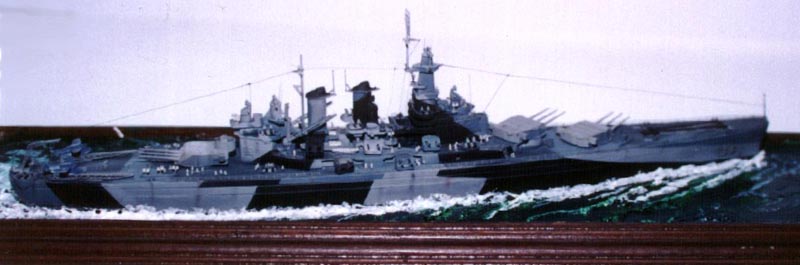
The USS North Carolina is one of the U.S. Navy's Fast Battleships commissioned during World War II. Towards the end of its construction, it drew so many viewers at port and during her sea trials that it was nicknamed The Showboat. The North Carolina's role during the war was primarily a screen ship for the U.S. Navy's aircraft carriers. In separate missions, it went with the USS Enterprise, USS Saratoga, USS Bunker Hill and USS Hornet and other U.S. vessels to fight the Japanese in the Pacific theater. It was also tasked as support ship for invading ground troops ( Marines ) from the Solomon Islands, to the Philippine archipelago, to Palau, and finally up to Tokyo bay during the final days of Imperial Japan. She downed many Japanese attack aircraft including the famous Kamikazes. She sunk the Japanese carrier Chitose and other support ships that crossed her path. She was one of the ships who helped sink the famous Imperial Japanese Battleship Yamato and its support ships in the Battle of Okinawa. Due to its many mission assignments, the North Carolina's road to history was not always easy. In separate accounts, she was hit by torpedoes and bombs and was erroneously thought to be sunk by the Japanese six different times! Despite her battle scars, the USS North Carolina and her superb crew were always able to manage to get back to Pearl Harbor for fast repairs and be off to sea again in a few weeks. The USS North Carolina is now docked as a living monument in Wilmington, North Carolina, USA. |
|
| When I built the USS North Carolina, I saw many flaws in the kit. First, the hull was wrong. Note that the bow is not correct. It should have anchor holes similar to Iowa Class battle ships. Then I realized that the radar was that of the USS Washington's. I took the extra radar from my GMM USS Arizona and it fitted well enough. Of course, I had to use brass rods and replaced the masts. I also used Tom's Modelworks 1/500 scale photo etch railings, ladders and radar's to replace the respective kit parts. The cranes and catapults were also replaced with TM's PE parts. I sanded off the molded anchor chains and replace them with chains from fake jewelry. Before assembly, I sliced the hull leaving about 1/3 of the boot which was enough for the waterline diorama I planned the model to be in. I did not glue the Oerlikon guns and railing yet. |
below to enlarge  |
| The painting was my favorite part. Since I wanted to paint her as she was from 1944 to 1945, I chose Measure 32/18D. I used the Squadron Signal reference on the North Carolina as my paint guide. I used Deck Blue for all horizontal surfaces and masked horizontal surfaces with a combination of haze bray, black and ocean grey. | |
| When I was done with the paint job, I requested a base made for the model. I painted the area covering the diorama with a mix of Aquamarine Blue and Warm Green using Le Franc & Bourgeois Acrylic paints. I intended the waters to be more green than blue. Being from the Philippines, I know that the waters of the Pacific is more green and becomes deep green in deep waters. I painted this area starting from the outer area with a dark shade and a lighter as I near the area where the ship will be placed. Then I applied a thin coat of Liquitex Heavy Acrylic Gel Medium. | 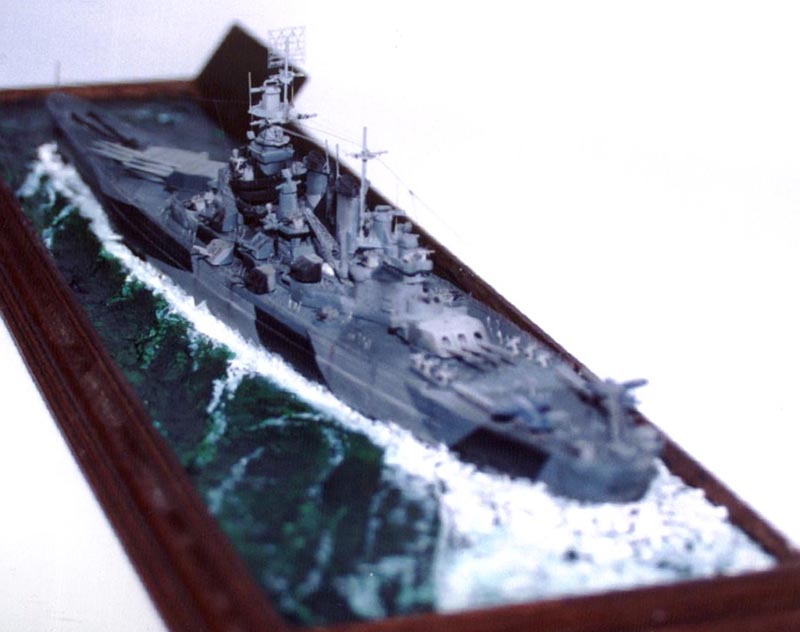 |
| I used a butter knife to emphasize the small wakes and direction of the waves as the ship slices into them. After this, I placed the ship on top of the base and once the gel medium dried, the hull was glued to it. I allowed 24 hours drying time for the gel medium. Remember that when you hurry the drying time of the gel and rush to apply the next coat, you might have problems shaping your top coat because the first coat will tend to stick with your applicator ( in my case, the butter knife that I am using ). I then applied a second but thicker coat of gel medium. I spread the gel medium consistently also starting from the outer area of the diorama going inwards to the hull. Upon reaching the sides of the ship, I sculpted the gel to make it look as it was slamming slightly on the ship. This is the advantage of using Heavy Gel Medium. It is thicker than the regular ones. The I sculpted the gel at the bow with a thin brush to make the wake look more realistic. Remember to go back to the wakes from time to time to check if the gel is starting to stoop down. Use a thin wet paint brush to put them back into shape. After another 24 hours drying time, you can now paint the gel with Acrylic paint. I diluted the Blue Green mixture I used and washed the sea area. Then straight from the tube, I painted the wakes with Titanium White. As Rusty White had advised me, never over do the white water. If you wanted to make your ship look as if she is speeding like mine, you can apply more white water compared to a ship at cruising speed. Paint the white water at the stern with a wide thick and slight dried brush make the area look a little more turbulent. The white water should vanish as you paint away from the ship. When dry, I washed this area with highly diluted Aquamarine Blue acrylic paint. | |
| When everything was done, I started gluing the Oerlikon guns, the railings and finished the rigging. I also weathered the ship with chalk pastel colors. I washed the small details with diluted black oil paint. I then over sprayed the ship with Humbrol Matte Coat without spraying the sea parts. You don't want to end up with a matte sea do you? After this, I used a liquid floor wax to make the sea shinier and more realistic. Jun and Michelle, two of my friends and fellow IPMS members, helped me out with the 1/500 naval figures in the end, painting/varnishing of the base and the application and finishing of the decals. | 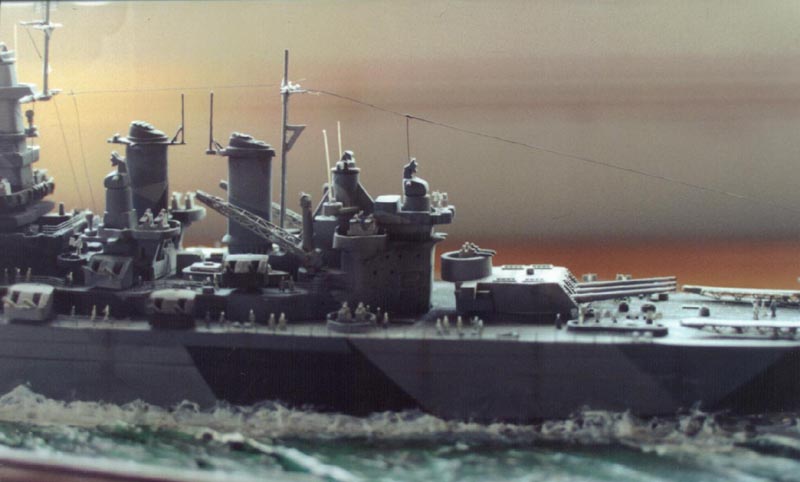 |
| At last, my first waterline ship diorama. Not bad for an experiment on a $10 kit. I hope to do better next time. | |
| Links:
Building the IJN Shinano
by Noel Carpio and Jun Villalon
|
|
