1/350 USS Lexington
Photo etch set by Gold Medal
models
by Tracy White |
| The recent Trumpeter
1/350 USS Lexington "Coral Sea" was yet another welcome addition to
the onslaught of new 1/350th injection molded ship models. Despite the
rush of new kits Loren Perry of Gold
Medal Models was able to turn out a Photo-etched detail set in only
a few months time and here we are, looking over etching excellence as only
a few can do. |
|
 |
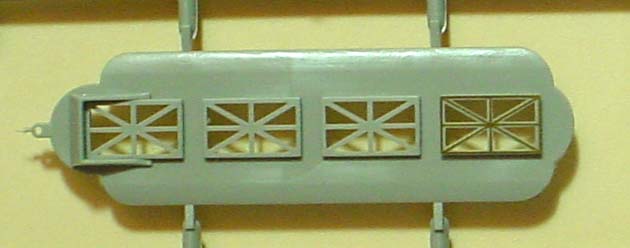
| Set 350-33 is designed specifically for the Trumpeter kit,
that is, Lexington in her fit at the time of the battle of Coral Sea. For
those who have worked with one of the Gold Medal Models sets before the
quality is what you've come to expect and many of the pieces will look
familiar to you. For those who haven't worked with one of Loren's sets
before, quality is excellent, the brass easy to work with and the pre-fit
pieces simplify the process, particularly when your railings run up to
a curved edge. |
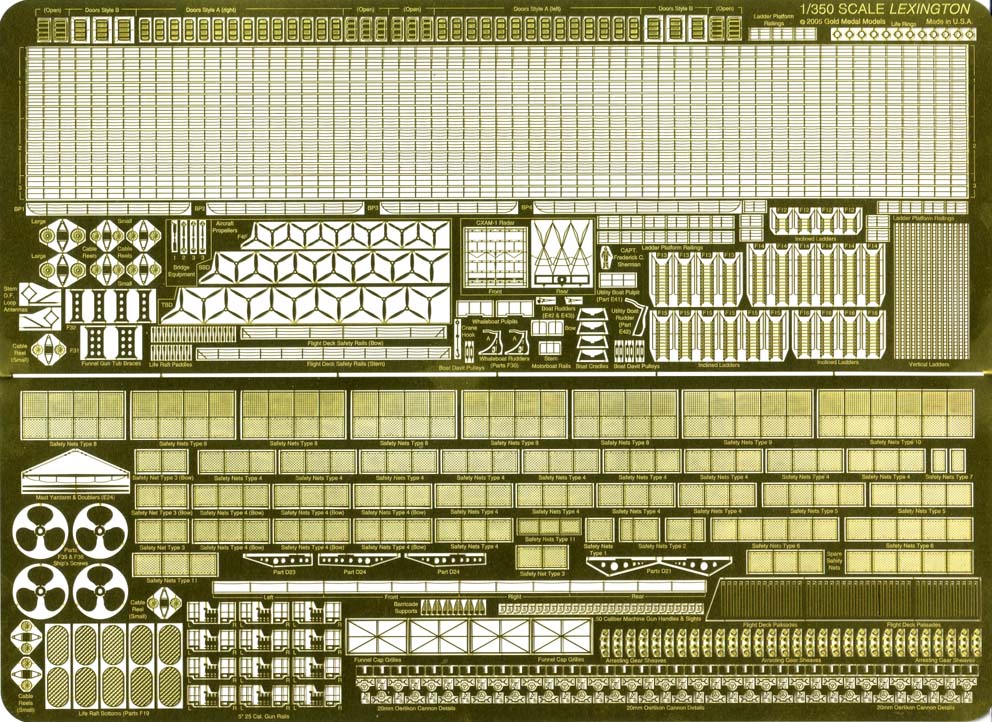
| Instruction Sheet side 1 & 2
click images to enlarge |
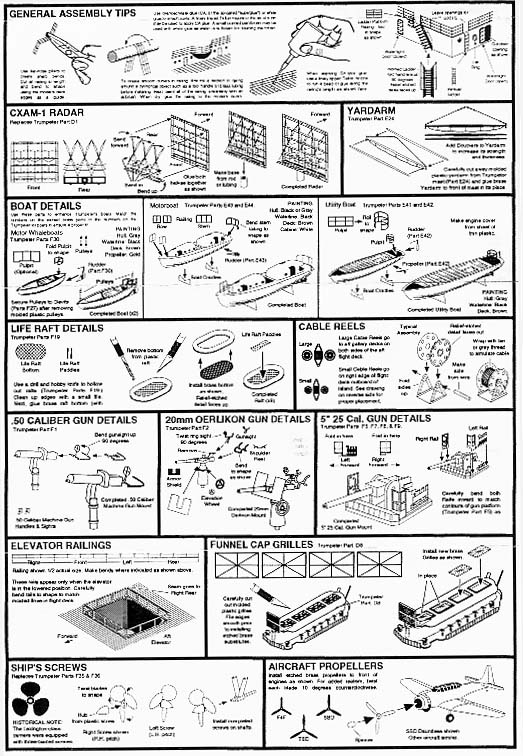
| I'm going to start off with the instructions here, as I
think this is one of the weakest areas of the Gold Medal Model sets. Now,
this is a big model with lots of areas to cover, and there is a TON of
detail in this set. Covering it in one double-sided instruction sheet is
difficult and generally the sheet does a good job if you pay attention
and look over the sheet, the set, and the model closely. But there are
a couple instances where I wish a second sheet had been included in order
to flesh out some of the details. |
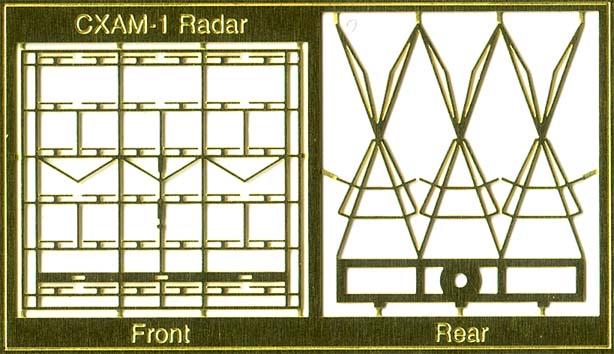
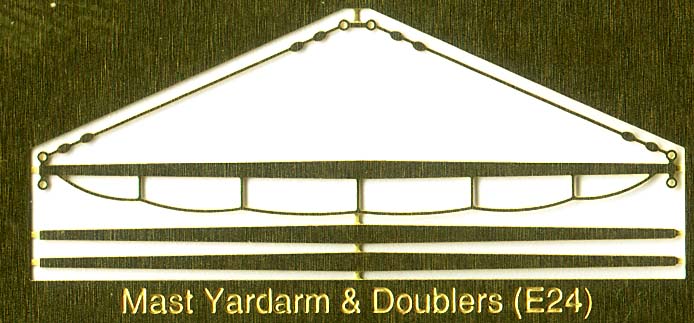
| Additional detail shots of the photoetch
fret.
click images to enlarge |
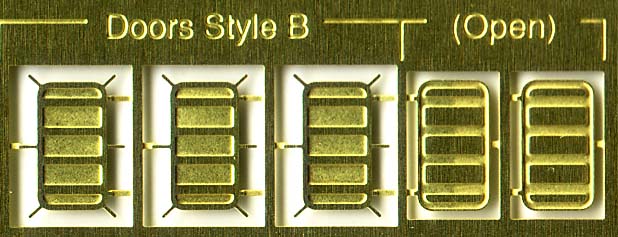
| For example, in the upper left picture you see some of
the doors. You get two styles, listed as A and B, both open and closed,
with 34 right hand and left hand style A doors (28 closed and six open)
and ten of style B (six closed, four open). If you look you can see that
style B is a wider door, but nowhere do the instructions mention this nor
what the differences are. For the record, the doors were designed to swing
forward when opening because that way if you take water over the deck they
open to the force of the water will push the door closed instead of slamming
it open. The sole nod to these parts is the standard "general assembly
tips" section included in every Gold Medal Models sheet that has one door
labeled "watertight door (closed)"
There are other tidbits like these that can leave the modeler scratching
their head if they haven't done their research or used a few of these sets
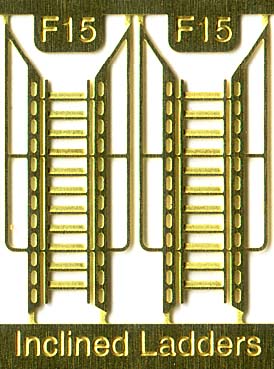
before. There are four lengths of inclined ladders as direct replacement
for kit inclined ladders but this isn't mentioned in the instructions and
some may find this confusing until they figure that out. Overall the instructions
work, but there are times the modeler might be left wondering what kind
of jigsaw puzzle they've gotten themselves into. I spoke to Loren Perry
about this and he said that the next printing will be better; Gold Medal
Models is in the midst of moving currently and what with the move, rush
of kits, and normal business going on the instructions were a bit rushed
to get the set out in a timely manner.
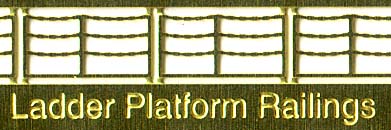
There is the normal assortment of three-bar, two bar, and chain railings.
There's over 55 inches (141cm) of three bar railings, 46 inches (118cm)
of chain railing (with the droop between posts), and 18.5 inches (47cm)
of two bar. Although not mentioned in the instructions at all, the two-bar
railings should be used in the .50 cal AA nests up near the top of the
funnel where there are no splinter shields. Otherwise the only other area
you might want to use them would be on top of the 8" turrets that were
removed before the battle of Coral Sea, which are not included in the kit.
While I'm at this point I'll mention quickly that there are some parts
included for the prewar fit of Lexington; the stern-mounted direction-finding
antennaes and two railings for port boat pockets that later had AA platforms
mounted with splinter shields. There is no extra railing for the starboard
boat pocket however. A curious omission but I would imagine that there
will be enough people with extra parts that trading will be relatively
easy. |
| Additional detail shots of the photo
etch fret.
click images to enlarge |
| There are plenty of vertical and inclined railings; I haven't taken
stock yet to see if there are enough for the kit but there are enough to
make a very good dent in what is needed. Check out a later part of my "So
you want to build Lexington?" and I'll have an answer then. I did check
to make sure that the vertical ladder parts are long enough to do the side
of the funnel and they are just about perfect; the tallest one on the model
I measured was "about" 1 10/32" (33.5mm) tall while the on on the photo-etch
set is 1 11/32" (34mm)! For the anal retentive, yes I know that 10/32 is
5/16; I'm just trying to keep comparisons simple, and besides, shouldn't
you be off debating whether anal-retentive is hyphenated? |
| Additional detail shots of the photoetch
fret.
click images to enlarge |
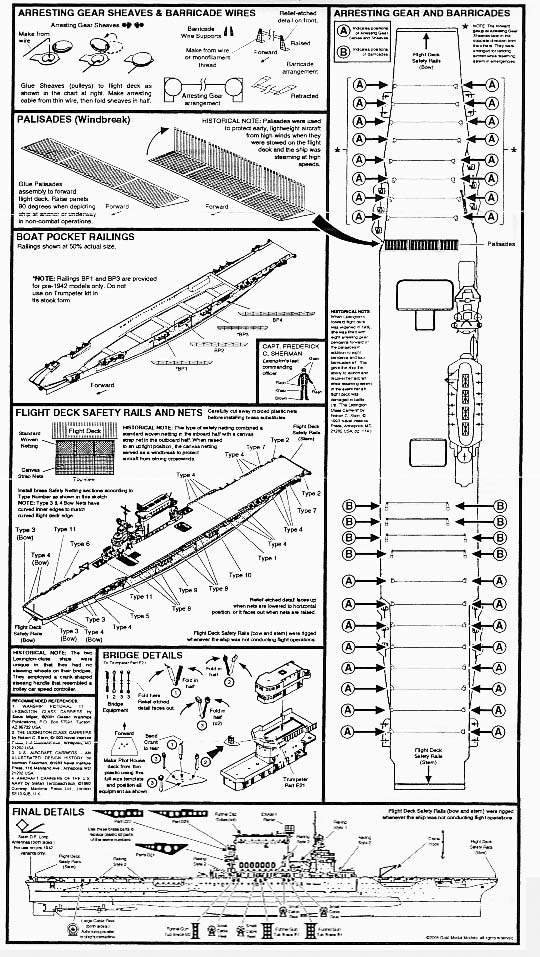
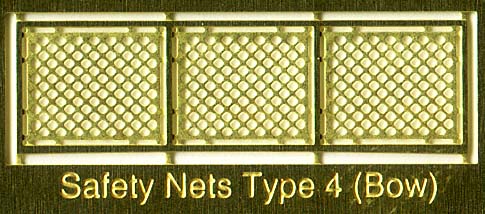
| There is an amazing array of safety netting for the model
as well. For those who haven't bought their kit yet or paid much attention
to her details, Lexington and Saratoga had a different type of method to
prevent sailors from falling overboard from the main deck. Instead of having
railings on the deck edge that could negatively effect an aviator's day,
there were inclined nets hanging outward from much of the side of the ship.
The areas where there were no safety nets were the very bow and stern,
to starboard of the island from the 8" turrets/1.1"AA guns back and forward,
and generally speaking around and over the open 5" AA gun mounts. These
railings were chain railings (type 2 on the set) and were removed during
flight operations. Separate pre-formed railings are included for the fore
and aft edge of the flight deck but should only be used if one is depicting
the ship as if secured from flight operations.
There are some nice structural pieces included, such as supports for
the undersides of the platforms behind the stack and underneath the 20mm
platform added just outboard of this stack during Lexington's last visit
to Pearl Harbor. Using these will require a little bit of work due to the
way Trumpeter designed their parts; retaining slots will need to be shaved
off and sanded smooth to make the open walkway this area actually was.
This will fix a problem with the use of the Nautilus models wood deck that
I'll touch on in part
II of "So you want to build Lexington?"
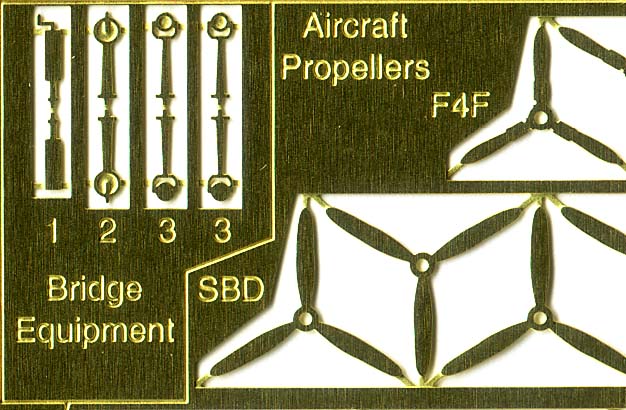
Also included are such "standard extras" as life rings; cable reels;
arrestor and barricade gear, ships and some air group propellers; cradles,
pulleys, and rudders for the ship's boats; flight deck palisades and elevator
railings; and fittings for the Anti-aircraft weapons such as 20mm shields
and sights and the fuze setting assembley and railings for the open 5"
/25 cal guns. One comment on these, I do wish that they had been relief-etched
like much of the other details, they just look a little flat to me now
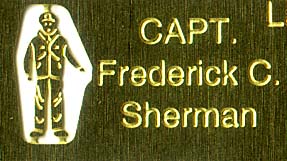
after all the spoiling I've had. Other extras include equipment for the
interior of the bridge and a figure of Lexington's last captain, Frederick
Sherman. Finally, parts are included to replace the bottoms of the ship's
rafts hung on the side of the stack and to add paddles to them. |
| So How Does it Fit?
click images to enlarge |
| Since this is labeled as a pre-shaped, pre-sized set I
wanted to see how some of the parts fit. Most intriguing for me were the
railings for the boat pockets; after having to cut a previous PE set up
for a curved end the idea of having one fit perfectly right off the fret
was appealing. I must say the experience was as tasty as I dreamed; the
upper left photo shows a nearly perfect fit. The reason it is not perfect
is that there's still a bit of flash in the corners I hadn't removed.
Next up is the safety nets near the bow. If you look at the
safety net image a bit further up the page you'll note that it is labeled
as a bow net; on the edge at the bottom of the picture there is a slight
curve to the edge so that it will better conform to the curve of the hull.
When test fit this work fairly well over most of the forward area; however
the forward area does not have a constant radius and there are some tighter
curves that may cause problems. Once again I invite you to check back to
my online
Lexington build in a bit where I will go more in-depth.
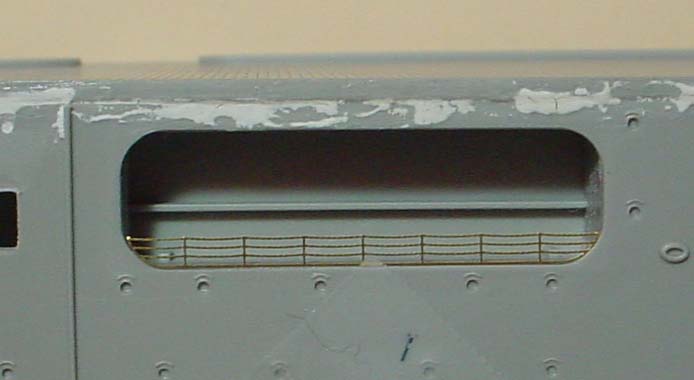
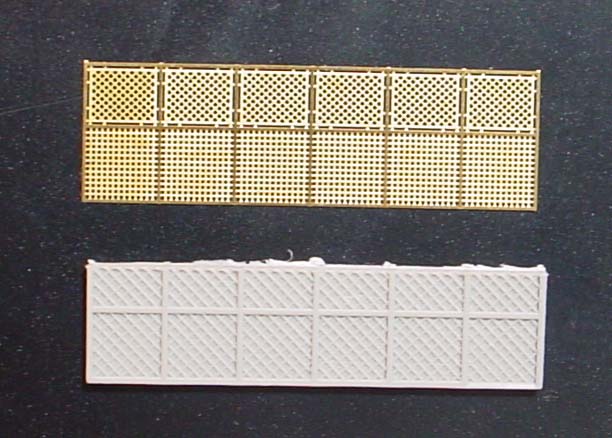
The last thing I checked quickly was the funnel cap grills. The outer
dimensions match the kit and also fit perfectlu on the front funnel vent
with it's extra shielding. Some extra work will be required in widening
the openings a bit due to the finer detail of the PE parts, but that should
be expected when replacing plastic parts with metal. |
Conclusion: The
Gold Medal Models Lexington PE set is a good set for a good model. While
there were some things I wish had been done differently I didn't find any
flaws. The set's $42 price is cheaper than some of the more recent carrier
PE sets from Gold Medal Models which should make it an easier purchase
for some people. The combination of well-excecuted etching and relatively
simple kit would make this an excellent first photo-etch set for new ship
modelers. The
Gold Medal Models Lexington PE set is a good set for a good model. While
there were some things I wish had been done differently I didn't find any
flaws. The set's $42 price is cheaper than some of the more recent carrier
PE sets from Gold Medal Models which should make it an easier purchase
for some people. The combination of well-excecuted etching and relatively
simple kit would make this an excellent first photo-etch set for new ship
modelers. |