Reviewed by Jon Somerville |
||||||
|
Much has been written about the history of the F-14 and its popularity makes it well known. So I will not go into a detailed history of this aircraft. First flight of the F-14A was on December 21st, 1970. It was in the fleet by October 1972 and first cruise in September of 1974. F-14As carried the distinctive Pratt & Whitney TF-30 which was a troublesome engine so the F-14B (aka F-14A PLUS) was designed in 1973 with an improved P&W engine. It was not successful but in July of 1984 the F-14B was reincarnated with a General Electric F110-GE-400 series engine. Production F-14Bs began in March of 1987. Fabrication of the F-14D ran about two years starting in March of 1990. A number of earlier F-14s were also upgraded to a D standard during this time period. But all this work came to an early end when the F/A-18E/F development program began. | ||||||
| THE KITS | ||||||
|
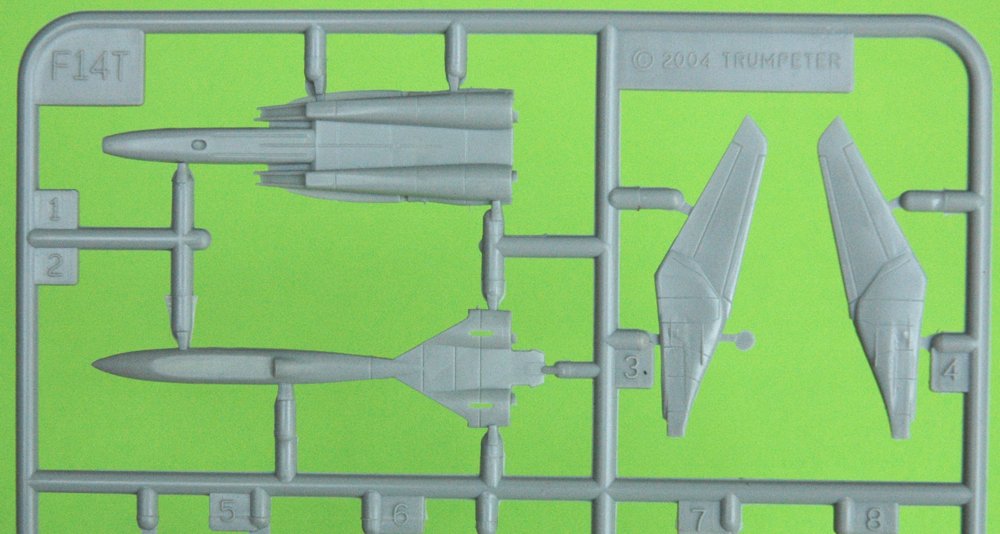
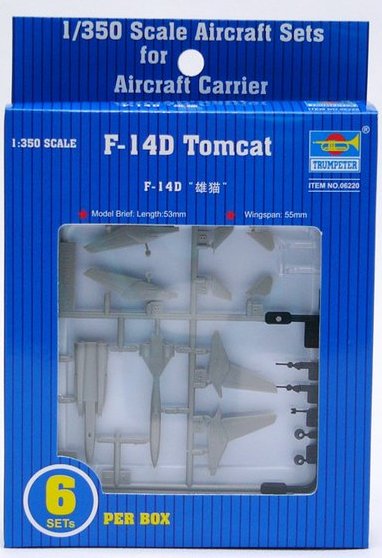
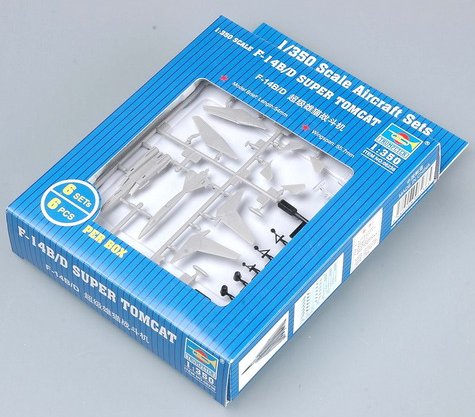
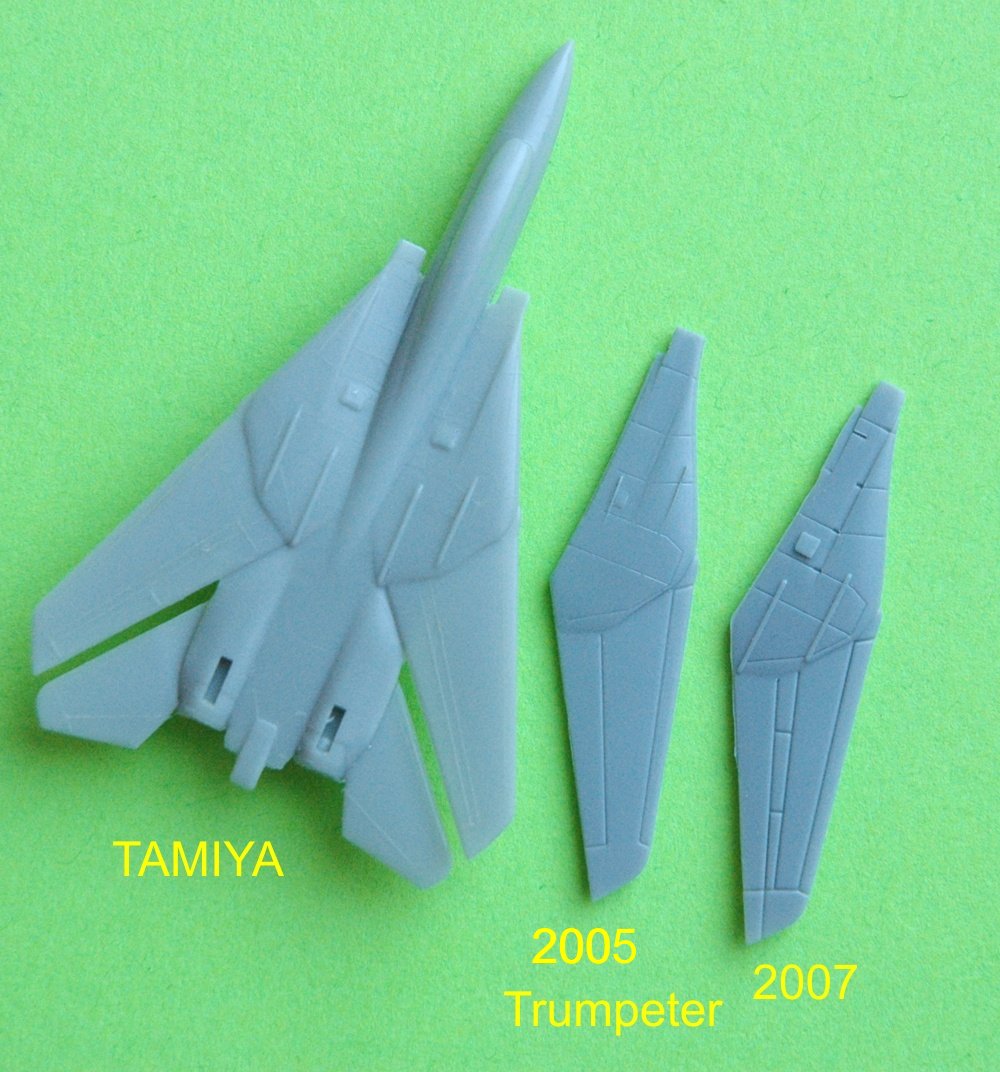
Trumpeter has released three different kits of the F-14 "Tomcat" in 1/350 scale. The first was a mere toy issued long before the announcement of any carrier to put the kit on and contained only one aircraft. This first release is hard to find and not useful for the ship builder so wont be reviewed here. Instead we will focus on the later two Trumpeter releases but we will also look at the Tamiya kit for comparison. When Trumpeter released its 1/350 USS Nimitz it was also released a number of independent kits of aircraft to help load the decks. Although the F-14 is not needed to build the Trumpeter USS Nimitz as built out of the box for its first cruise, it is still very welcome to build any later Nimitz class carriers. The first kit that came out was a six-pack of F-14s and arrived on the shelves in January of 2005 (copyright in 2004). The second release, also a six-pack, came out in August of 2007. A quick comparison makes the newest version look like a very simple modification of the earlier release. But there is actually a lot of difference. Some good news comes in the form of drop tanks provided in the more recent 2007 release. A closer look shows many corrections, including the errors in the strakes. Early version strakes were correct for the wings swept forward option but were incorrectly placed, and in my copy looked mutated, for wings swept back option. Also the 2007 edition fills the gap under the wing better. Panel lines in the newest version are more crisp and numerous. |
to enlarge |
|||||
 |
||||||
| REVIEW | ||||||
|
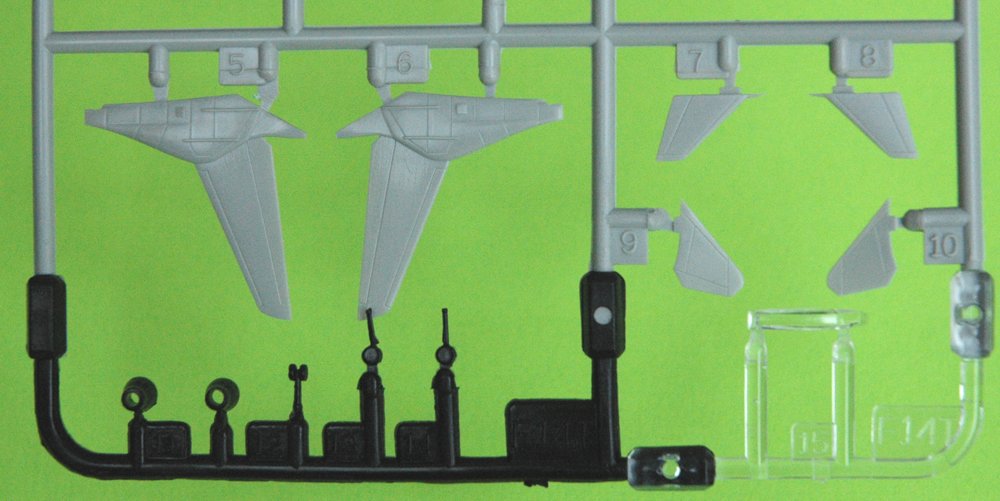
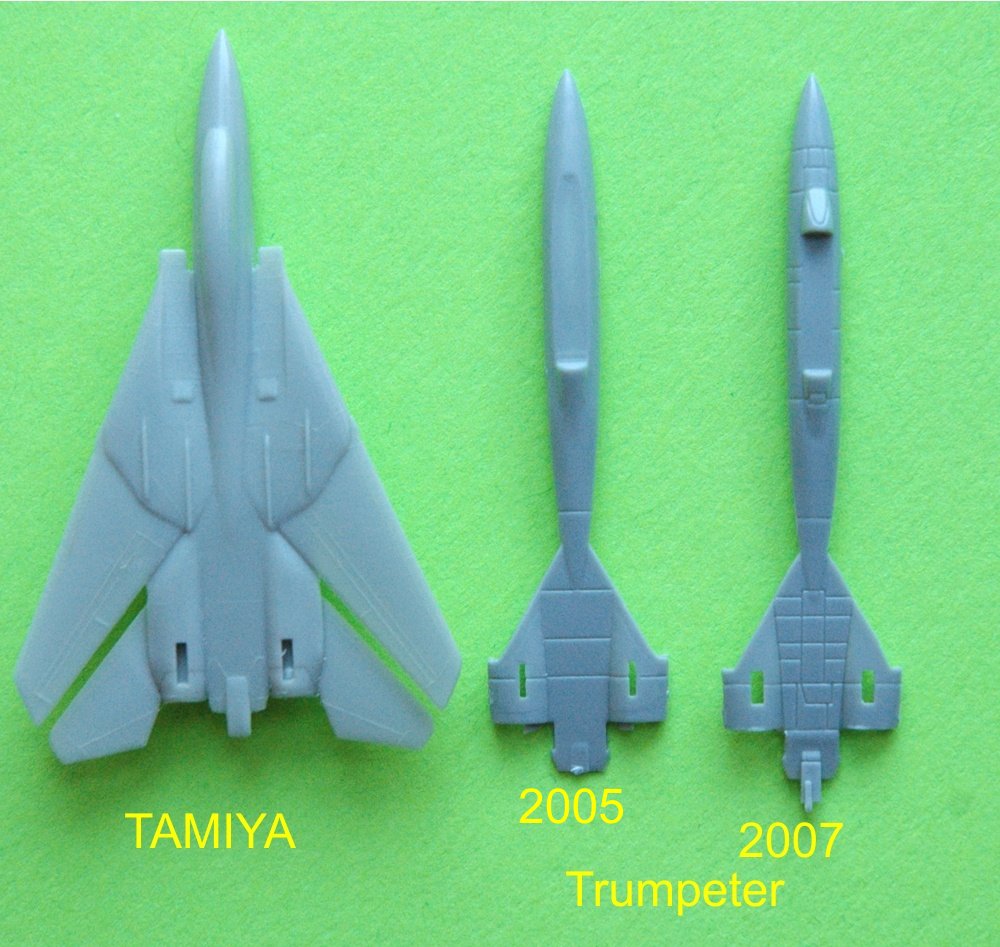
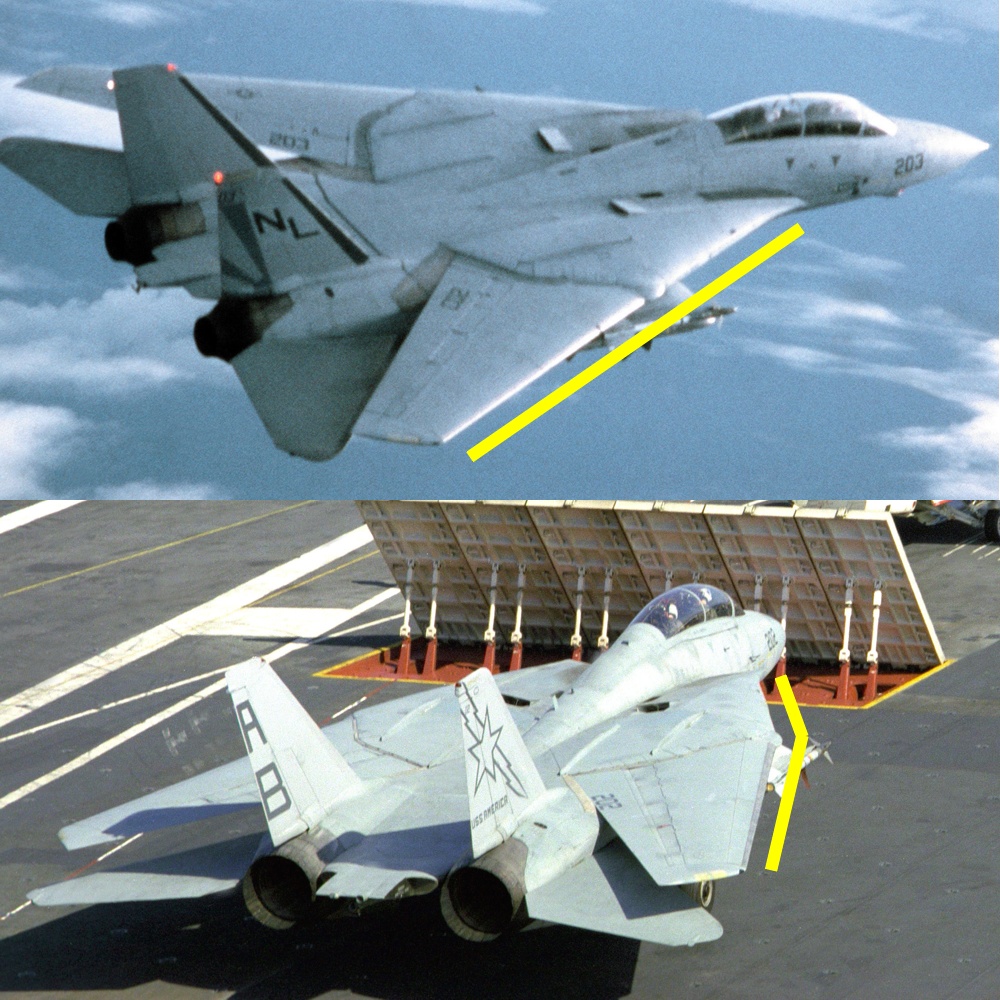
Both kits come in gray, black and clear parts. The plastic is typical good quality of Trumpeter. Both kits have wings swept or forward options. To look at the kit as is in the box, my impressions were that it looked messy. By this I mean that there basically four pieces that make up the fuselage, upper, lower fuselage and extensions from the wings. To me it looked like it would be a lot of work to assemble and especially clean up. But as I build them I have found their choice of design rather appropriate and has worked here quite effectively. When cleaning the parts you want to be very careful as they are modeled so crisply that it is easy to remove too much and thus giving a worse fit. The wing parts themselves are as mentioned part of the fuselage and optional for wings swept or forward. One should be aware that the swept option is actually the "oversweep" position. Flying sweep is 68 degrees while the "oversweep" makes the width of the aircraft smaller and easier to store on the flight deck, that is a 75 degree angle. I've included an image that shows a side-by-side comparison. I personally like this "oversweep" position that Trumpeter provided, as it is proper when parked on the flight deck where most of these little aircraft models are destined. Therefore if you are building this kit for display by itself in a flying configuration, the wing sweep won't be quite correct. The Tamiya kit is molded in the flying 68 degree swept wing configuration. Tamiya did this because they molded it in one piece and in the over-sweep position puts the wing over top of the horizontal tail. Trumpeter's horizontal tail on the F-14 is nicely shaped and looks more accurate than the Tamiya equivalent. Unfortunately it extends too far past the wings when the "oversweep" option is chosen. Not sure if it is the wings being over swept too far or the horizontal tail is slightly too big. An easy fix is to just sand down the extra length on the horizontal tail. |
|
|||||
|
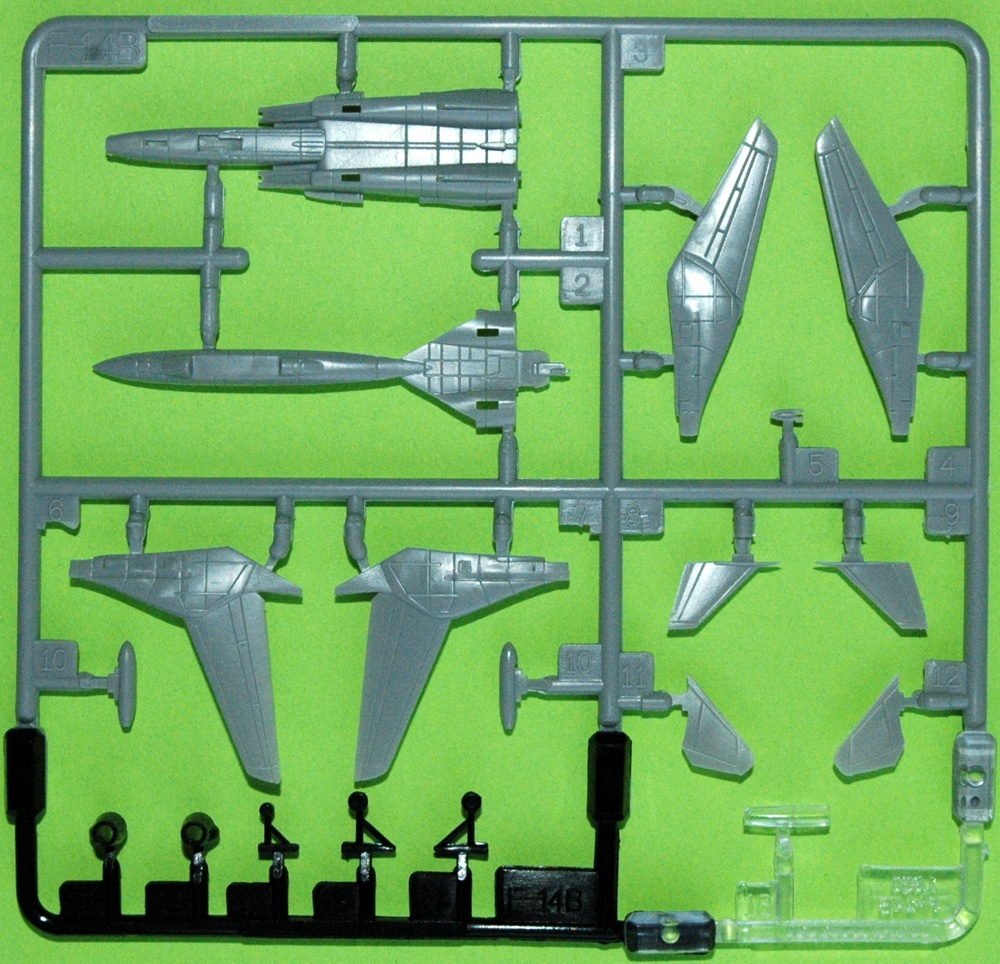
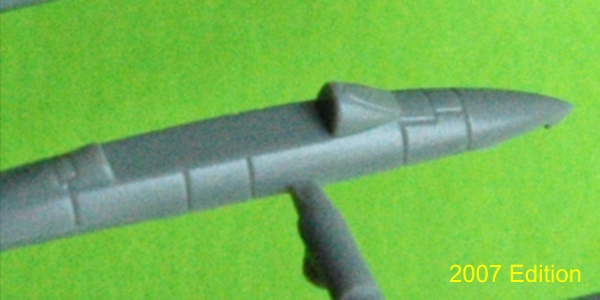
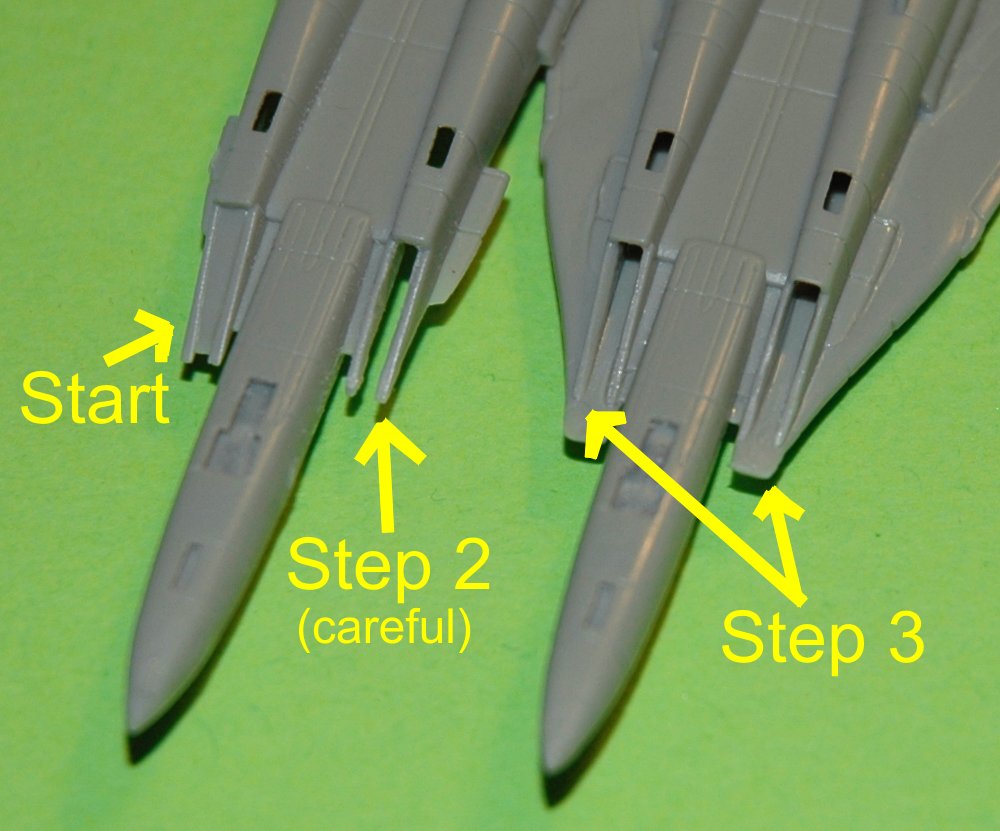
Canopies provided in each kit are molded in clear plastic. Fortunately this newest release was not completely done in clear plastic like some others have. Length of the canopy in the 2005 release is slightly too long. This was corrected in the 2007 release however the windscreen was molded into the fuselage so is solid gray. This is a mixed blessing as it makes it easier to mount the canopy in the raised position but lacks continuity in the canopies look. It is my opinion this is the weakest part of the 2007 release. A close up photo of this windscreen is included in the review. One other advantage that the Trumpeter F-14 has over the Tamiya is the upper and lower fuselage halves allow for led weight to be added to keep the nose down. I had no problem getting enough weight in the nose to keep it down. However, if you have an open cockpit, it could change things as it limits the amount of space in the nose, but still think it possible to add enough weight. Intakes on both kits are slightly hollowed but an experienced modeler will want to do more for a better-looking aircraft and cut out deeper intakes. This will be really easy as the right sized/thickness razor saw can cut down the middle of the intake clearing out the plastic as the upper wall of the intake is not in place till the wing is attached. I would recommend building in this order; Mount the upper and lower fuselage together and clean up any seams. Then use your razor saw to hollow out your air intakes so that once they are cleaned up the wings are ready to mount. Be careful not to break off the intake walls like I did once thinning them out. Recommend thinning out the remainder of the intake after gluing the wings in place. I have included a photo that shows the steps I've just described. |
|
|||||
|
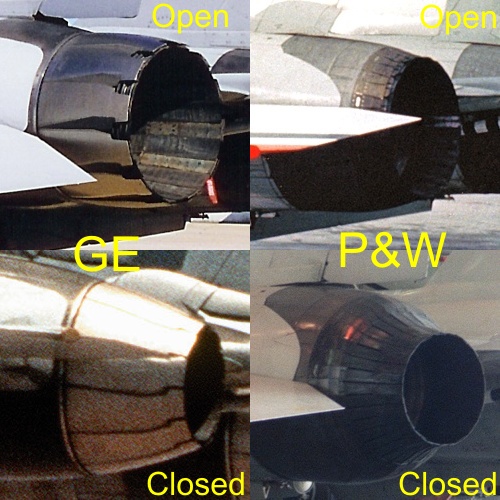
Landing gear is slightly more accurate in the 2007 release as there are now cross struts. Most builders will want to use photo etch but the kit will build up nicely even with the landing gear provided. Exhaust nozzles on the F-14 in this scale has been a point of contention. Some state that it is too small to tell the difference between GE and P&W engines in this scale. I disagree with this statement. GE engines are long wide turkey feathers and when wide open make the engines slightly longer. P&W F-14 engine turkey feathers are thin and numerous and the length of the exhaust greatly shrinks when the engine is wide open. When I first saw the 2005 release I thought the engines looked like P&W but now not so sure and have concluded they look like neither. The 2007 release isnt perfect but a great improvement. Tamiya nozzles are certainly most correct for the P&W and are depicted in the closed position. |
|
|||||
|
A strange difference between the two Trumpeter releases is in the belly between the engines. Down the length of the fuselage on the centerline it should be flat. Yet in the second Trumpeter release, this is not flat, there is a drop in this flat section at the intake. Ultimately this wont be much of a concern as it wont be very visible when the aircraft is on the deck of the carrier, but is still an oddity. The platypus tail has some added detail in the 2007 version only but much of this is a bit oversized. Chin pod is included in the 2007 release is a very nice feature. This allows you to build a more accurate F-14D but should not be included in other versions of the F-14. The F-14A/B has a variety of types of pods or blisters under the nose. For good examples of the various chin pods go to this terrific F-14 web page. | ||||||
|
||||||
| DECALS | ||||||
|
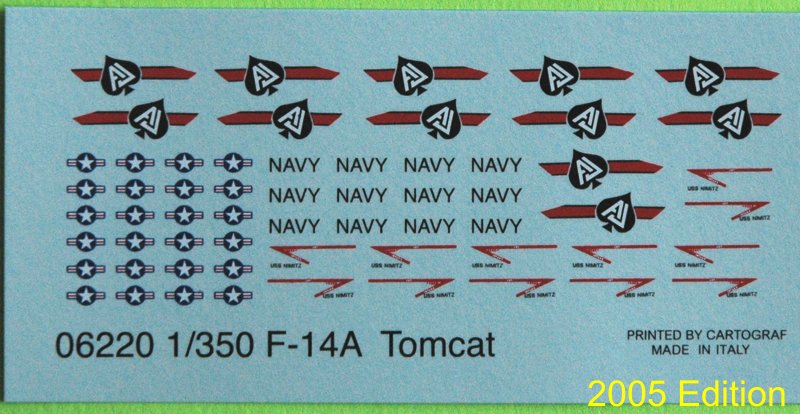
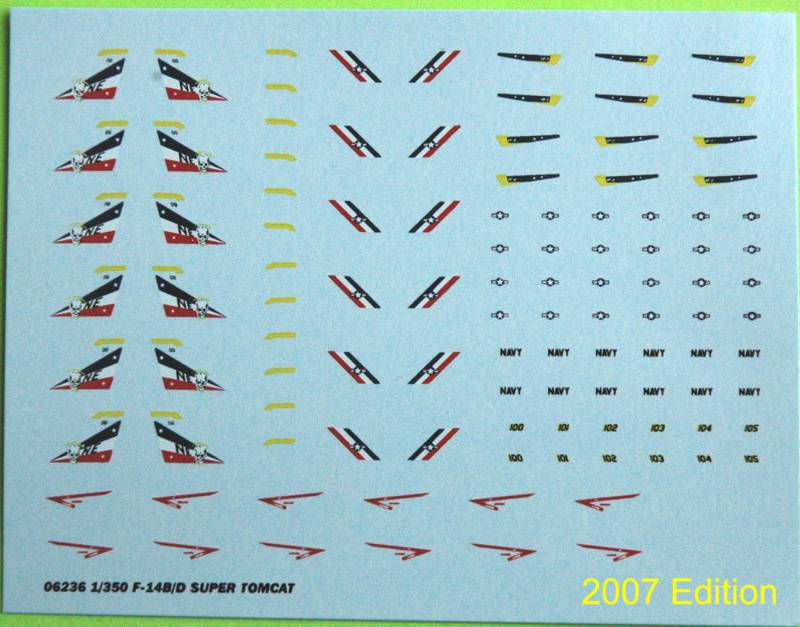
The set labeled "F-14D Tomcat" actually has a decal set that is labeled "F-14A Tomcat." Further proof to me that this kit is a bit of a Frankenstein Tomcat. Otherwise the decal sets from both kits are better than most of their other 1/350 scale aircraft. |
|
|||||
| INSTRUCTIONS | ||||||
|
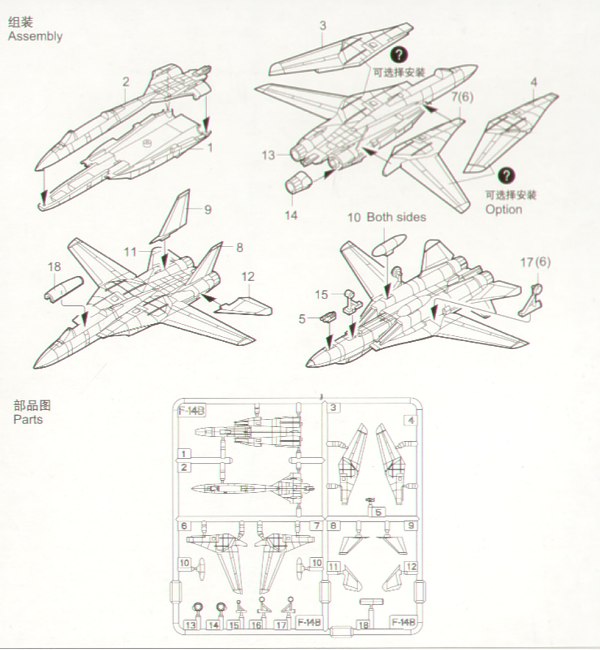
Just like all Trumpeter 1/350 aircraft kits, the instructions are on the back of the box. | 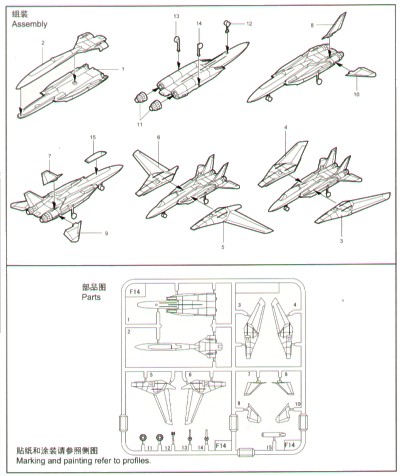
|
|||||
| CONCLUSIONS | ||||||
|
The 2007 release, F-14B/D Super Tomcat, is the better of the two releases. It is an improvement on the older release and comes with external fuel tanks. Although not perfect I believe it to be the best option. I had already purchased the earlier 2005 version but will not be using except in the hanger deck. Fit on both kits is excellent. If you want/have to build the A model Tomcat on your flight deck or building a flying display with these little aircraft, the Tamiya aircraft maybe the best option. The Tamiya would be the easiest to build but for overall best results I would have to go with Trumpeters 2007 release. When the real Tomcat is parked on the flight deck its wings are in the "oversweep" position and both Trumpeter examples represent this nicely. Aftermarket photo etch would make these aircraft look better but one can still build an outstanding kit right out of the box. Decals are provided but would highly recommend making your own or buying after market. These 1/350 kits have been popular even for people building as is, minus an aircraft carrier. |
||||||