3D-WILD
1/350 3-D Printed IJN Early War aircraft sets
(A6M2 Zero, D3A1 Val, B5N2 Kate)
(NOTE: This is a combined review of three different subject
sets that are each sold separately.)
(NOTE: This is a combined review of three different subject
sets that are each sold separately.)
|
Reviewed April 2022 by Dan Kaplan |
|||||||||||||||||||||
|
3D-Wild is a new company producing accessories and kits for
modelers. According to their website, they specialize in “producing high-quality
miniatures, dioramas, model kits, and other products for wargamers, modelers and
fans of miniatures all over the world. As of today, most of our products are
being produced by the most advanced 3D-printers in the 3D-printing industry.”
This includes sets of 1/350 aircraft. The three types of aircraft covered in this review comprised the air groups of all of the Imperial Japanese Navy’s front-line aircraft carriers in the 1941-late 1942 timeframe. Until now, only three model manufacturers (Hasegawa, Fujimi, and Pit-Road) have offered A6M2 Type 0 “Zero”, D3A1 Type 99 “Val”, and B5N2 Type 97 “Kate” aircraft in 1/350 scale, and all of these are styrene injection versions. Hasegawa and Fujimi’s versions require full assembly and painting, while Pit-Road offered finished and painted aircraft that just required decals for their markings. There are certain tradeoffs between those choices. Typically, the injection versions from Fujimi and Hasegawa are pretty good on shape, scale and details. However, the assembly and finishing of multiple part aircraft can be time-consuming, particularly when there are noticeable seams to fill and sprue runner attachment points to file down. Plus, wing and control surface cross-sections can be on the thick side (i.e., over scale). Not to mention that injection aircraft universally come with solid canopies with molded frames; any attempt at greater realism requires their removal and replacement with pricey photo-etch versions. Aircraft markings have been limited to some of the aircraft aboard the carriers Akagi, Hiryu, and Shokaku; these vary by the set. Conversely, Pit-road’s pre-assembled aircraft eliminate most assembly and finishing problems, but are more expensive on a per unit basis. For the most part, these same pieces offer only black painted canopy glass, and, notably, the finish quality can vary between aircraft types. Plus, markings for pre-assembled aircraft have typically been limited to just a few aircraft from the carriers Akagi or Shokaku. Perhaps more importantly, these are now out-of-production. 3D-Wild has recently opted to enter this ring with 3D resin printed aircraft. Their line-up includes both early war and late war IJN aircraft. (They also offer modern USN aircraft.) They provide a largely complete, though unpainted, aircraft with a printed canopy frame as part of the fuselage, along with an open cockpit. This means there is far less assembly, seam filling, and handling. Beyond those attributes, 3D-Wild offers two other features that help differentiate its aircraft from the injection molded crowd. One is configuration. Whereas all the other companies offer only flight-ready, takeoff configurations with loadouts that have to be altered to depict a stowed configuration, 3D-Wild offers the modeler different configuration options. Each type of aircraft differs in the number of configurations available. One has to check 3D-Wild’s website for the specific aircraft type, but generally speaking, it comes down to: a) flight ready with extended wingtips; b) stowed with folded wing tips; and c) which combines (a) or (b) with alternative weapon load-outs. While (c) is more applicable to the Vals and Kates, know that there is a late war fighter-bomber version of the A6M2 Zero. As the extreme example, the Kates have eight possible configurations. Also, please note that each set of six aircraft is sold as one configuration only; there are no mixed sets. The other key feature is the full extent of their decal options. 3D-Wild has done some extensive research and provided tail codes and striping options for an extraordinary number of historically correct aircraft. The decals for each type of aircraft are the same, regardless of the set configuration. |
|||||||||||||||||||||
|
|
|||||||||||||||||||||
| The 3-D WILD review sets | |||||||||||||||||||||
|
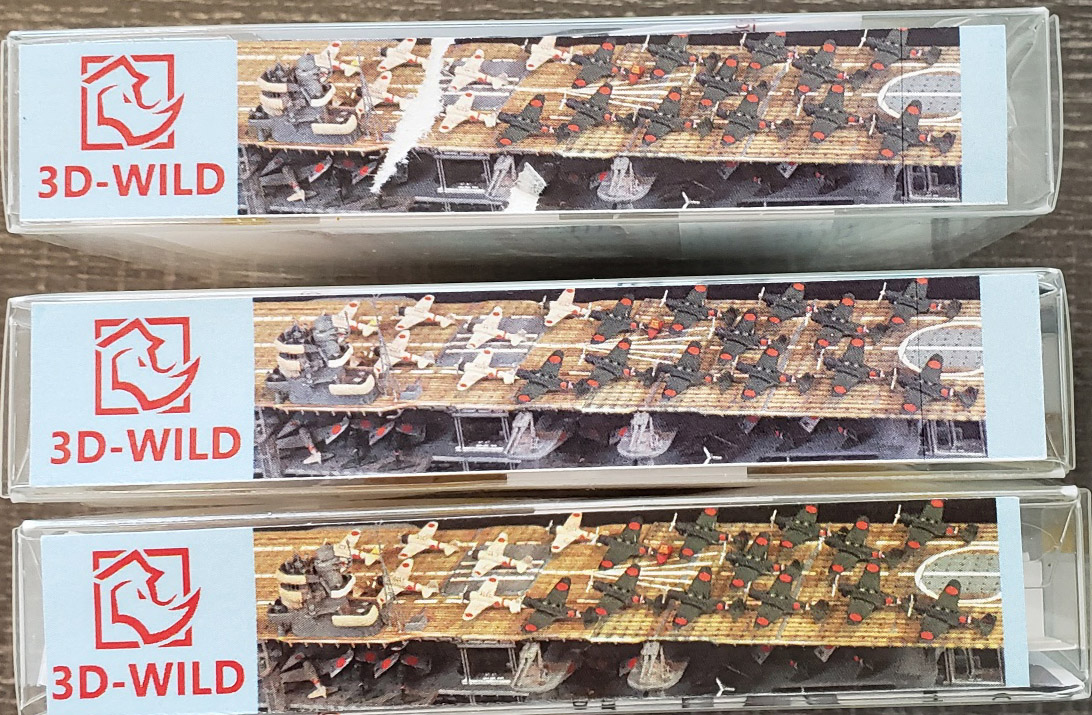
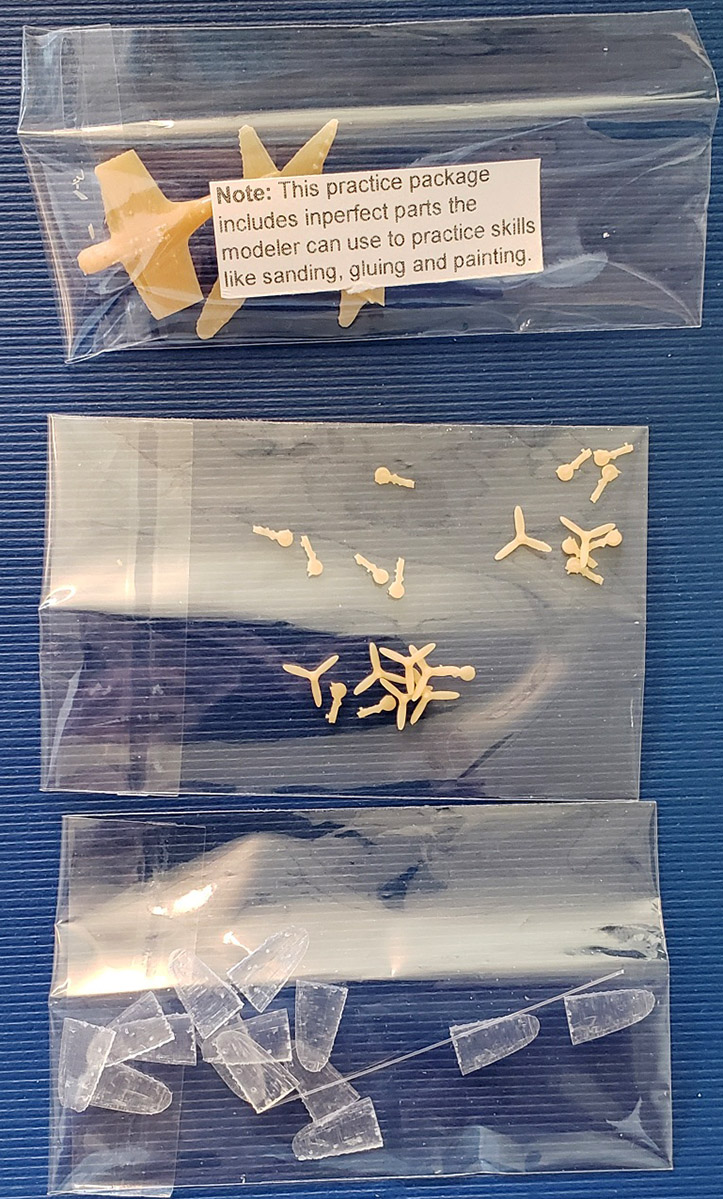
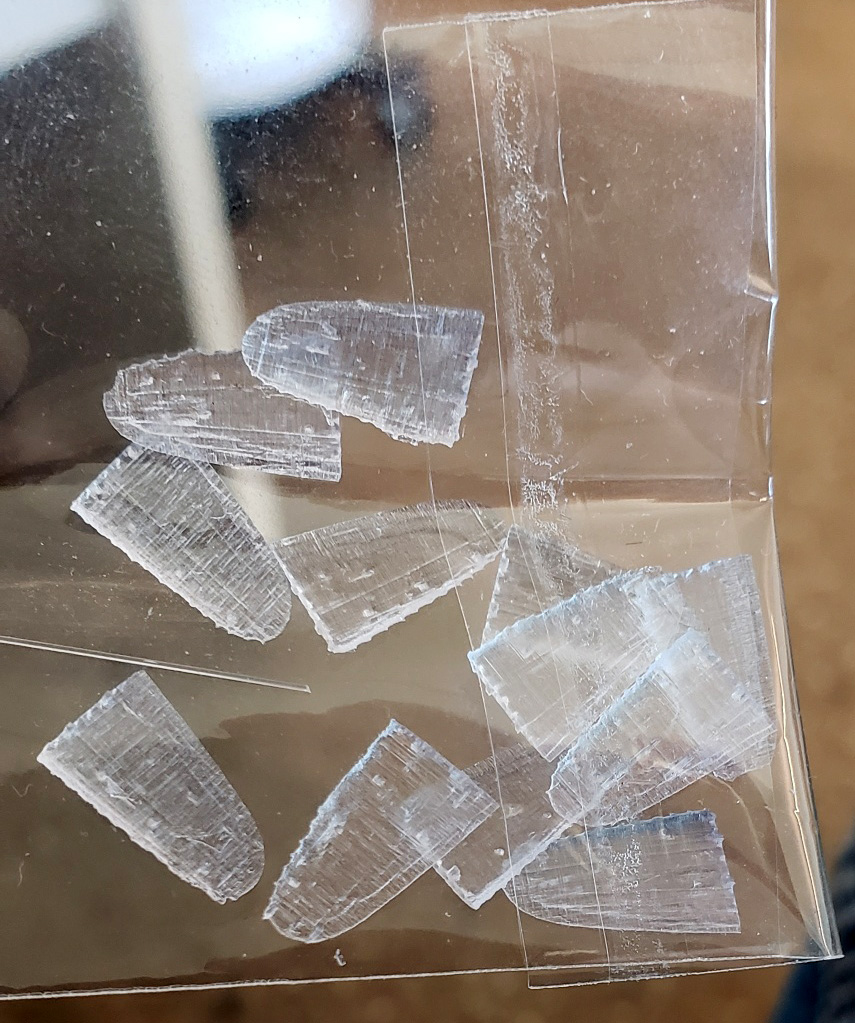
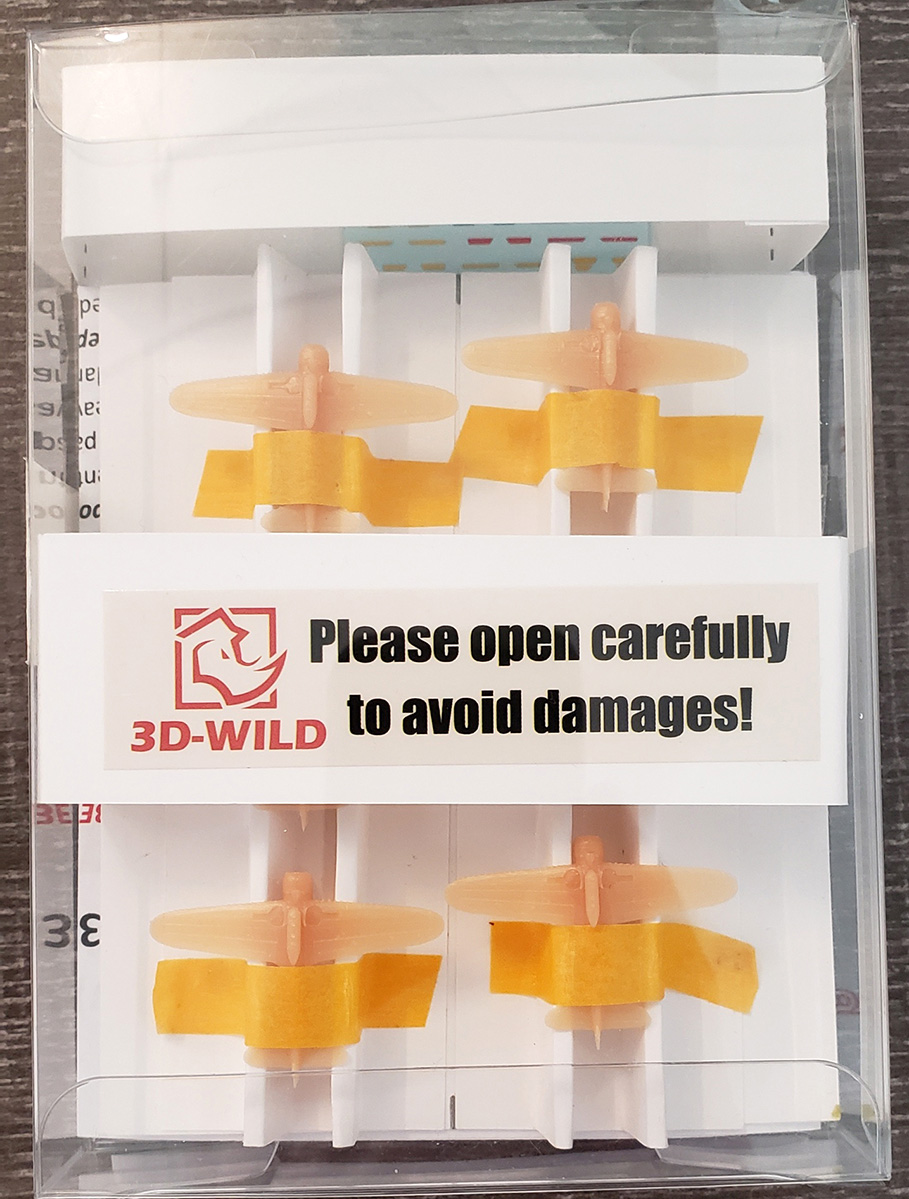
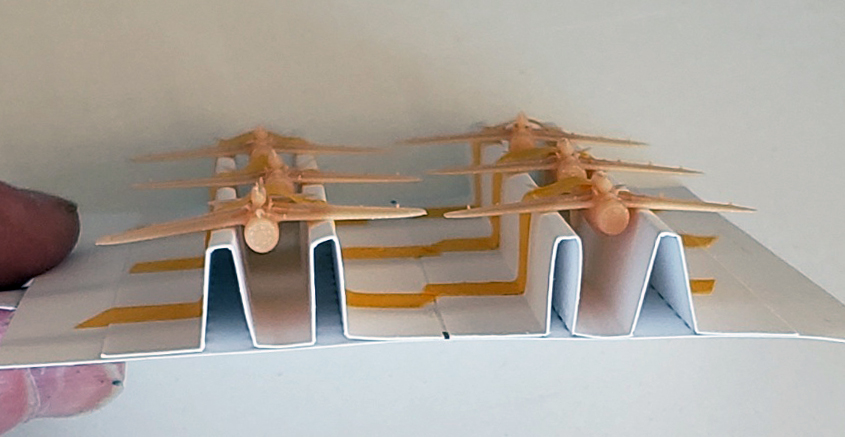
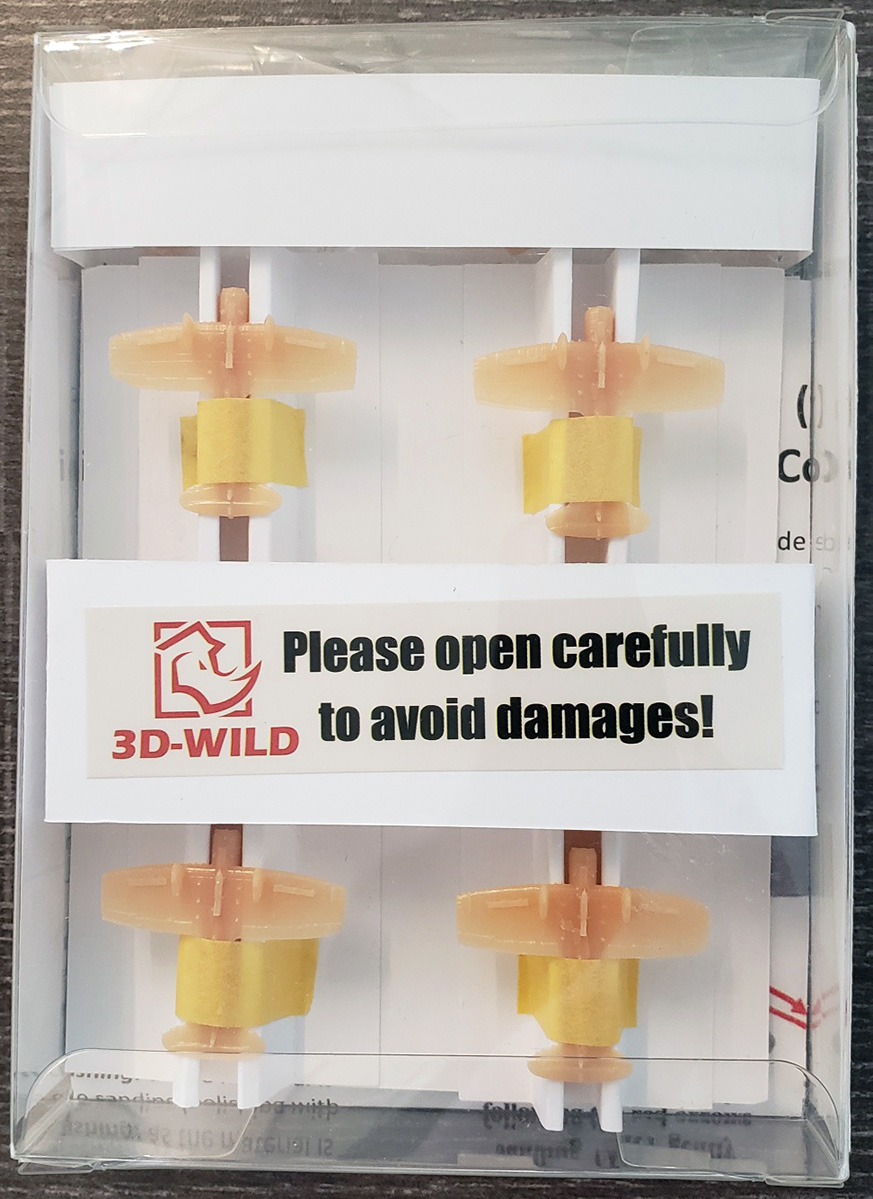
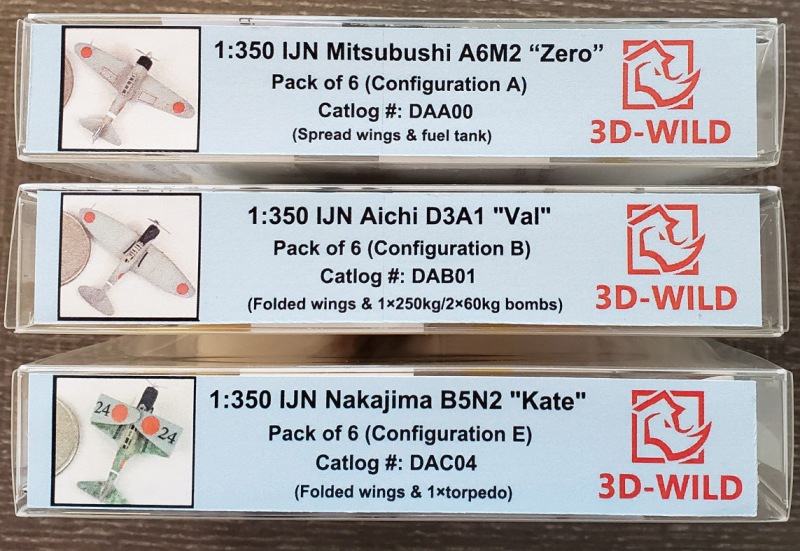
Each set comes in a clear, light vinyl box. Included are
six unpainted, but nearly complete, aircraft. Typically, the wing and
fuselage/vertical stabilizer/rudder are printed as one unit, along with
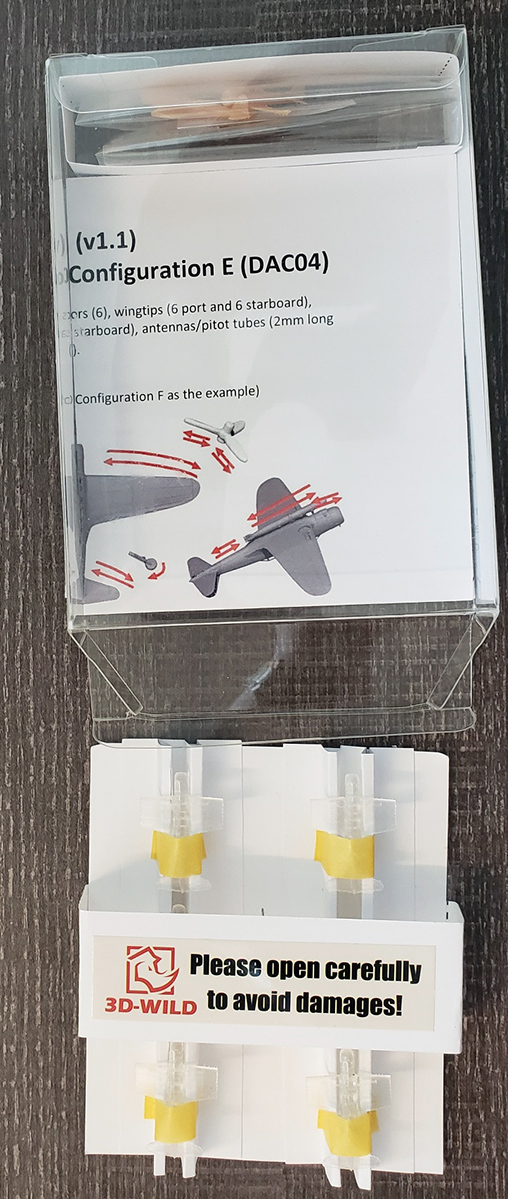
tailplanes, belly tank or weapon, and canopy frame. They are packaged upside
down in two rows of three aircraft each. Each row of aircraft is nestled, canopy
down, within a long U-shaped channel made of paper and glued to a thin
paperboard sheet. The backing board is attached to a central band that, together
with the backing board, positions the entire raft within the vinyl box. Each
aircraft is taped to the channel using medium tact, Tamiya -like tape. It’s very
smart packaging, meant to hold each aircraft securely while protecting the
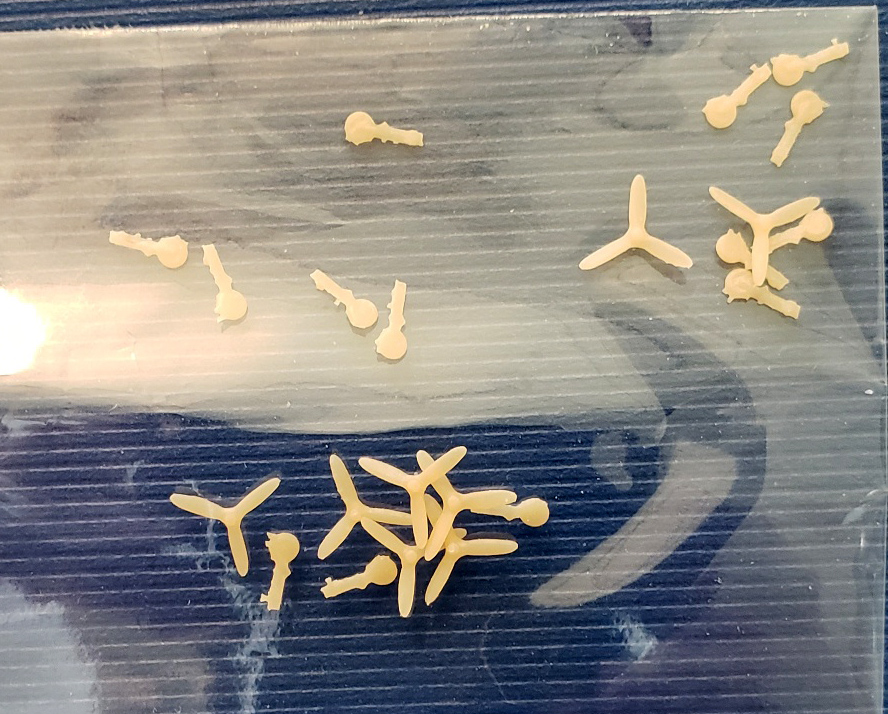
fragile canopy. A note in large lettering cautions one to open carefully to avoid damages. The need for great care extends to peeling the tape off the aircraft fuselage; I accidentally, and quite easily, broke off one Val and one Zero tailplane when peeling off the tape a little too quickly. Propellers, landing gear, and (if from a stowed configuration) wing tips are packaged together in a separate, clear vinyl sleeve, as are two sheets of decals. Also included are two randomly printed aircraft that are clearly imperfect cast-offs, and are meant to be used for practice. Practice here can be defined as sanding, gluing and/or painting. It’s a very smart, customer-focused addition. |
|||||||||||||||||||||
| Nakajima B5N2 “Kate” | |||||||||||||||||||||
|
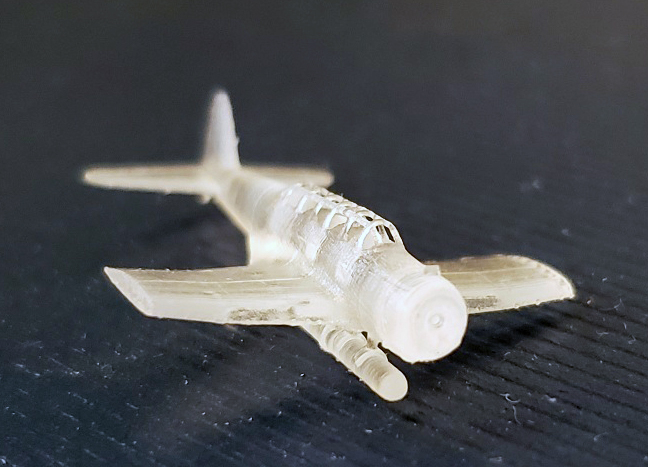
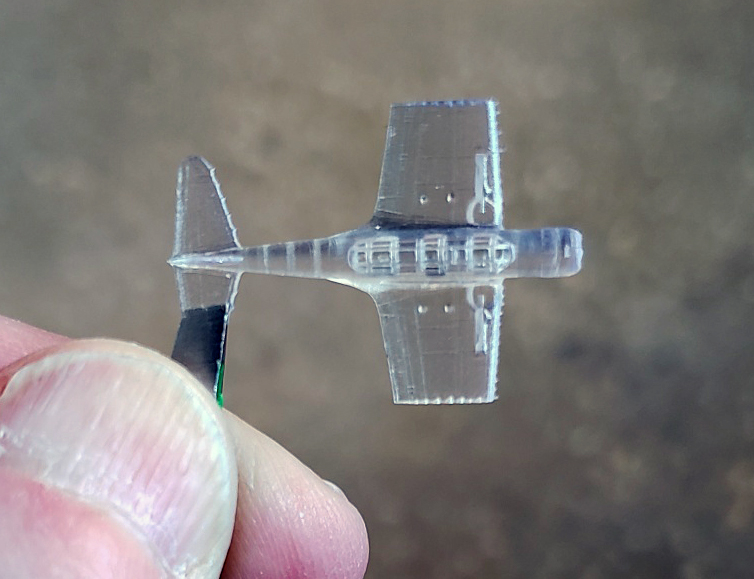
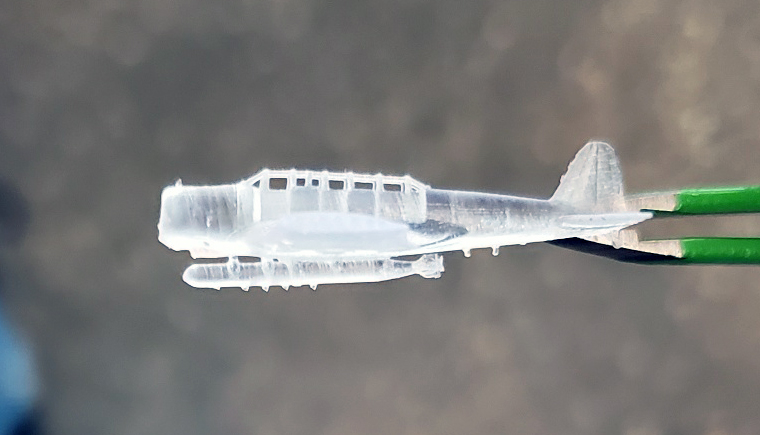
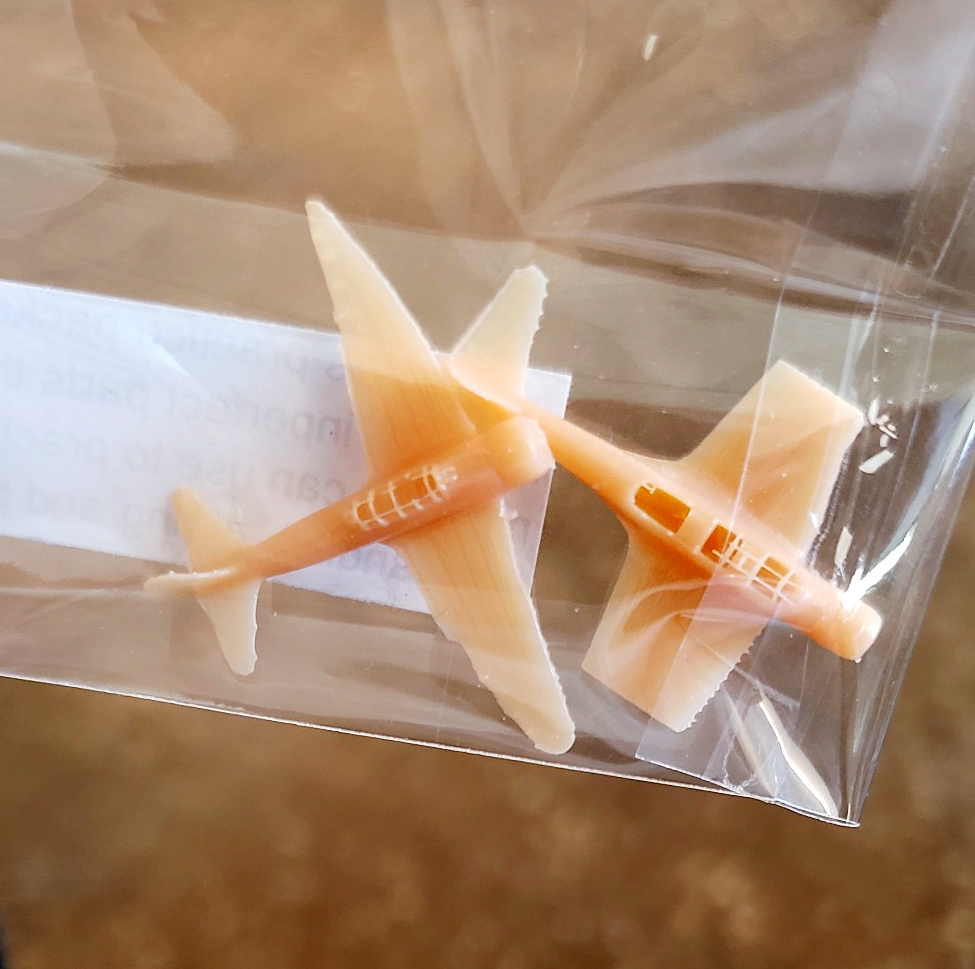
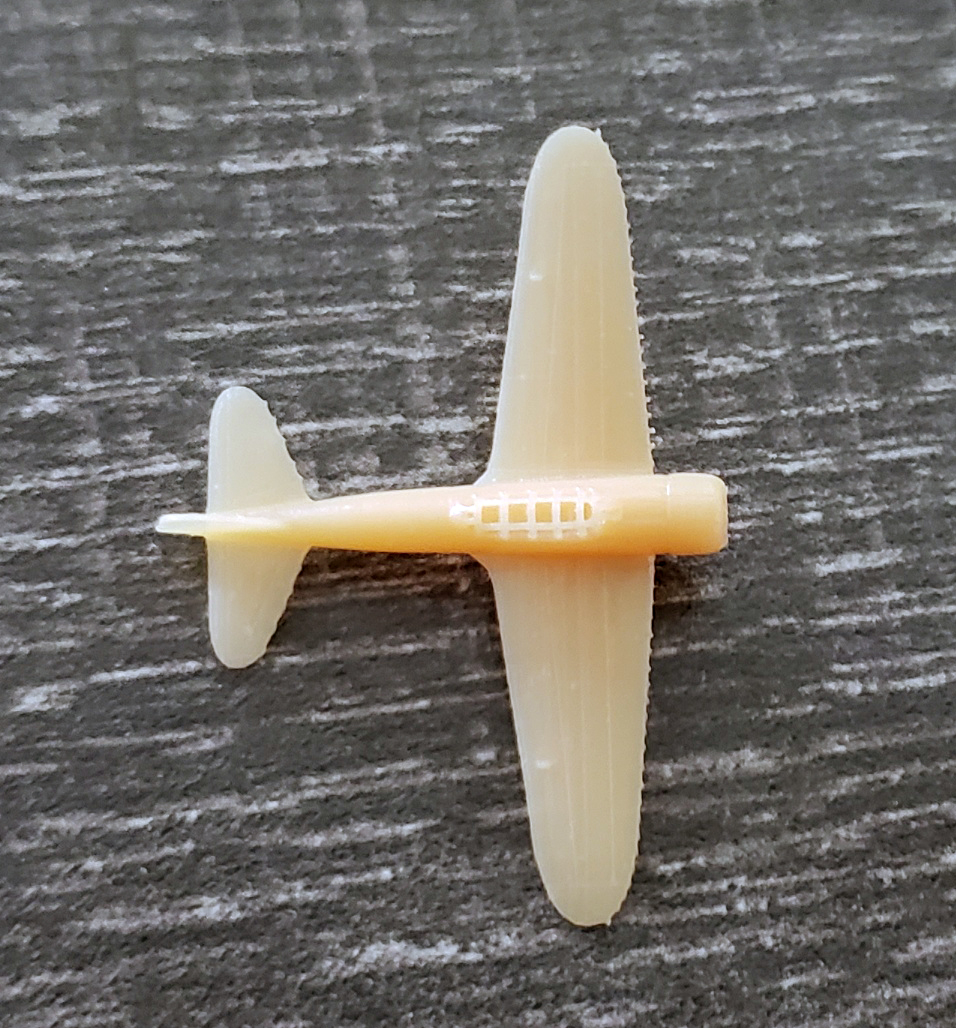
These were the first aircraft that I examined. My review
sample was configuration E, which is the stowed version with folded wingtips and
a mounted Type 91 aerial torpedo. These were molded in a translucent white
resin. (Note: Afterwards, I also received a few of the Kates in configuration F,
which is the flight ready, fully extended wing with torpedo. These were colored
in a yellow-orange tinged resin. My comments below on the Kates apply to both
configurations that I received.) |
|||||||||||||||||||||
|
|||||||||||||||||||||
| Mitsubishi A6M2 “Zeros” | |||||||||||||||||||||
|
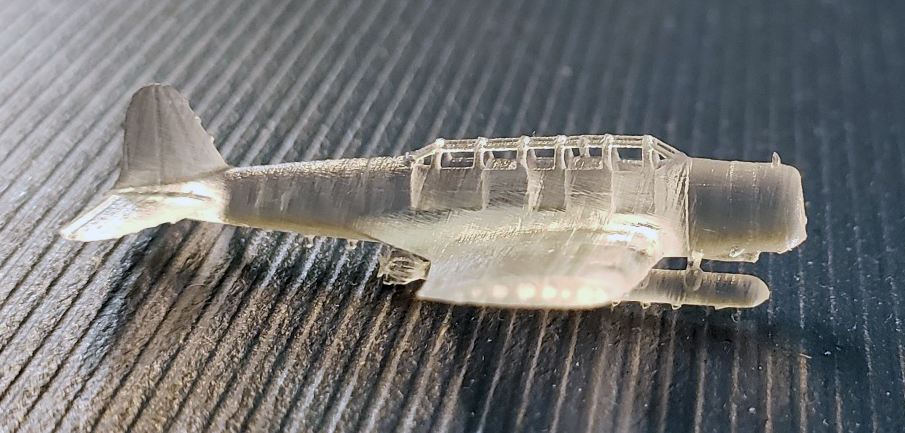
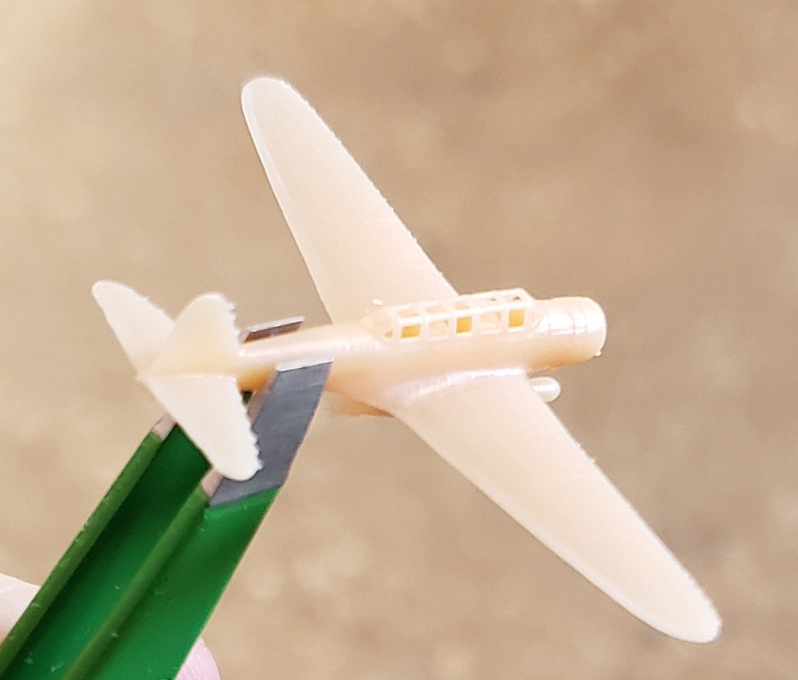
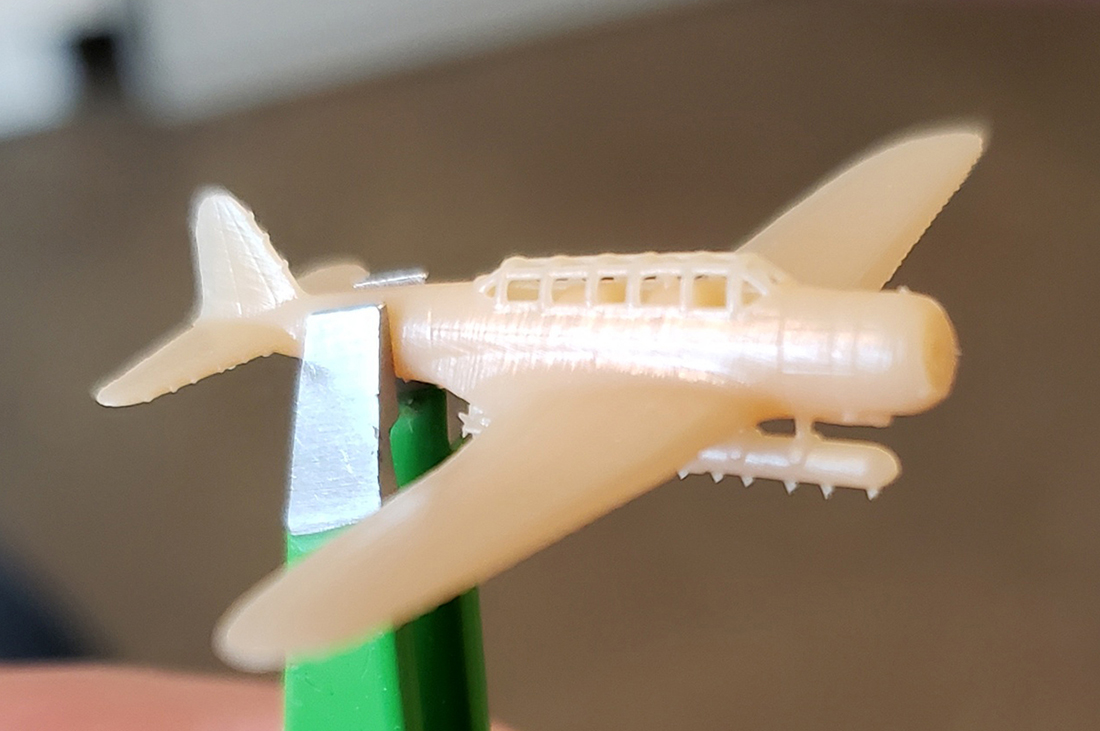
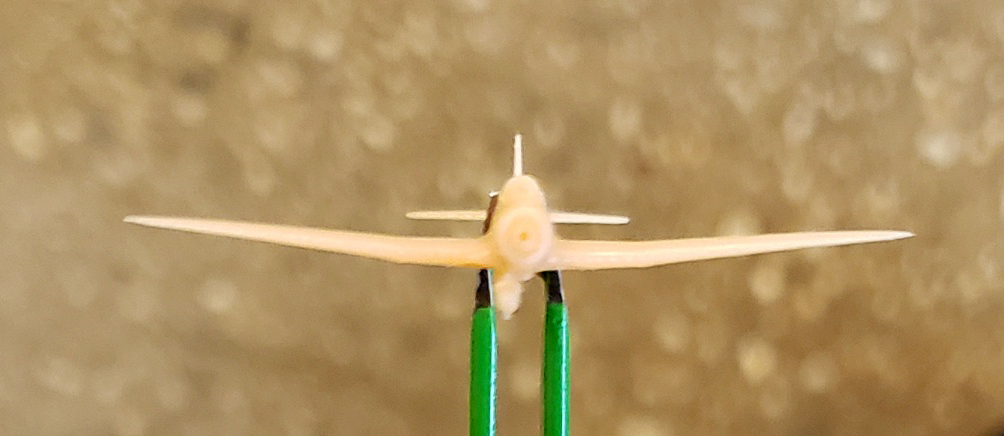
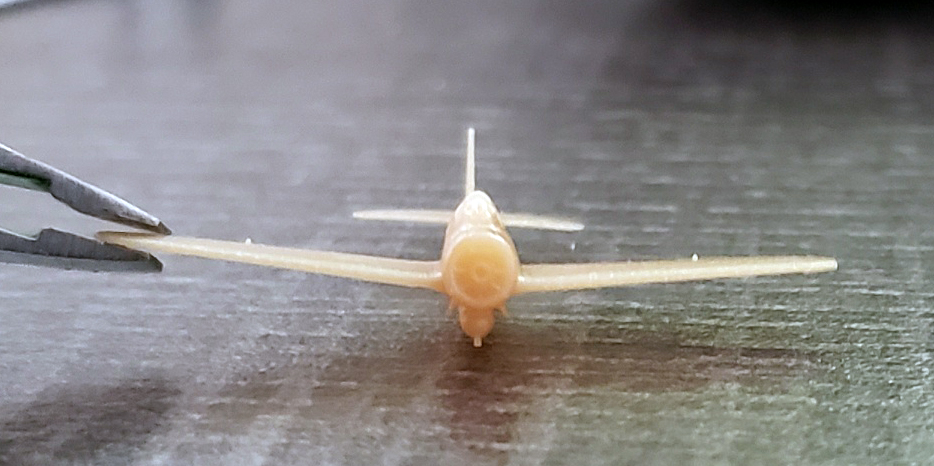
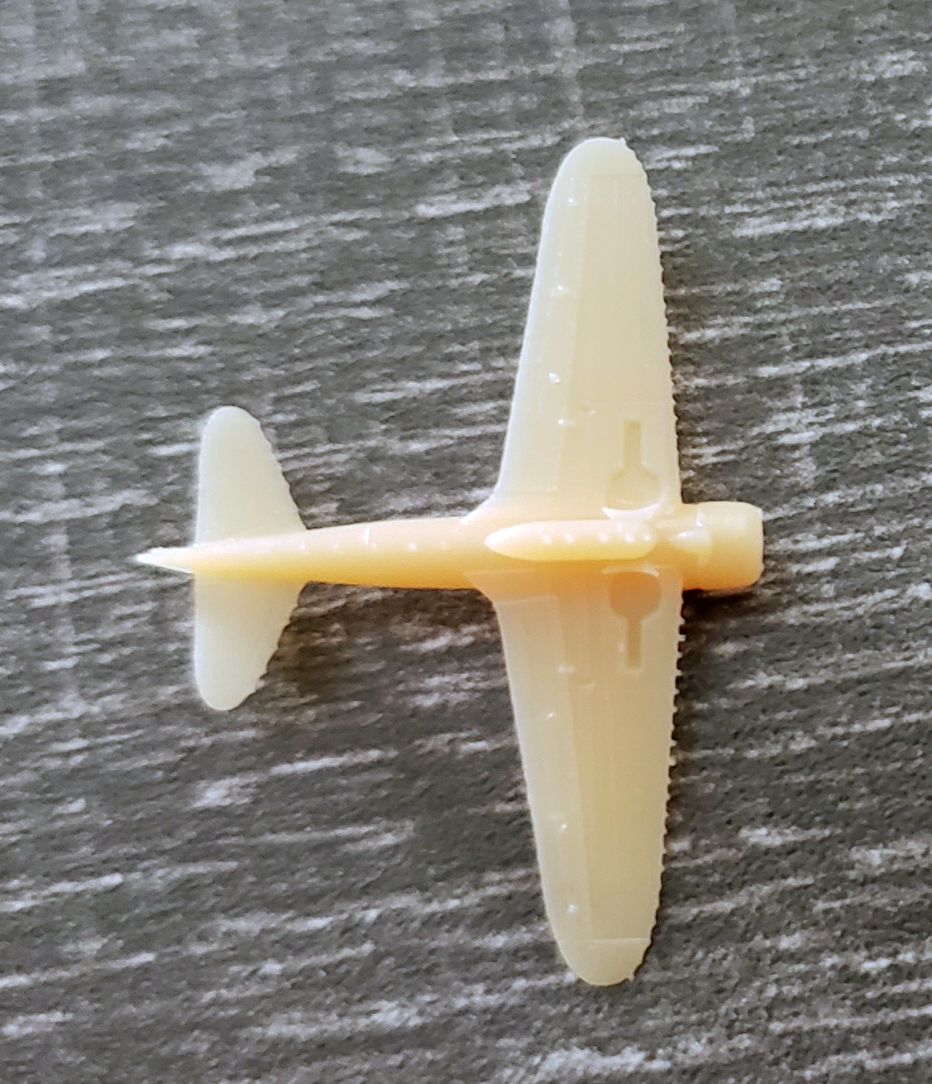
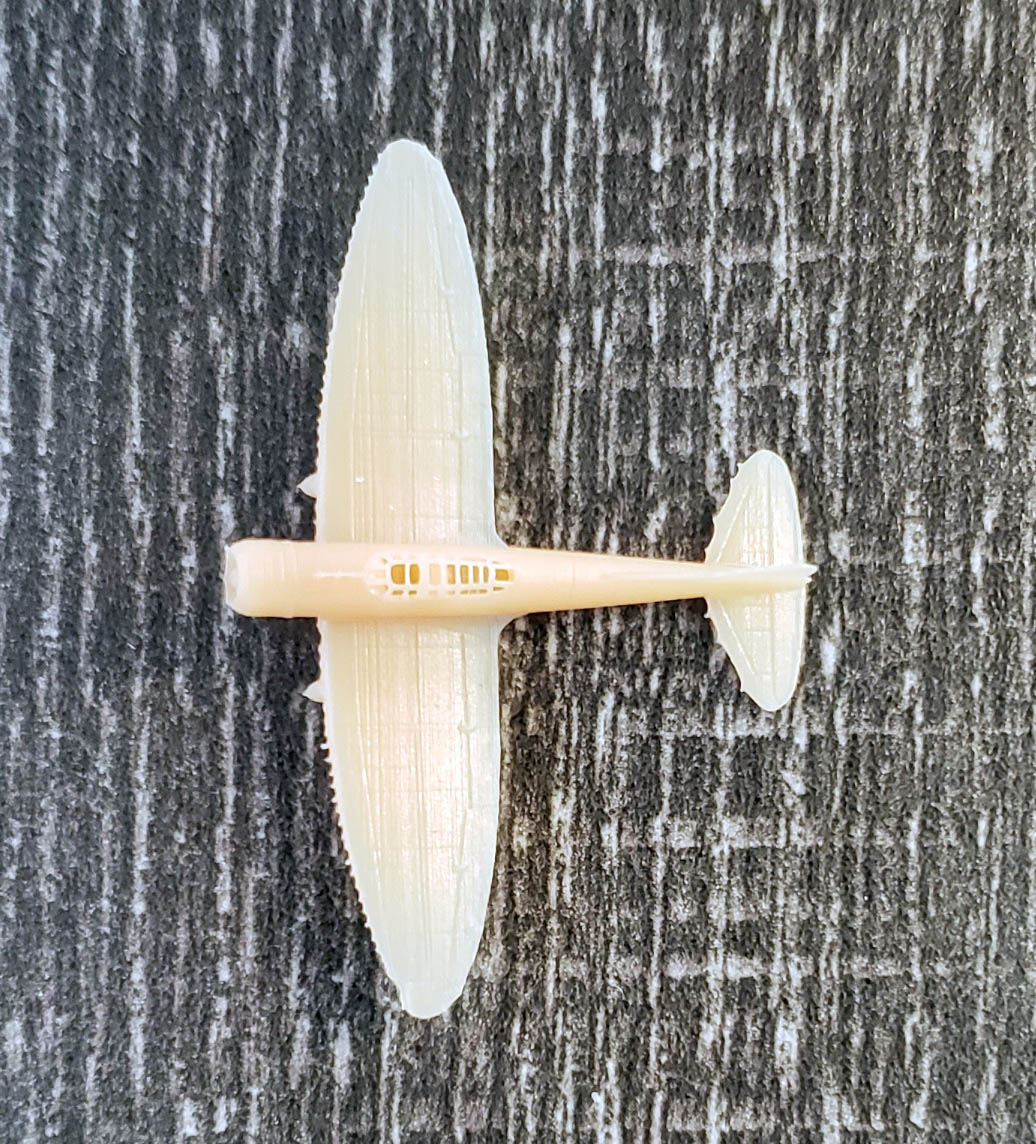
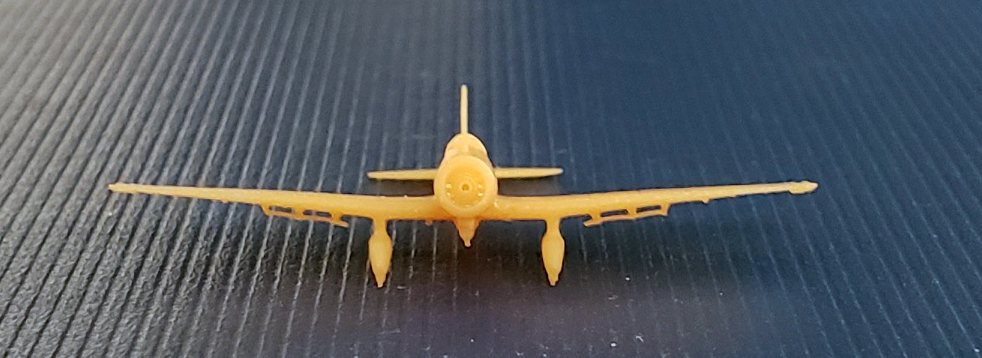
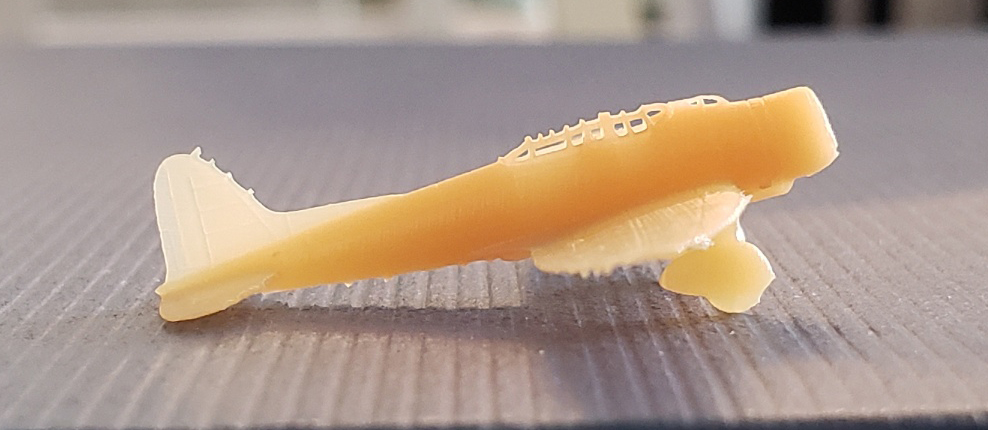
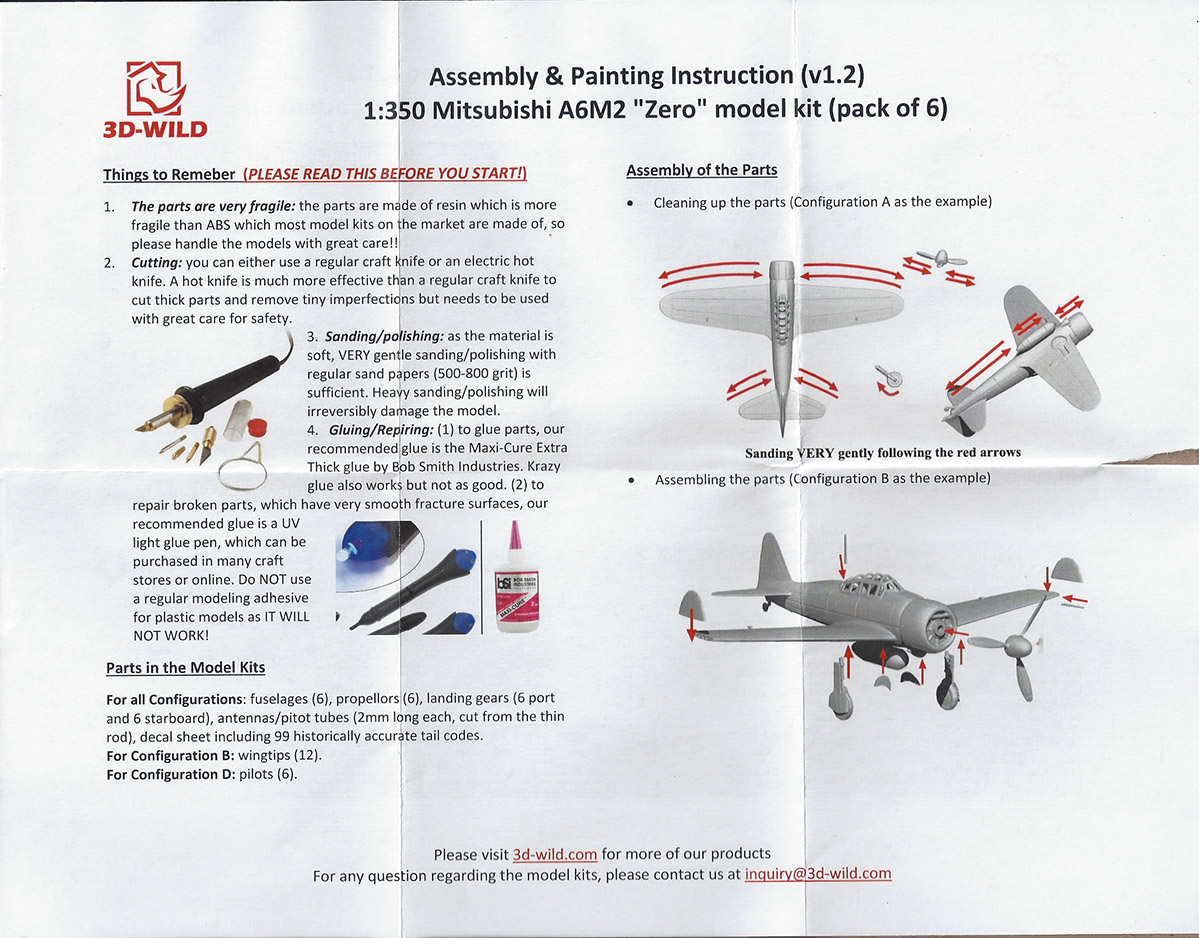
For the most part, my comments for the “Zeros” echo
those for the Kates regarding their very positive traits. My review set was
configuration A, which is flight ready with a centerline drop tank. Like the
full wing Kates and Kate parts, these were molded in that same light
yellow-orange tinged resin. |
|||||||||||||||||||||
|
|||||||||||||||||||||
| Aichi D3A1 “Vals” | |||||||||||||||||||||
|
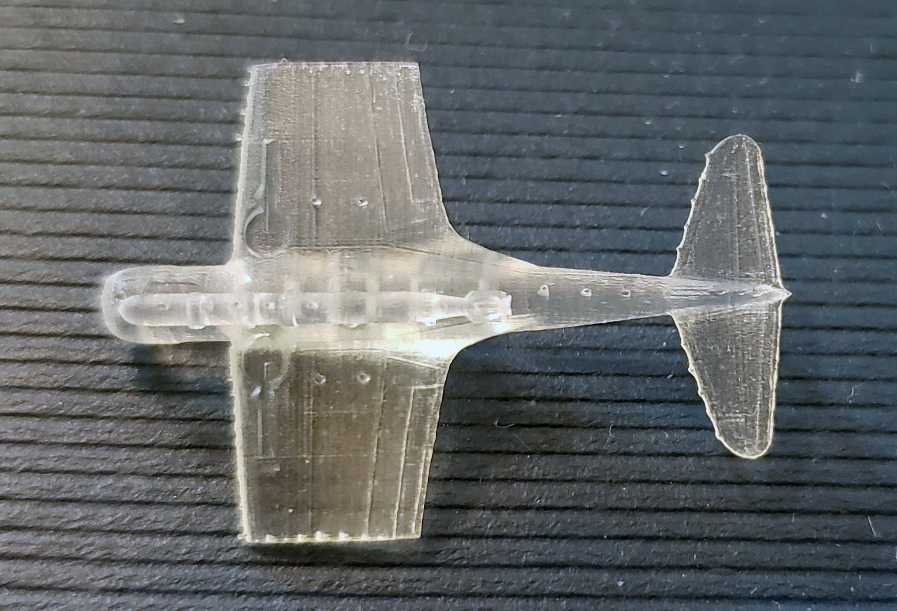
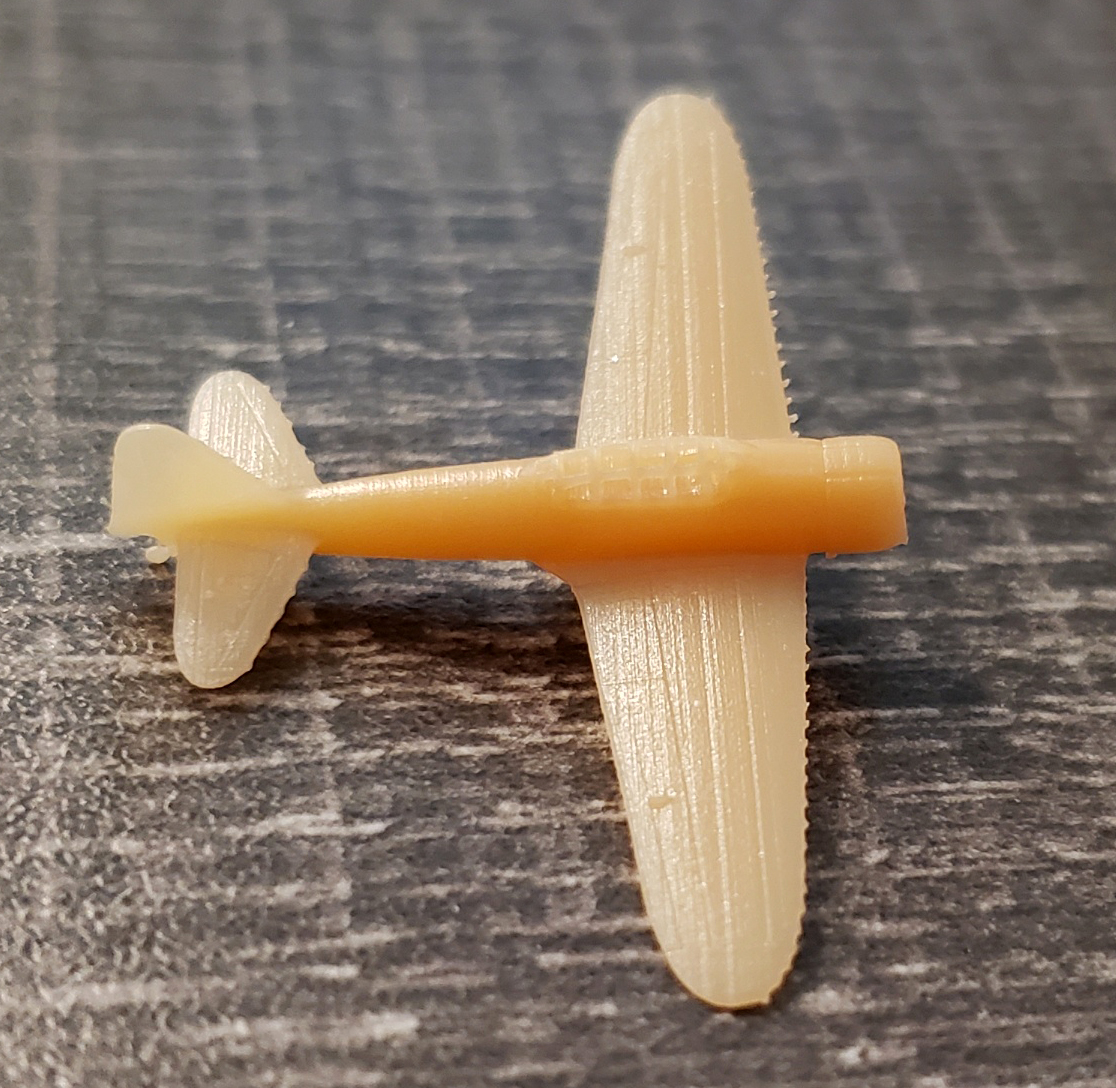
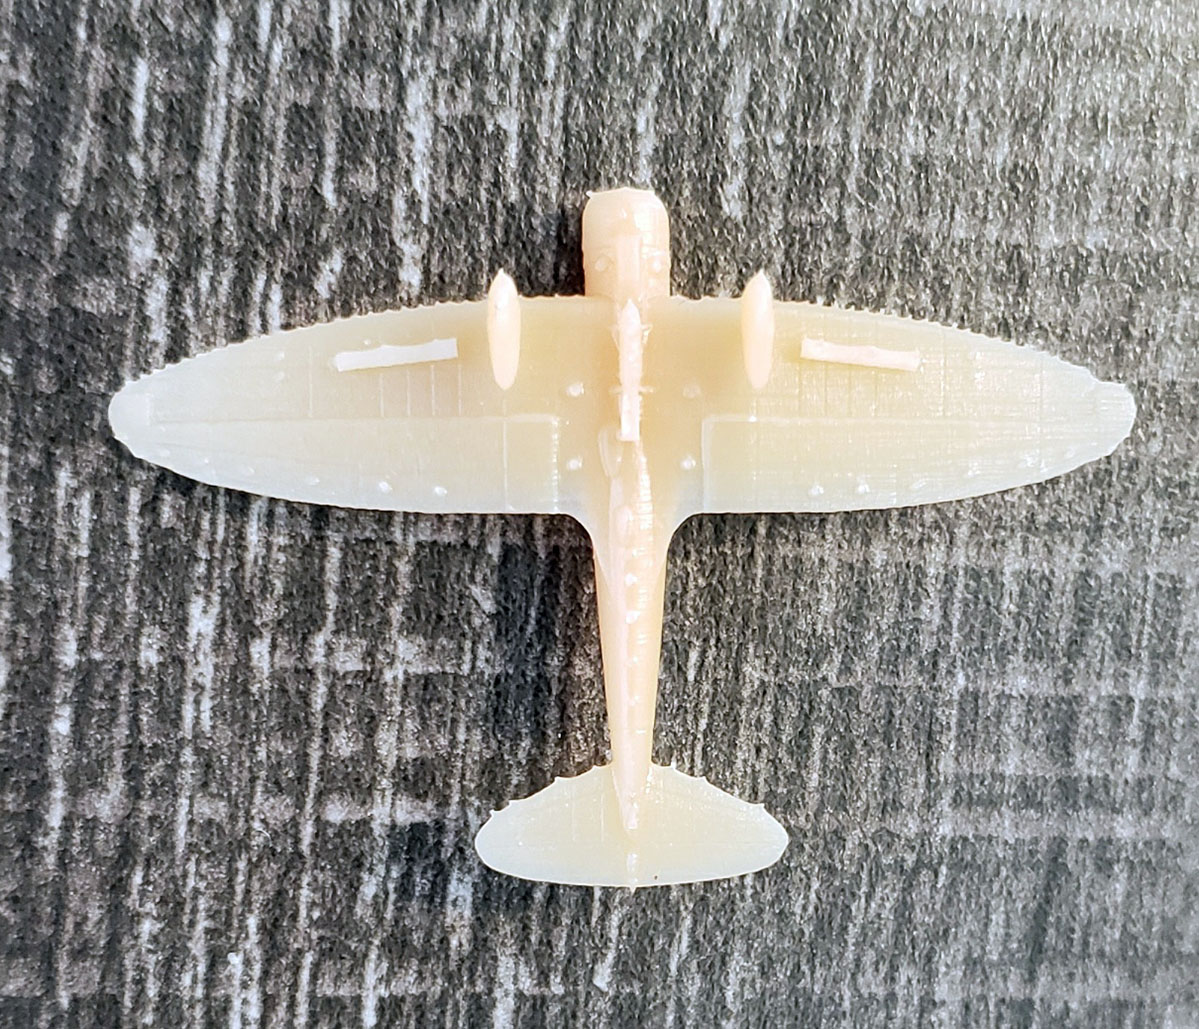
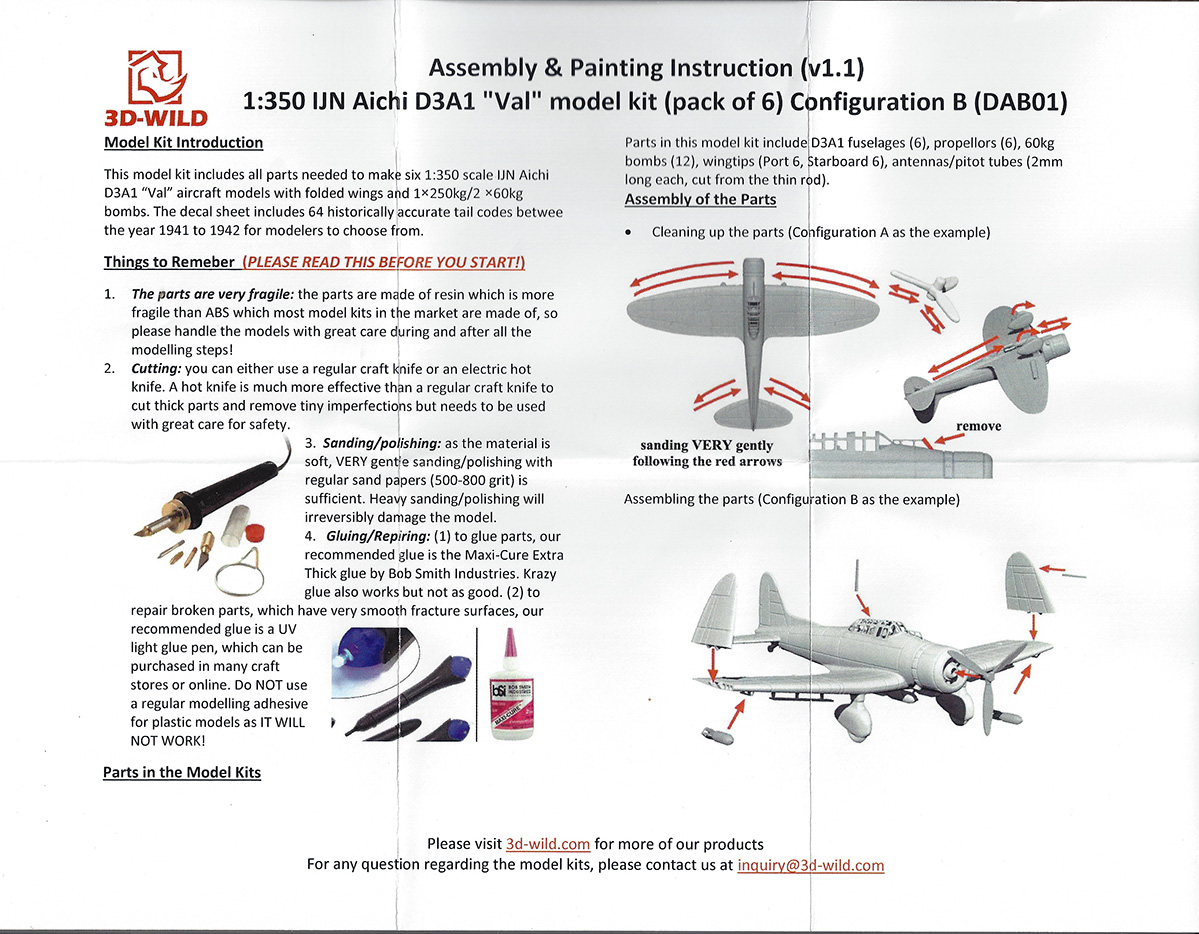
Overall, the Vals were mostly impressive in
the same manner as the Kates and Zeros. This set was configuration B, which
consists of stowed wings and ordinance of one 250kg bomb along with two 60kg
bombs. Sizing was also accurate. And, like the Zeros and full wing Kates, this
set was molded in the same light yellow-orange tinged resin. |
|||||||||||||||||||||
|
|||||||||||||||||||||
| DECALS | |||||||||||||||||||||
|
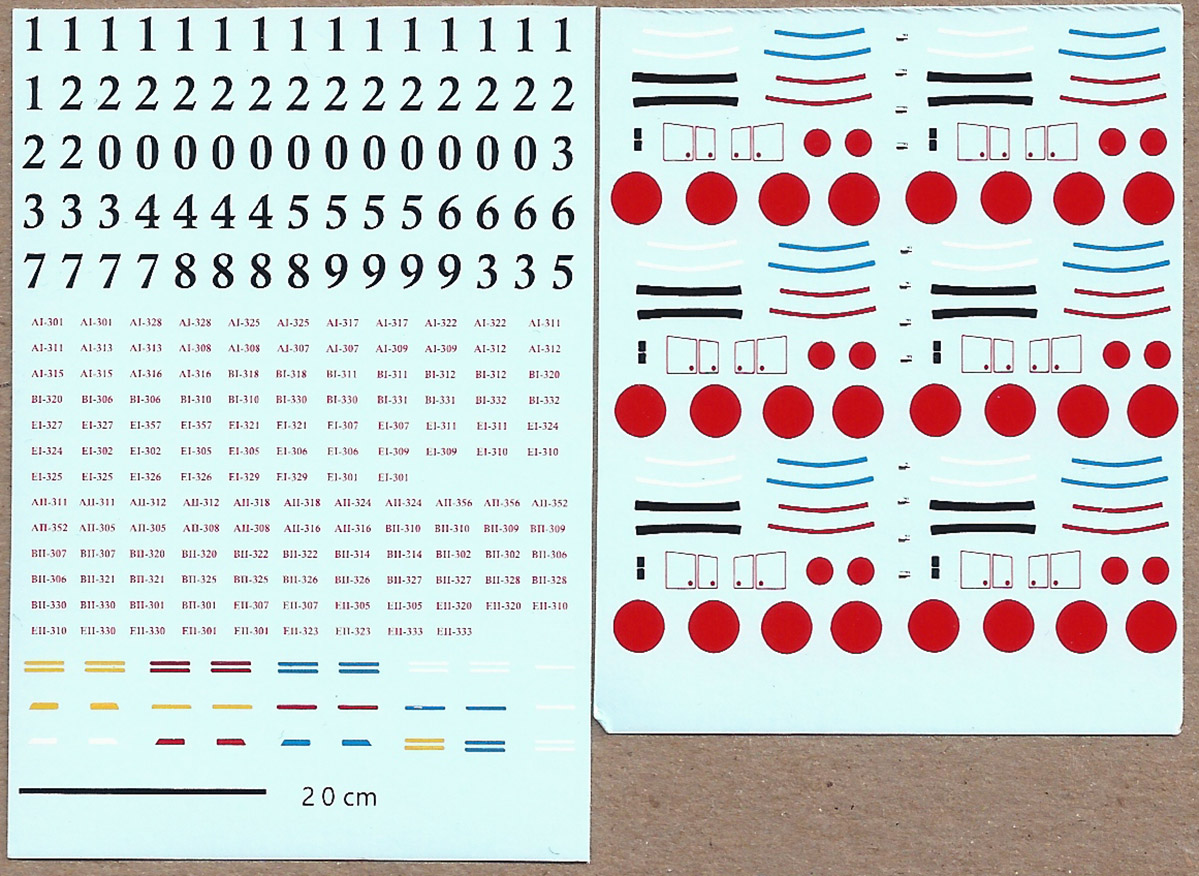
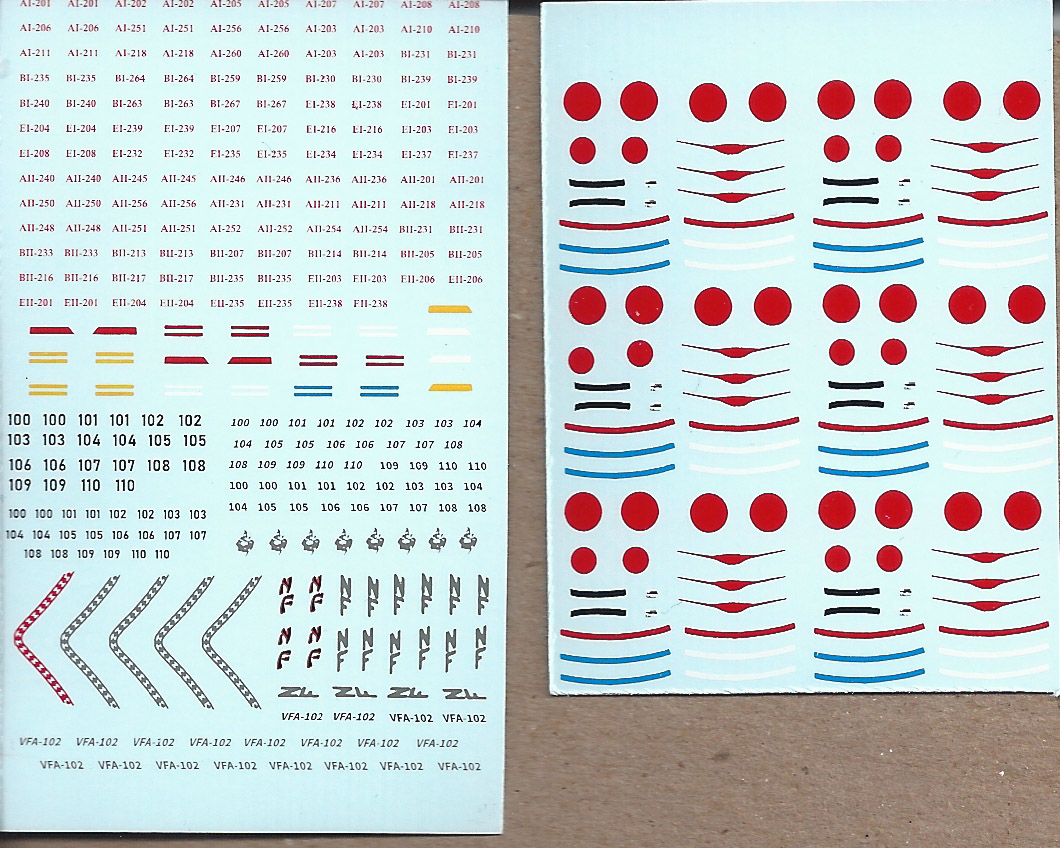
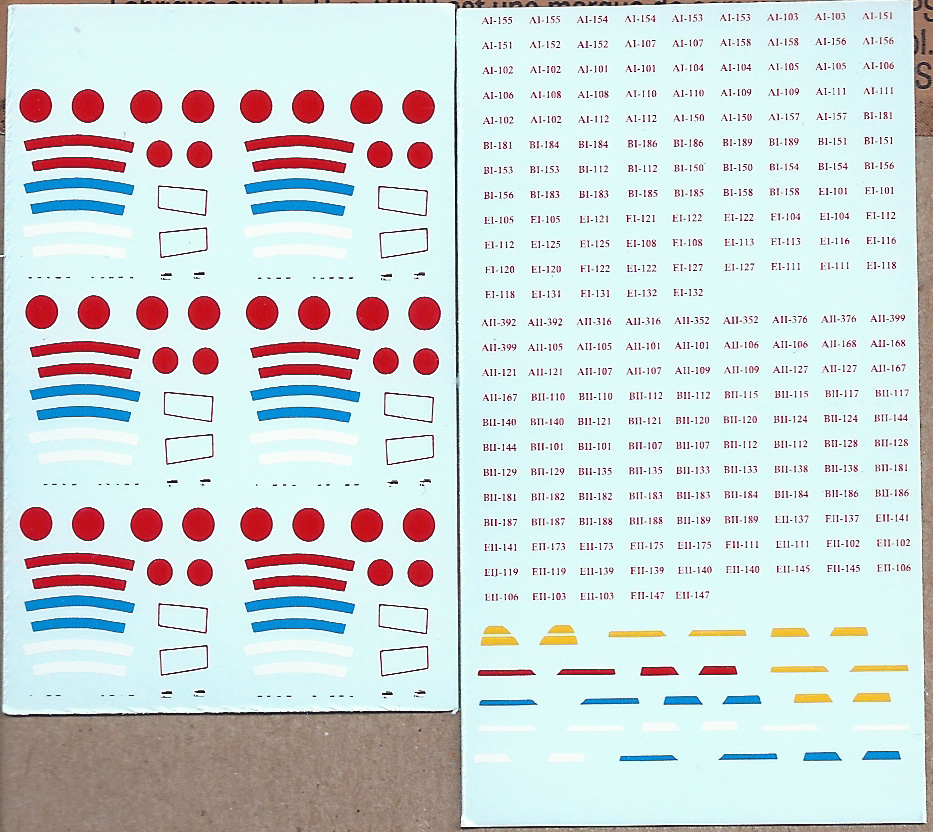
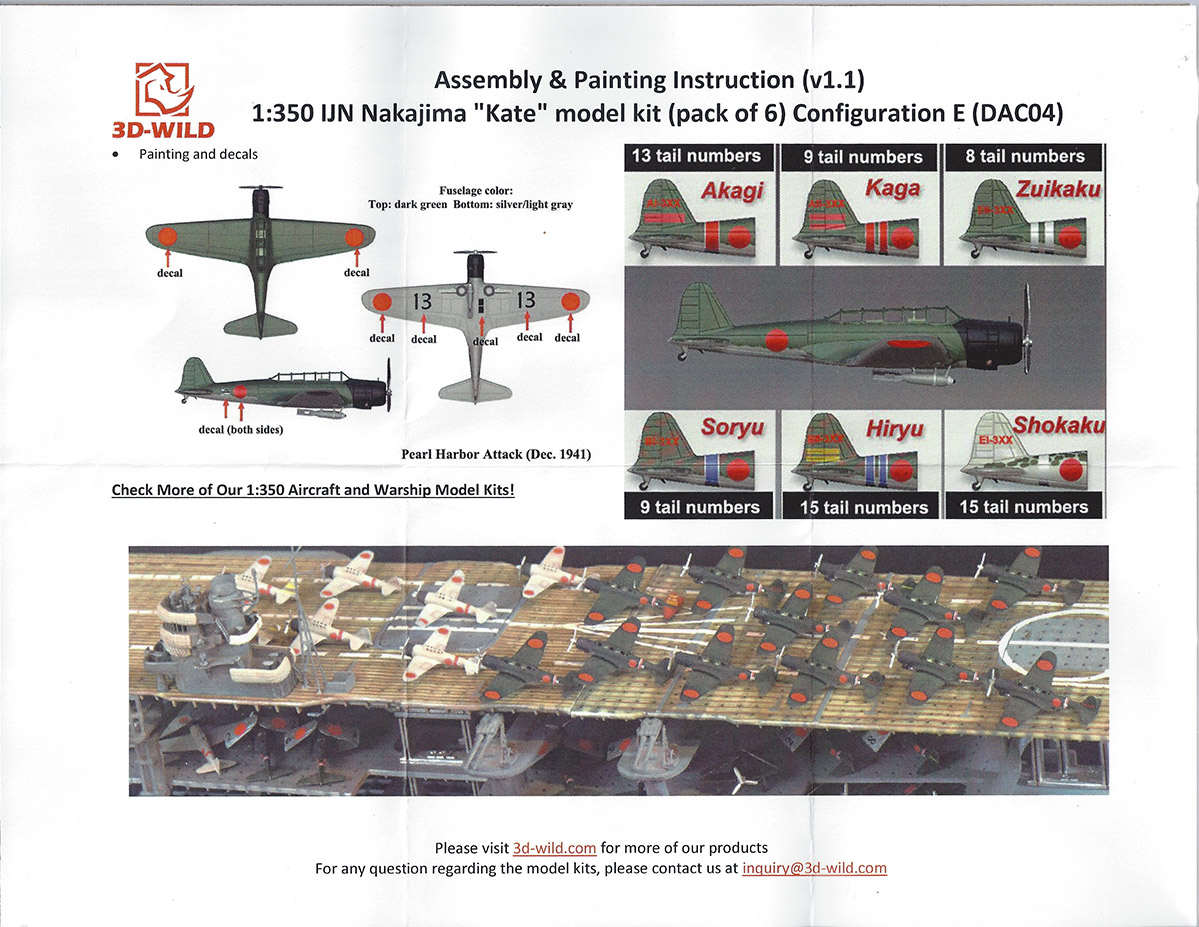
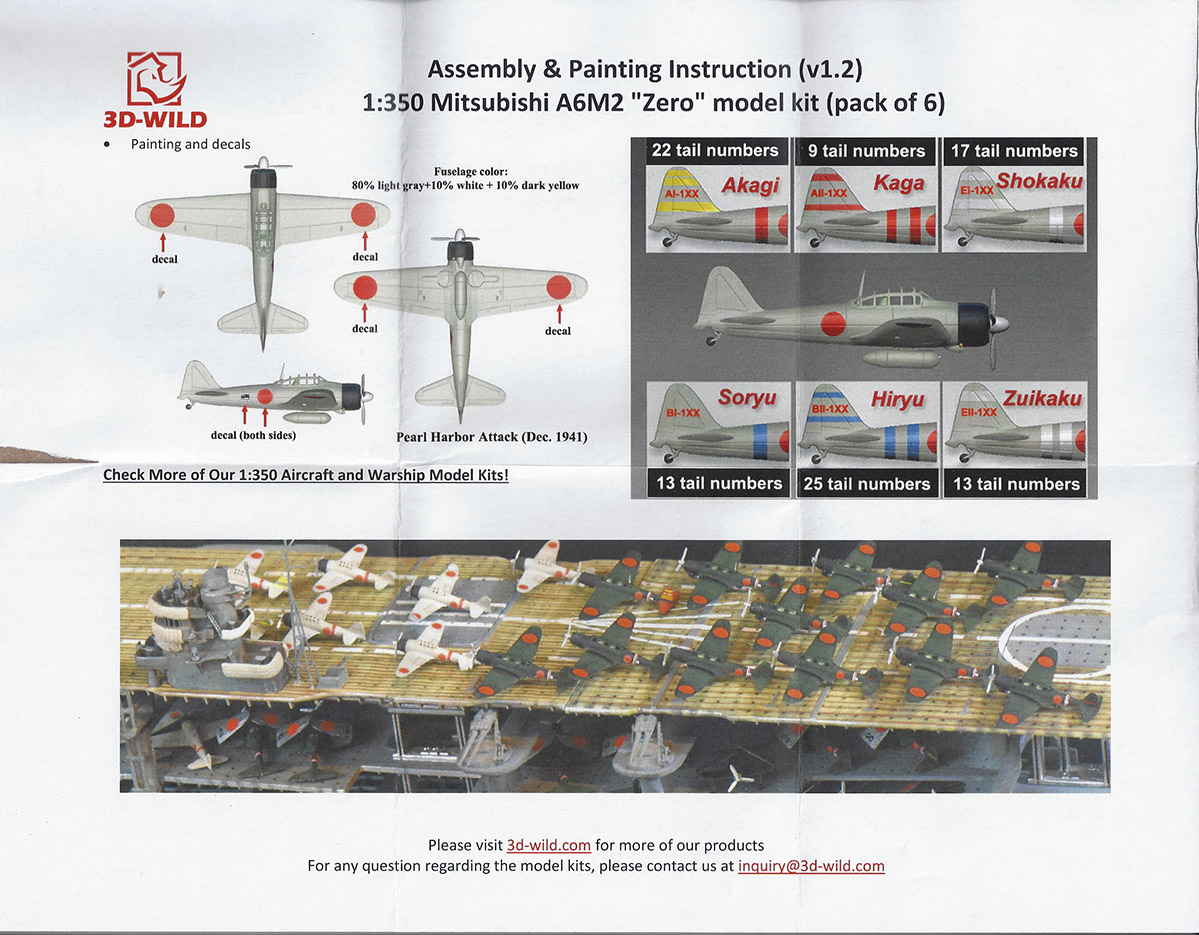
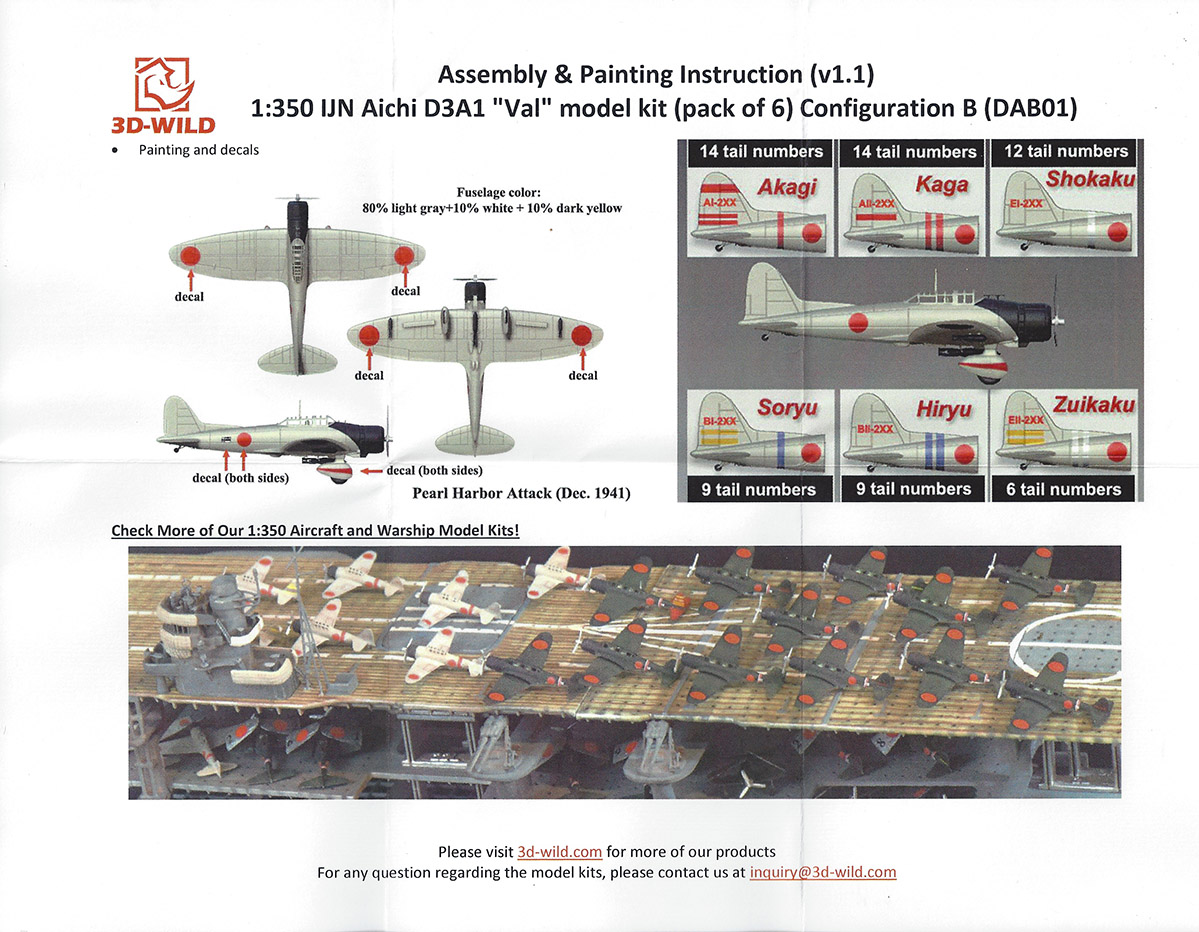
The decals are specific to each type of aircraft, and cover
an extraordinary number of historical IJN aircraft in the 1941-1942 timeframe.
3D-Wild has provided 69 unique tail codes for the “Kates”, 46 tail codes for the
“Vals”, and 99 tail codes for the “Zeros”. Plus, there’s an assortment of Rising
Sun roundels, wing root warning stripes, and ship ID fuselage stripes for all
these aircraft, all of which equipped the six front line carriers of the 1st Air
Fleet (also known as the Kido Butai, or Mobile Force). The research behind this
feature was no doubt meticulous and time-consuming. The decals are beautifully
printed and have no registration issues. By the way, for those modelers unfamiliar with the ships of the Imperial Japanese Navy, those six aircraft carriers are: Akagi, Kaga, Soryu, Hiryu, Shokaku, and Zuikaku. |
|||||||||||||||||||||
|
|||||||||||||||||||||
| INSTRUCTIONS | |||||||||||||||||||||
|
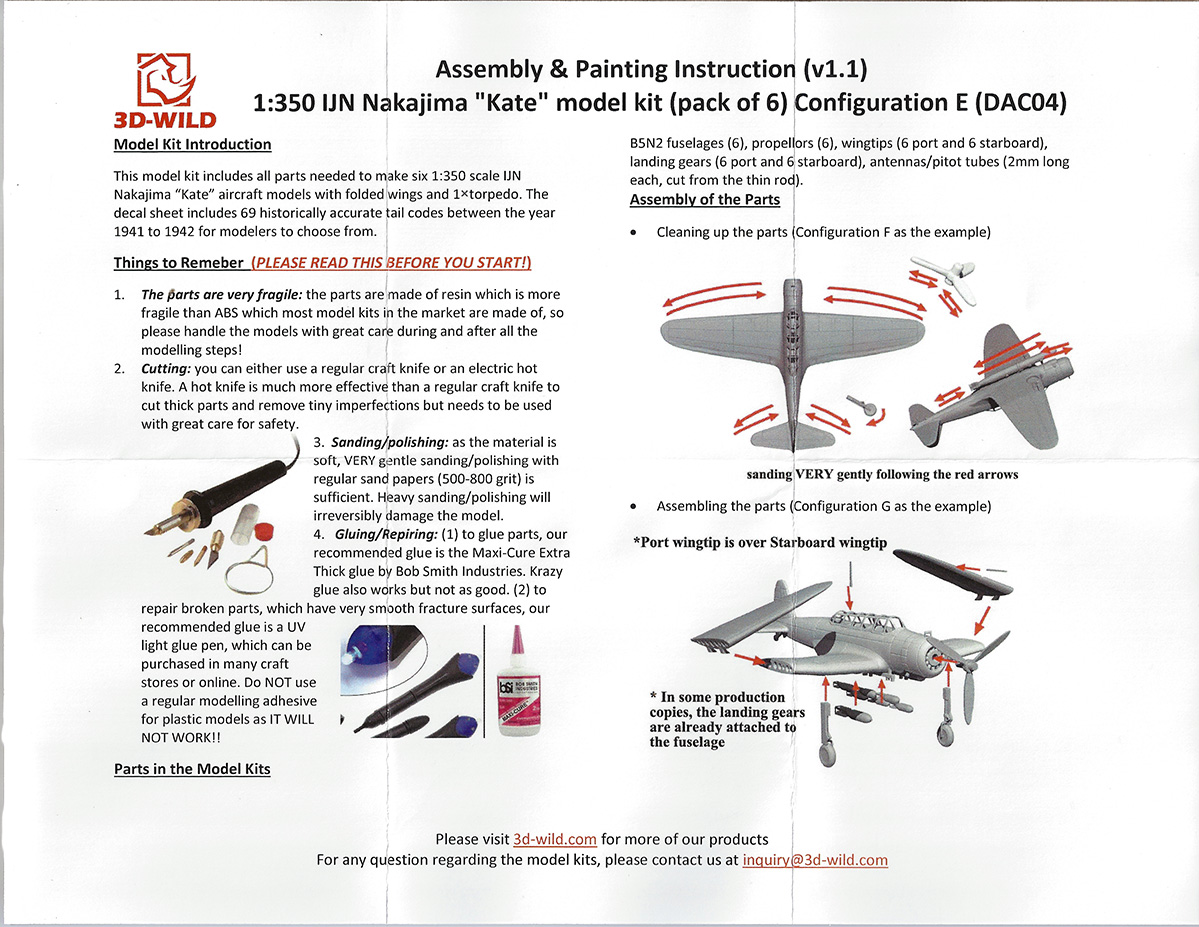
There are two pages of instructions with each set. These
are nearly identical, though each version is keyed to the specifics of the
airplane type and configuration in that particular set. 3D-Wild does recommend
applying a primer to reveal any possible surface imperfections, and then sanding
lightly with 600-800 grit sanding paper or stick to remove such imperfections.
In fact, the instructions are VERY specific about how and in what direction to
sand the fuselage and wings. I would highly recommend taking a moment to review
these before attempting any corrective work. It's important to differentiate about how and when to glue parts. For assembly, most quick drying glues for resin, like cyanoacrylate glue, will work. For repairs, though, it’s a little trickier. Broken parts leave very smooth breaks with this type resin, so there is little “tooth” on the opposing surfaces for a glue to grip. So, there are two alternative approaches. One is to prime, and perhaps paint, the broken surfaces to enable a glue to grip those surfaces. The other is to use a UV light repair pen on the unpainted surface to bond them together. All of this is covered in a helpful how-to article posted on 3D-Wild’s website regarding assembly and painting: https://3d-wild.com/blogs/news/assembly-instruction-of-1-350-scale-aircrafts-produced-by-3d-wild |
|||||||||||||||||||||
|
|||||||||||||||||||||
| FINAL THOUGHTS | |||||||||||||||||||||
|
I admit to some mixed feelings about these aircraft. When
it comes to this hobby, I am not what the marketing types refer to as an “early
adopter”. I prefer the tried and true. I put a lot of effort into my builds,
and, if successful, I want the results to have some lasting qualities. That
said, I try to be open to new innovations and products, particularly if they add
more accurate scale, greater detail and, hopefully, less effort. These new 3D printed aircraft certainly hold great potential in all those areas. The promise of minimized finishing and assembly as compared to the styrene injection alternatives would be a great timesaver. The inclusion of a printed canopy frame and open cockpit are extremely attractive in terms of minimizing effort for effect. Painting and decaling are a probably bit of a wash between the two mediums, but the extent and quality of the decals are another major advantage of these sets. In fact, given the lack of decal options otherwise available for 1/350 IJN aircraft, this feature alone adds considerably to the implied value of these sets, particularly for a modeler aiming for a high degree of historical accuracy. Still, the original Zero and all the Val samples show that it’s hard to completely ignore the potential for warpage over time. Nor can one ignore cost. While their cost is not astronomically different on a per set basis when compared to a typical package of styrene aircraft coupled with the addition of photoetch parts, it is also true that one tends to get more units per set of aircraft and accessories using the styrene/PE approach. One must also be mindful of the fragile nature of 3D printed items. It didn’t take much for me to lose focus long enough to break a piece here and there. Overall, I’d say the bottom line assessment here is that the Kates are great, the Zeros good, and the Vals less so. With that said (or written), I do think the potential of these aircraft are worth the leap of faith for most modelers. It helps greatly that 3D-WILD has placed an emphasis on customer service. They will reasonably replace any aircraft that arrives warped or damaged-in-transit due to packaging for free. One just needs to contact them with an explanation and photographic evidence of the issue(s). They also appear to be diligent about continual product improvement, so my hopes are that the product does meet the promise over time. Recommended. A sincere thanks to 3D-Wild for the review sets. The sets are available direct from 3D-Wild’s website: https://3d-wild.com/ Their retail price is US$29 per set of six aircraft. |
|||||||||||||||||||||