Simulating water using Silicone
By Rainer Michalek
Hasegawa 1/350 IJN Mikasa - Creating a water base. |
click images
to enlarge |
 |
|
|
The first thing that is required is a suitable base this is dictated by the size of the model and how you wish to present it; in this instance I used a surplus shelf. Using white glue and double-sided adhesive tape, I glued a styrofoam board to it. |
 |
|
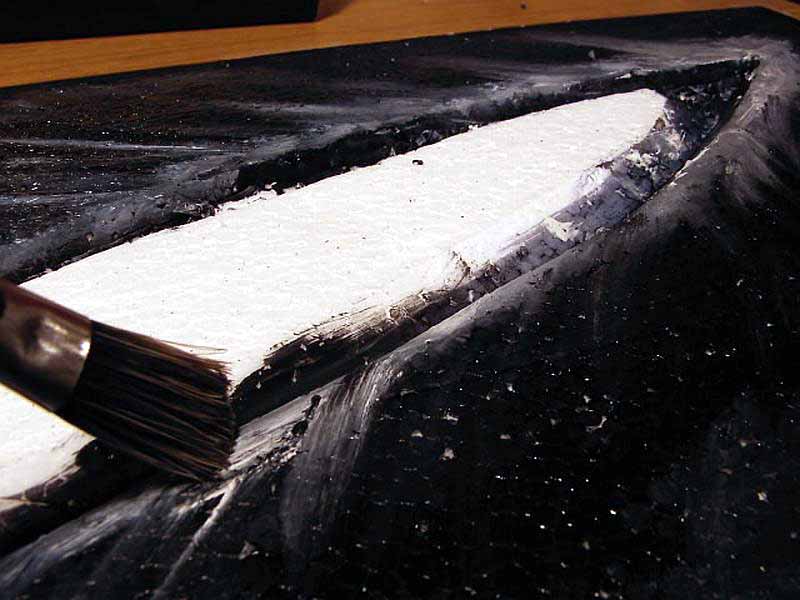
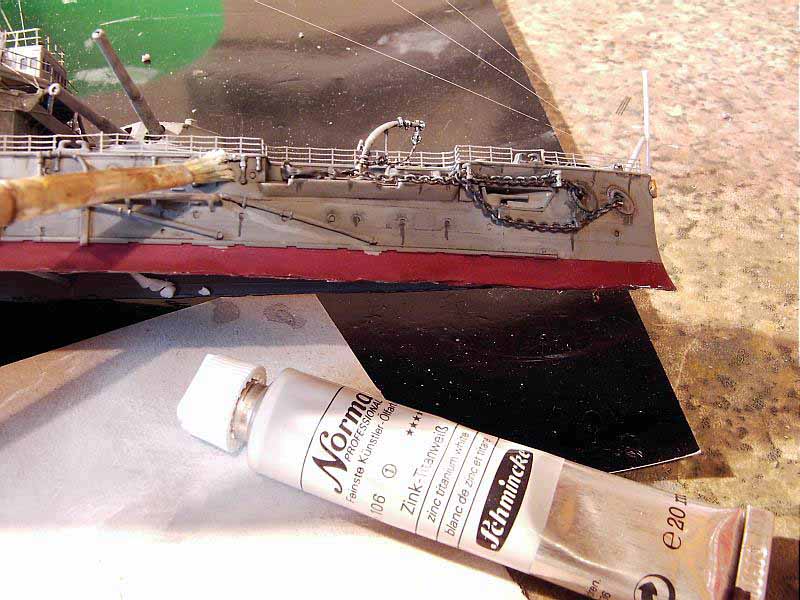
My Mikasa was then placed obliquely on the stryrofoam board. The waterline shape of the hull was traced with a fineliner to the board, and a cut-out made to accept the ship level with the waterline. I was now able to colour the styrofoam using water soluble oil paints in shades of black, white and ultramarine. These three shades are mixed to create lighter and darker areas. Around the hull perimeter and in the areas of the bow and stern wake, virtually pure white was used; the paint being applied with a large paintbrush. |
 |
 |
|
|
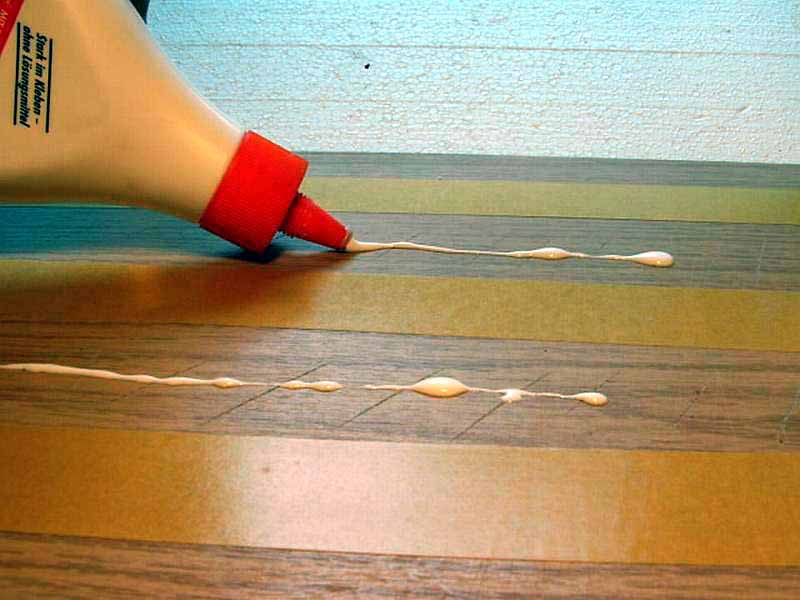
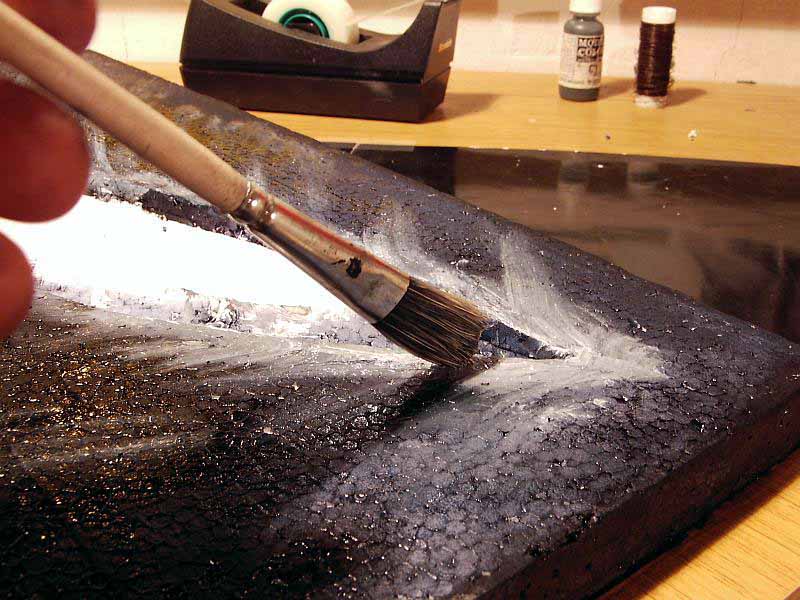
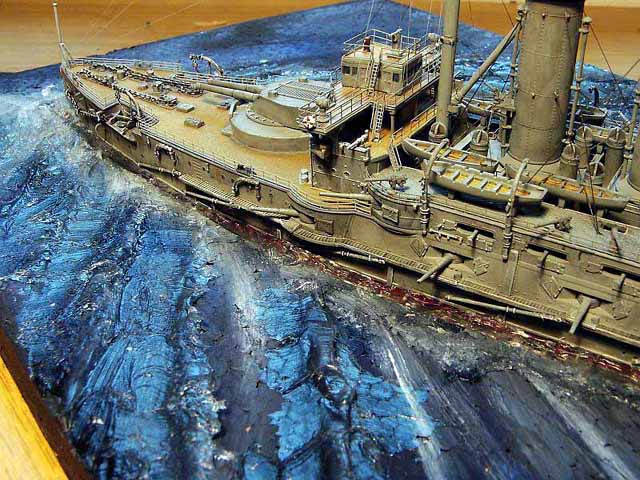
As the paint is fast-drying I was able shortly afterwards to replace the model in the hollow I had previously carved and begin creating the water from clear plumbing supplies silicone in a large tube. I always apply the silicone from the hull outwards, as the waves get smaller the further you get away from the ship |
 |
 |
|
|
When sculpting the waves you need to decide what scene you wish to present; i.e. is the ship riding at anchor or steaming ahead at full speed? There are many possible scenarios; but generally speaking the larger the swell, the harder it is to replicate in a convincing fashion. With this in mind I decided on a moderate bow wave that spread sideways, applying thick strings of silicone and sculpting them with a steel spatula from dental supplies that I use to work my way throughout the diorama until reaching the edges. | 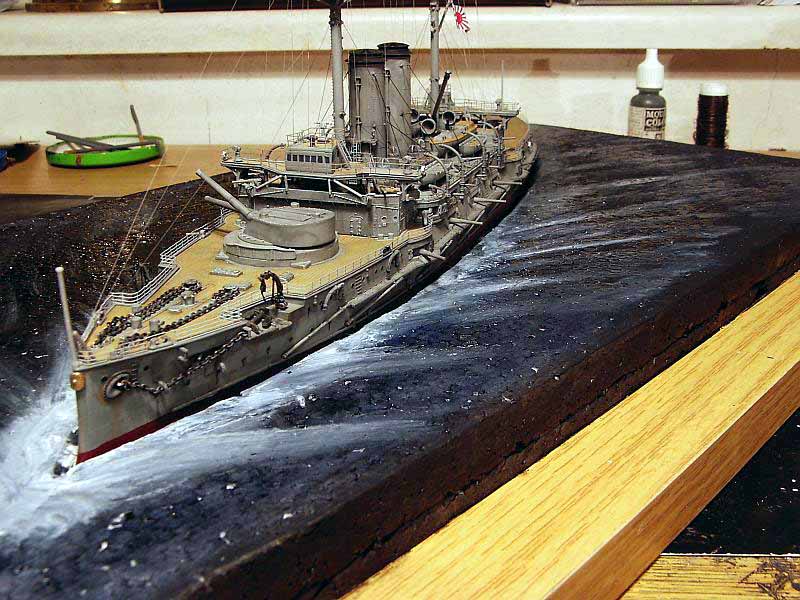 |
 |
|
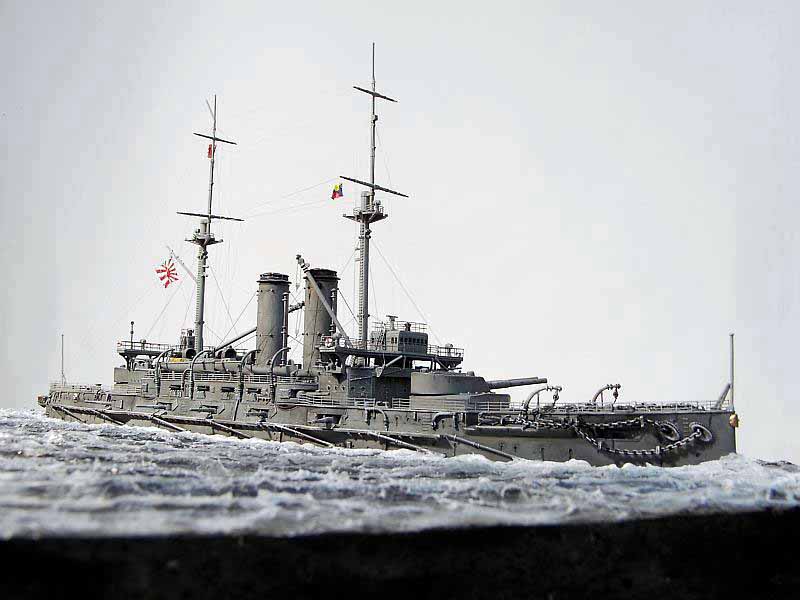
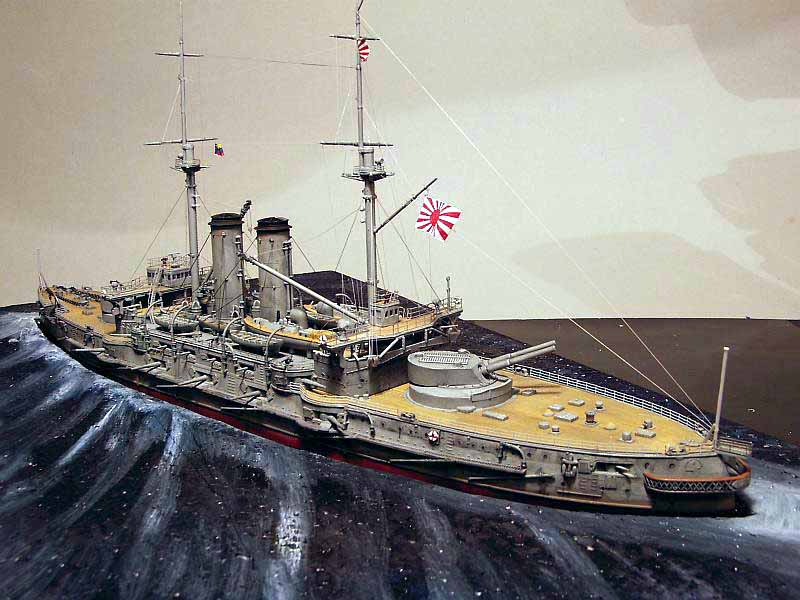
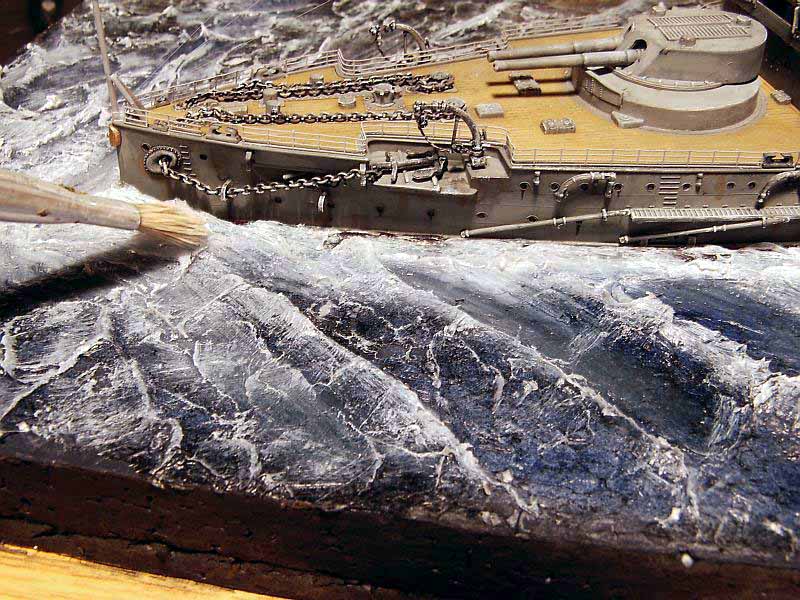
| After an hours work the silicone is cured, and wave crests and spray may be drybrushed
using white artist´s oil paint, rendering bow wave and the ship´s wake in lighter tones.
It is not that hard, really, just give it a try and you may love the results! |
 |
 |
|
|
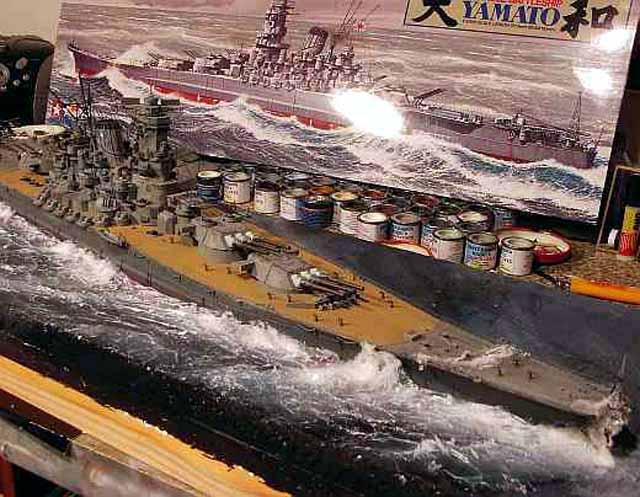
If you wish to reproduce heavier seas, here is how I built my Yamato diorama. Tamiya 1/350 IJN Yamato- Building heavier seas and creating a backdrop. |
|
| It is an ongoing debate - what backdrop to use for larger model ships. If you build AFV´s, getting outside for photography is no big deal - but it is not that easy for model ships as they are often too delicate to be taken outside. I did not like the idea of attempting the painting of a backdrop at first, however the longer I studied the box-art of the kit, the more I was convinced that I needed a really good backdrop for my models. But first I had to place Yamato into the sea.... | |
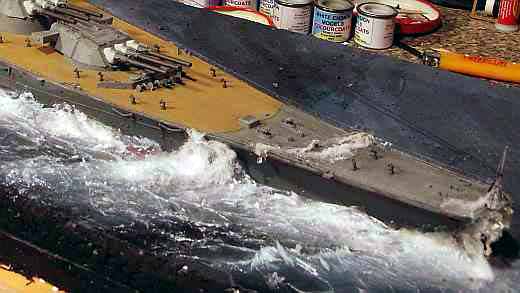
The DioramaI used two layers of styrofoam glued on top of each other which were in turn glued to a surplus shelf. As I did not intend to waterline the model, I had to insert the hull really deep into the Styrofoam. After positioning the model, I traced the hull and carved the styrofoam to shape until the model fitted to my satisfaction. Thin styrofoam strips were used to adjust the draught to the correct level. Once I was happy with the fit, I removed the model and painted the styrofoam my usual way with black, white and ultramarine blue water soluble oil paints. The shades are mixed individually to achieve a credible seascape. Around the ship, lighter shades are used. Bow wave and wake are painted nearly white. Now for the tricky part . Usually I find sculpting water easy. But this time I wanted to depict Yamato in heavy seas as portrayed on the box-art |
 |
| I had longed to do so for quite some while yet had lacked a suitable model. But how would I model believable waves? So I spent many hours watching wartime Kriegsmarine footage on video, finding fascinating and inspiring scenes showing the Scharnhorst during operation Berlin .That was how I wanted to depict my Yamato! | 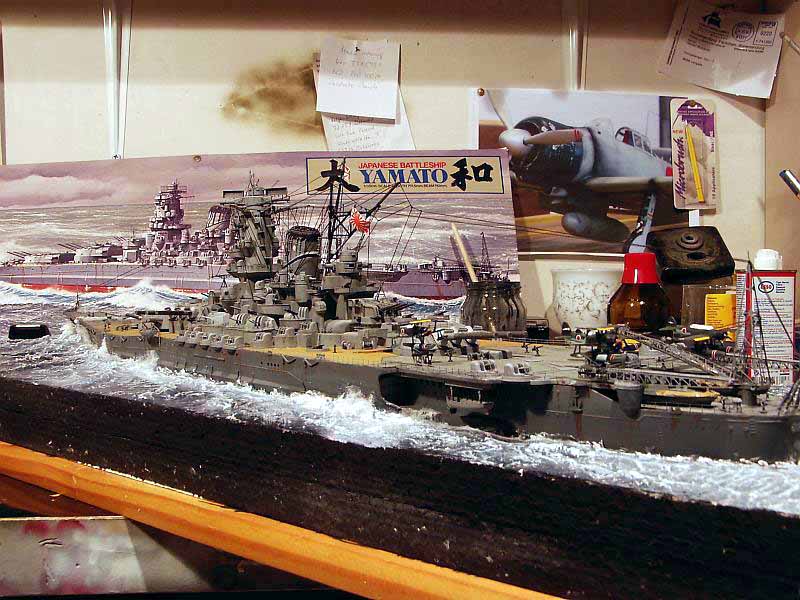 |
|
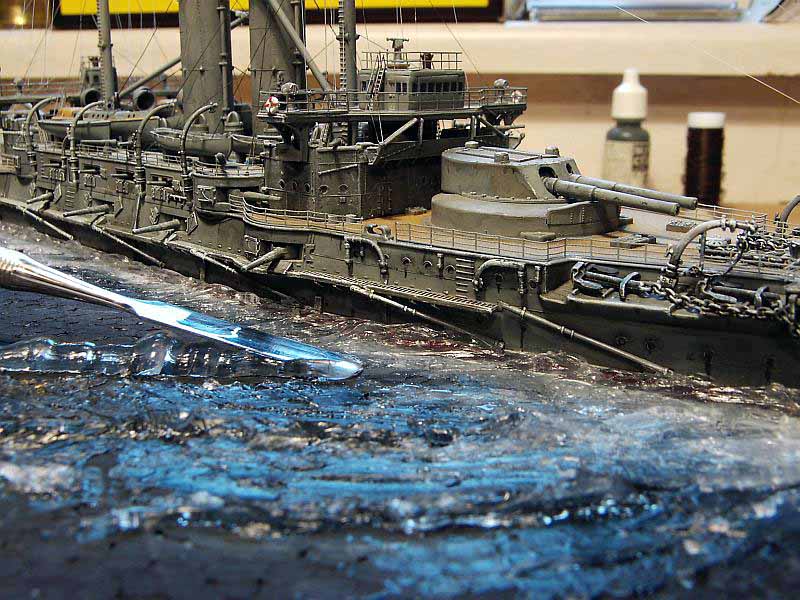
In sculpting the breaking bow wave, cotton wool was added to the silicone. Again my dental spatula was used, a tool which is supremely suitable for this task. Given sufficient imagination, any kind of wave can be sculpted with this tool! I also wanted to show water running over the fo´c´sle. To give this impression I applied a small trace of silicone to the chainways, adding small amount of cotton wool. I have as yet to imitate spray, I am clueless as how to do that. If anyone with any ideas, please feel free to let me know! Work on the fo´c´sle was the hardest part. Where the water rises higher around the hull, cotton wool was added to the silicone, which made working the shapes easier as I could now pull the waves to where I needed them. I ended up using a full cartridge of silicone for this process. After drying, the wavetops and wake areas were drybrushed with Schminke´s Titanium White artists oil paint, adding a certain "je ne sais quoi" to the effect. Give it a try; present your model in a heavy sea. |
 |
 |
|
The backdropA piece of light blue wallpaper made an ideal base. I started mixing Tempera black and white water soluble oil paints to various shades of grey. As I had no clear idea of how to paint a convincing backdrop, I simply started painting that piece of wallpaper grey using a large paintbrush. Early on I doubted if I would succeed and even thought of giving up the entire project. |
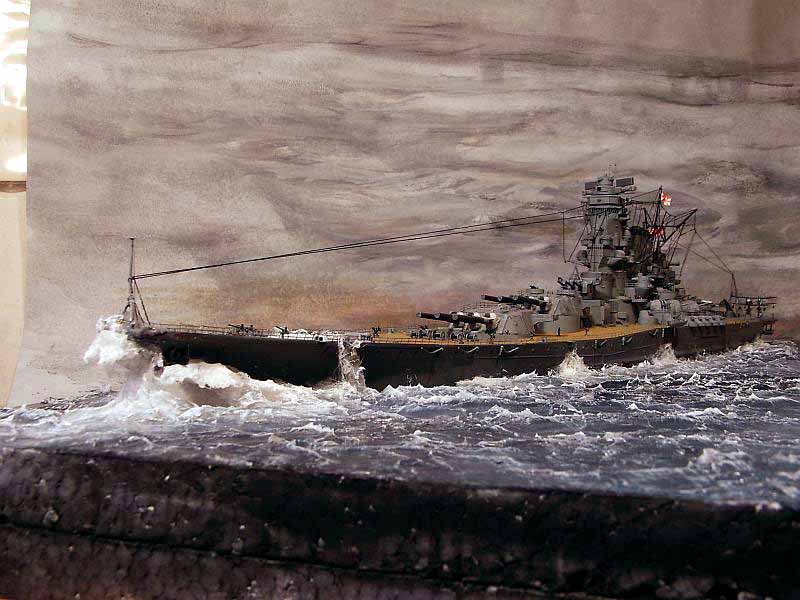 |
| But all is well as ends well - I persevered and ended up with what looks to me like a nice backdrop for larger models. The morning after I added some sepia and yellow to the lower part of the backdrop to hint at a sunset. | 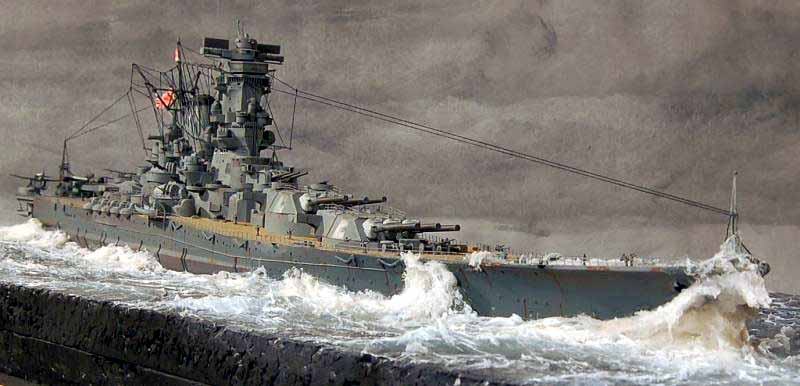 |
|
This project again goes to show how you can achieve a satisfactory result with very limited means and materials I hope I have been able to give some inspiration for your future projects with these words You can see the end results in my gallery here at Modelwarships.com Greetings from Germany! |
|