 |
||||||||
|
I have found this simple method of creating ocean waves and wakes, for the display of my 1/700 scale waterline ship models, to be very easy and rather realistic. It works well for 1/700 scale and probably not as well with larger scale models, and it may not be applicable for smaller scales such as 1/1200 and 1/2400 scales. I have received many compliments from other ship modelers concerning the water effect that I have used in my dioramas and some of them have asked about how I do it. Although I didnt invent this technique, I have prepared this tutorial How-To in order to demonstrate my method of it. |
||||||||
| The key ingredient for this method of water effect display is TAMIYAs Ocean Effect Plate A Item No. 89673. | 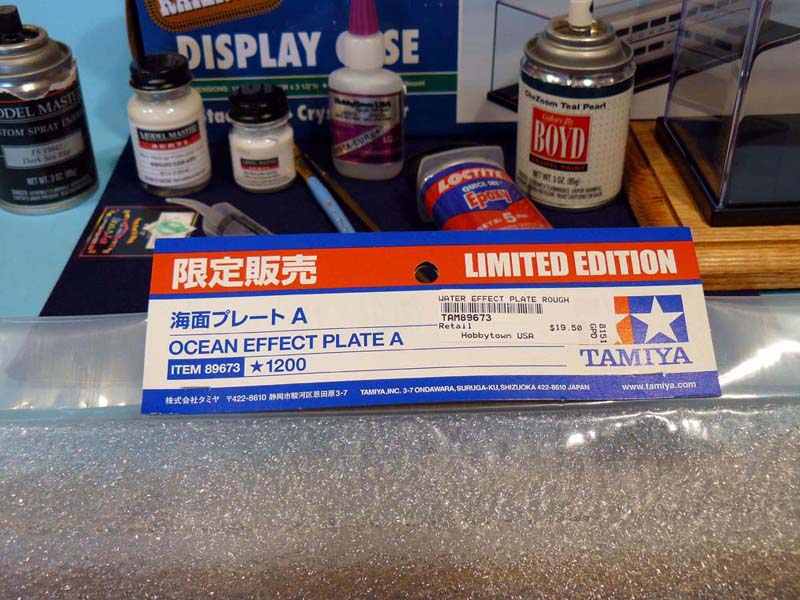 |
|||||||
| The Ocean Effect Plate A creatively depicts a gentle, but rippled, ocean surface. | ||||||||
| I have just recently discovered that PLASTRUCT has similar, thinner water effect plastic sheets that come in blue or clear and in larger sheets. They are intended for smaller scale displays, but with the various textures that the sheets come in, they could be used for 1/700 scale harbor dioramas, I would think. | 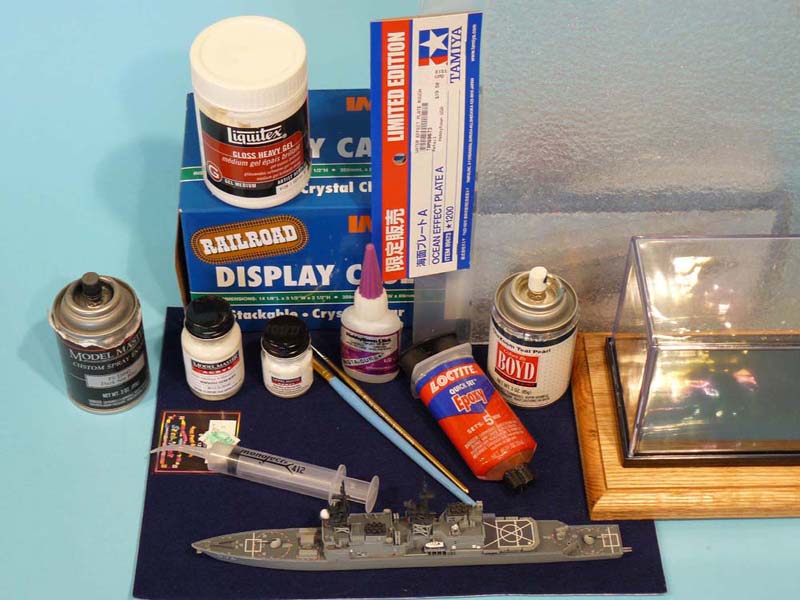 |
|||||||
| Materials
Besides the Ocean Effect Plate A, I use the following listed materials: 1. IMEX Model Company, Inc. Stackable-Crystal Clear plastic display
case. (IMEX has several different sizes to choose from with black or clear
bases.)
|
||||||||
| Step 1: Cutting The Ocean Effect Plate A (OEP) to Size. | ||||||||
| After measuring the black base of the IMEX display case, upon which the OEP will be glued, I transfer the measurement to the OEP and cut it to width on the table saw. | 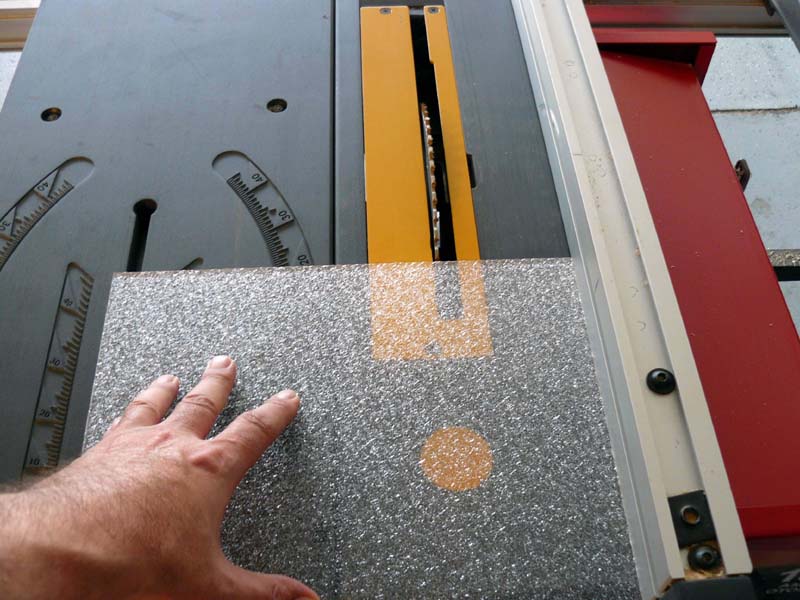 |
|||||||
 |
||||||||
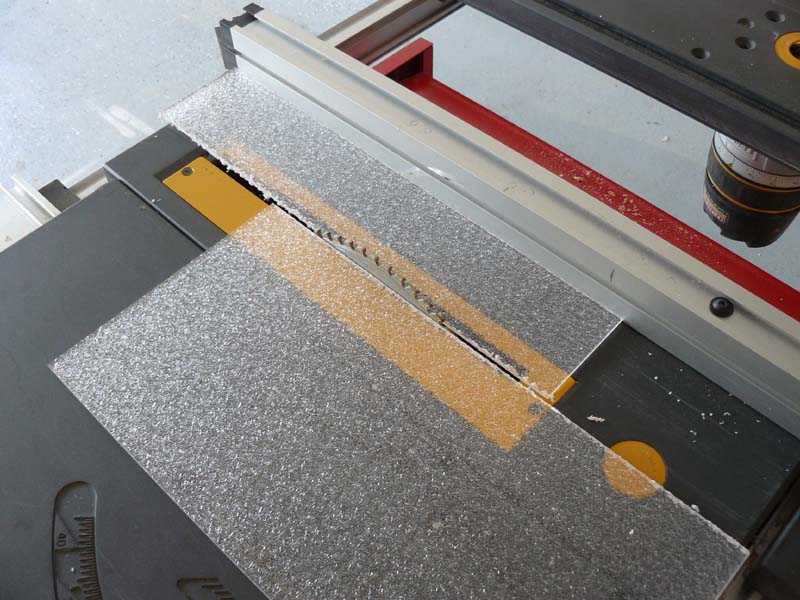
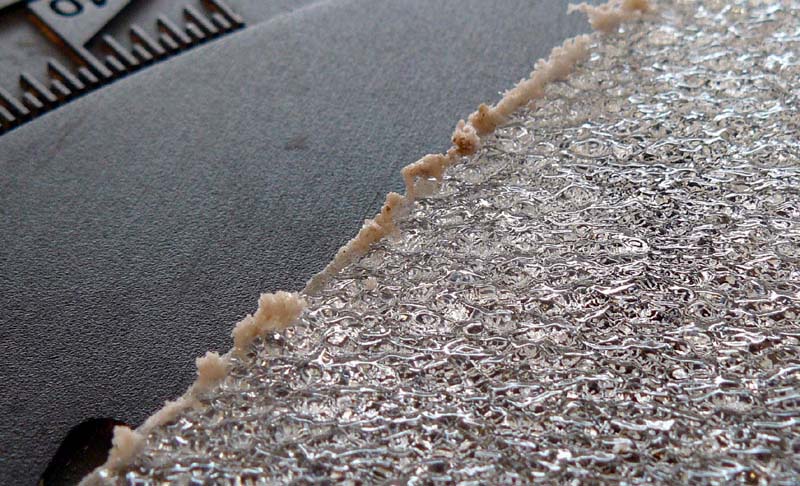
| The OEP is easily cut with the table saw, however the saw blade can
melt the plastic shavings that are given off from the cutting process and
the shavings can stick to the cut edge of the OEP.
Insert Photo WE-6 here |
 |
|||||||
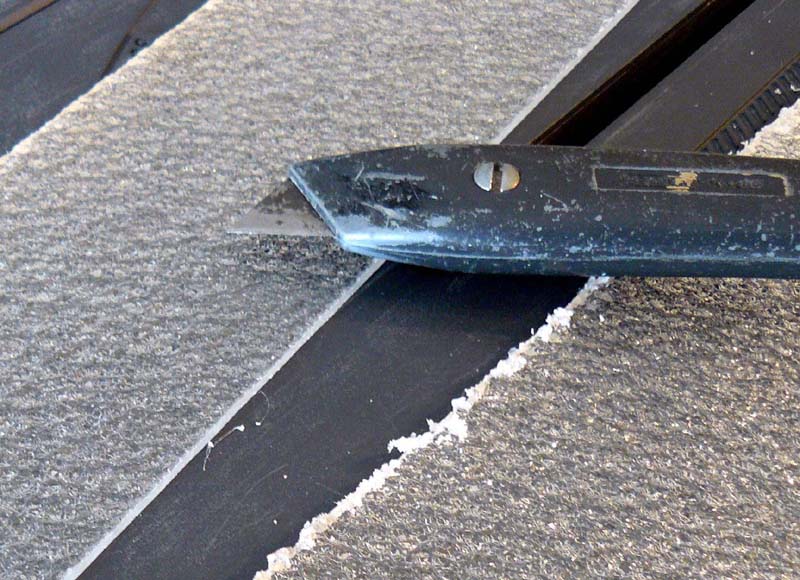
| These shavings are easily scraped away with a fingernail or a razor
knife. Sandpaper helps to smooth any rough edges that are left over.
Insert Photo WE-7 here |
 |
|||||||
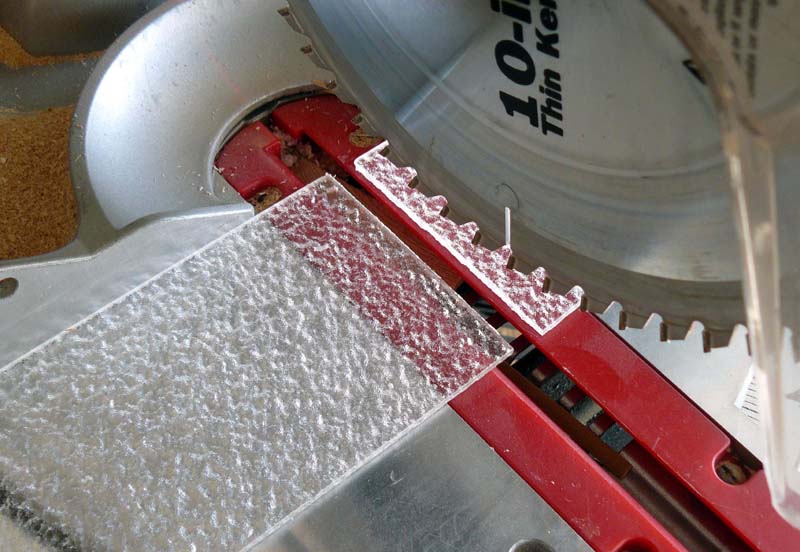
| After the melted shavings have been scraped and sanded from the edge, the OEP can be cut to length with a power miter saw. This saw did not melt the shavings to the cut edge. | 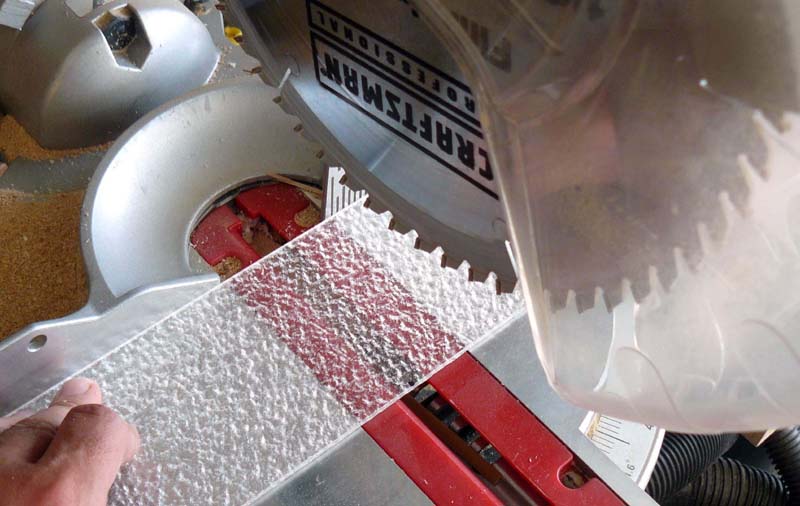 |
|||||||
 |
||||||||
| Step 2: Painting the ocean color on the OEP. | ||||||||
| I use TESTORS Colors by Boyd CheZoom Teal Pearl enamel spray paint.
It is a dark blue-green color and replicates the color of ocean that I
am looking for in my displays. Some dark blues can be used or even blue-gray,
Id think. I have seen another modeler use two different shades of blue,
and striping the wave, and giving the water a nice realistic effect.
Here the smooth bottom of the OEP is painted with the CheZoom Teal Pearl color. By painting the bottom of the OEP and not the textured top side, the clearness of the plastic contributes to the watery look of the final effect. |
 |
|||||||
| It takes a few coats of this first color to cover the OEP sufficiently. The final result of this step does not have to be a solid color. Some transparency can be okay. | 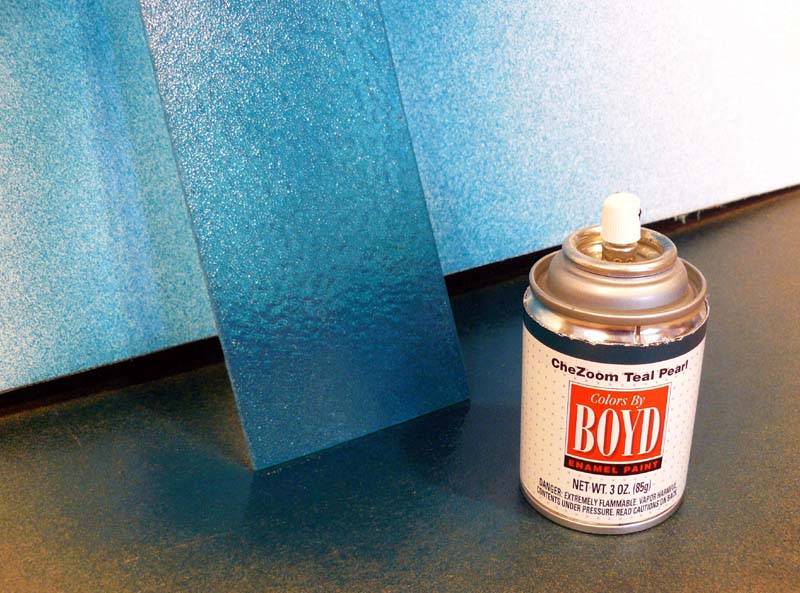 |
|||||||
| Here the first color is compared to an original piece of OEP. |  |
|||||||
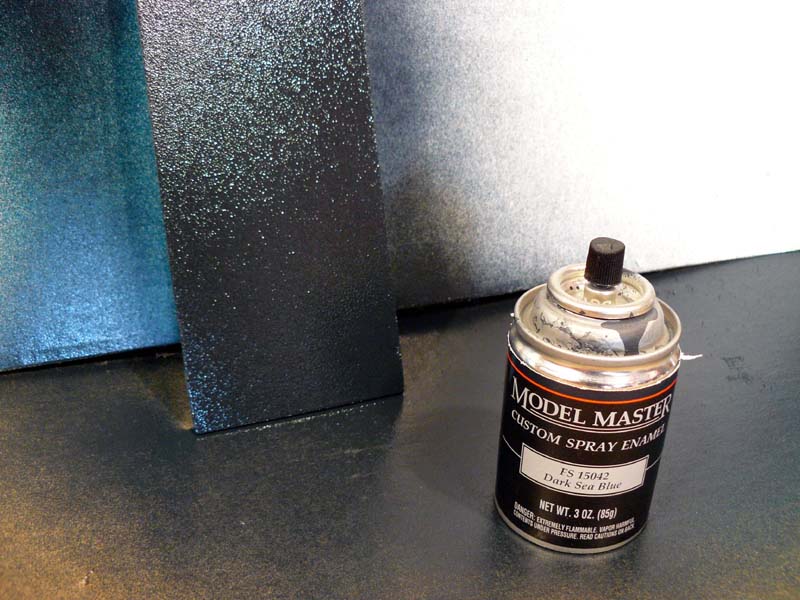
| After the first color has dried I spray a very dark color over it. Here I am using TESTORS Model Master Dark Sea Blue, but you could use black as well. I have found that the super glue will show through the lighter color during the next step of attaching the OEP to the black display case base. This darker, and final, color will prevent undesired black spots from the super glue showing through the OEP, later. | 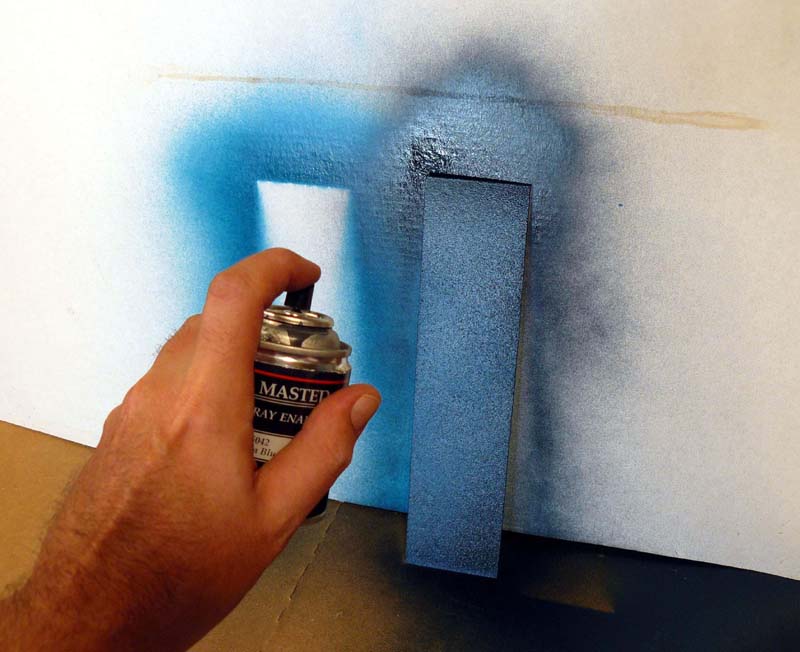 |
|||||||
 |
||||||||
| Step 3: Attaching the OEP and Model to the Display Case Base. | ||||||||
| The painted OEP and the model can be attached to the base by drilling
holes in the base, OEP, and the model and using screws and glue to secure
them together. I have done this on some of my first models, but I have
since found it unnecessary.
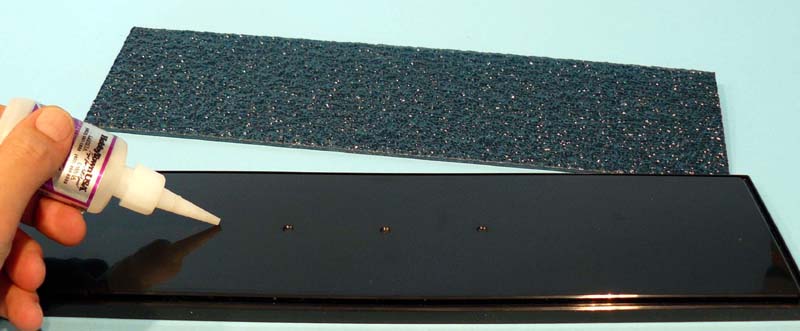
Super glue holds the OEP to the plastic display case base well enough, as well as for attaching the model to the OEP. The LIQUITEX gel used in the next step also assists in securing the model to the OEP. Ensuring that the display case base is clean, smooth, and flat the OEP is then attached with super glue. I am using HOBBY TOWN USAs Gap Filling Insta-Cure Cyanoacrylate Glue. |
 |
|||||||
| Small clamps will be needed to hold the OEP securely to the display case base while the super glue cures. |  |
|||||||
| Go easy on the amount of super glue when attaching the model to the OEP. I have found that the fumes from excessive amounts of super glue can affect the finish paint on the model. The glue can be poured on the OEP or the bottom of the model. | 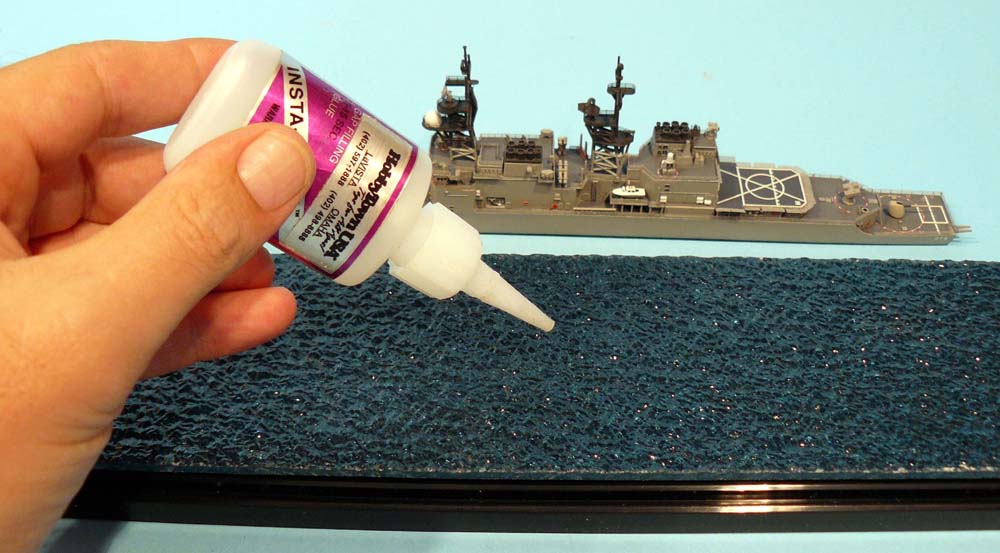 |
|||||||
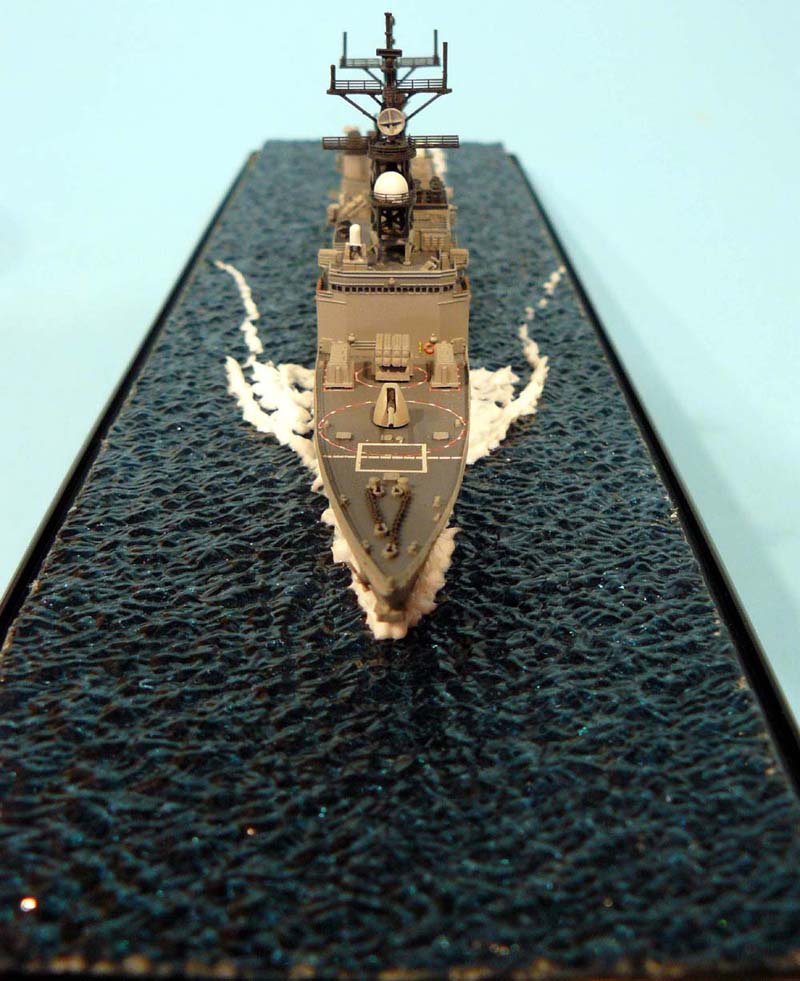
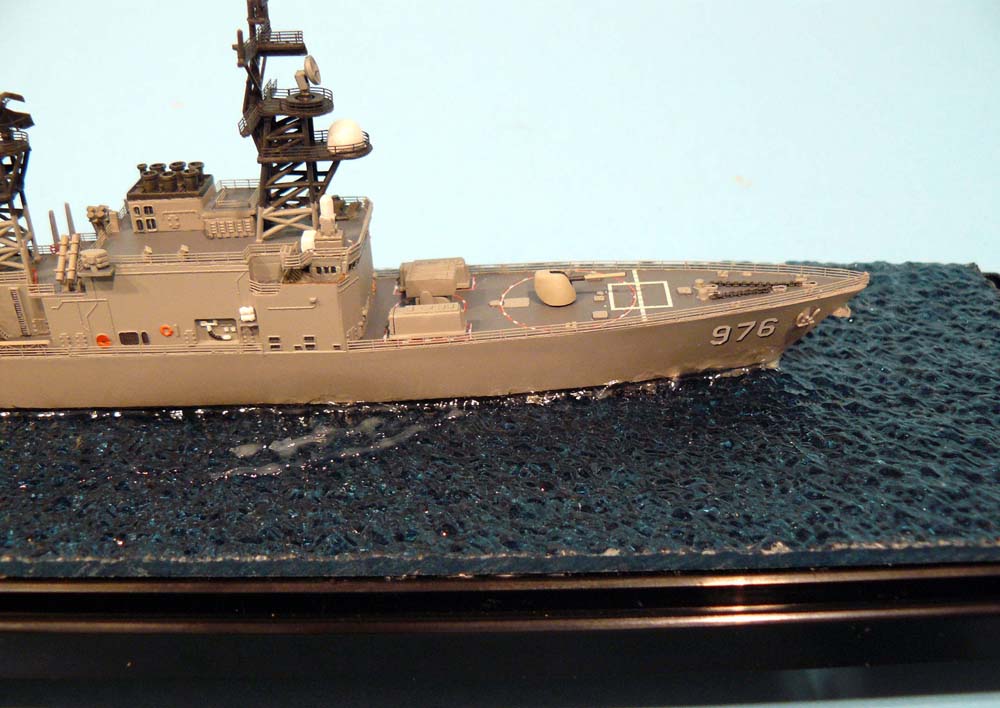
| In my displays I like to center the model from port to starboard, but I like to move the model a little farther forward of being centered in the direction of the bow. I think this contributes a little more animation to the display. |  |
|||||||
| Step 4: Creating the Wake and Waves. | ||||||||
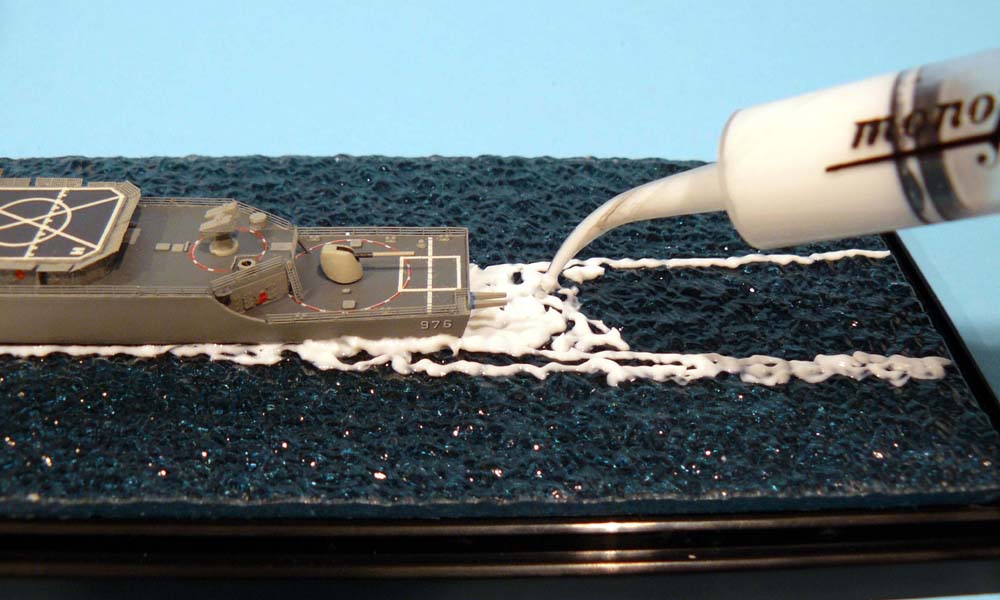
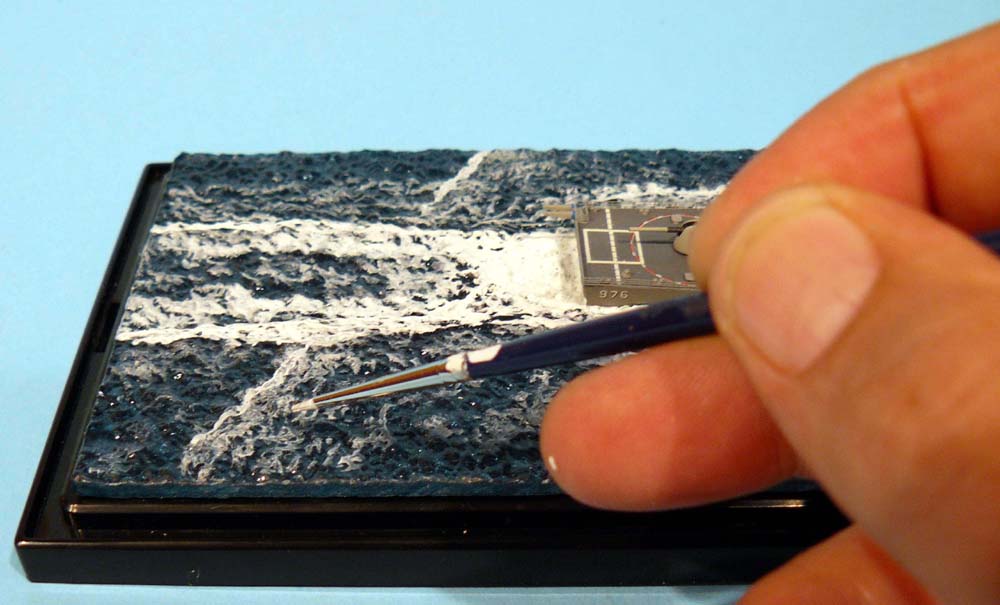
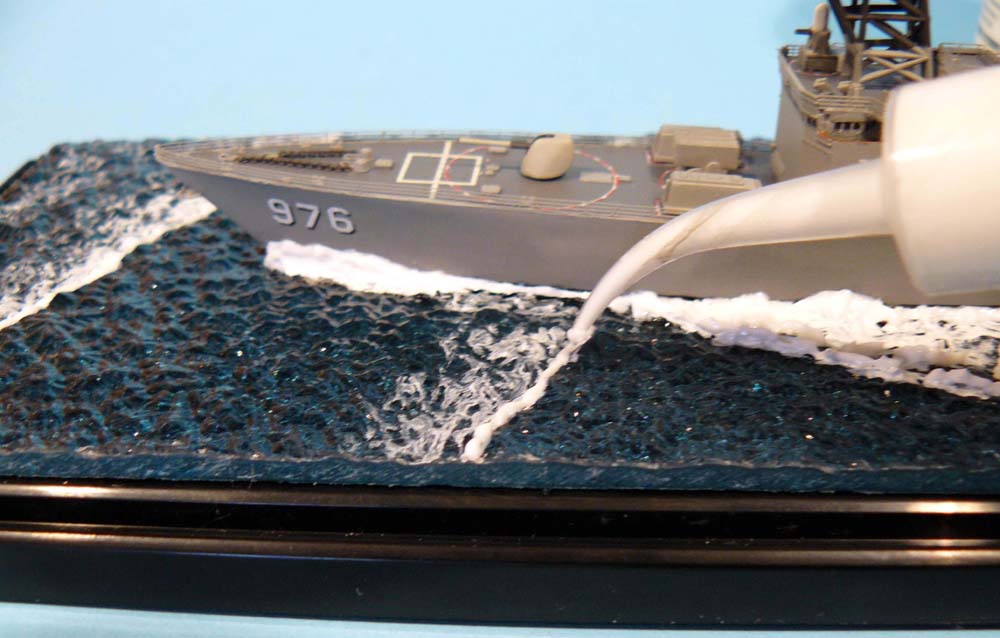
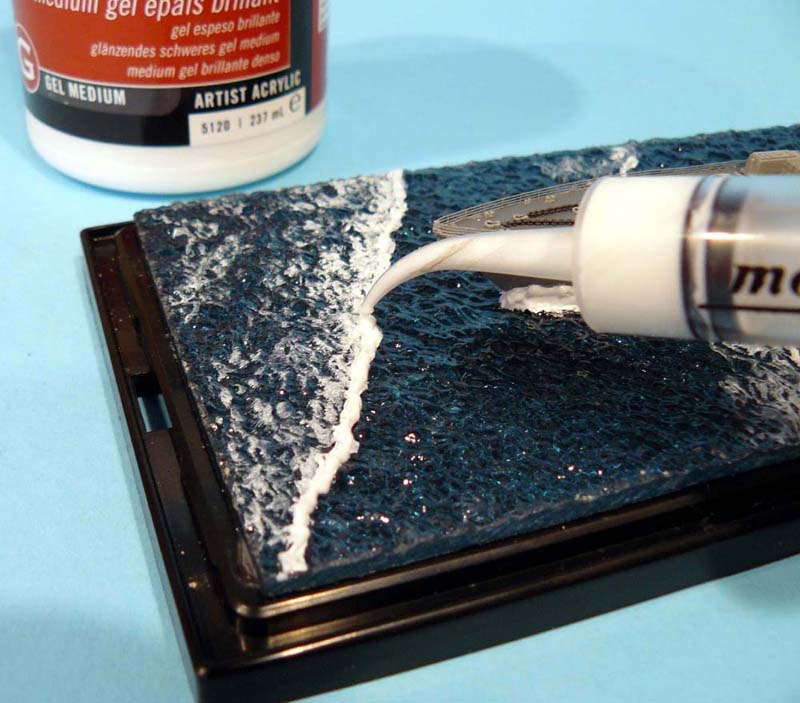
| With a hobby syringe filled with LIQUITEX Gloss Heavy Gel (an artists canvas preparation acrylic gel), I fill the gap between the model and the OEP that occurs because of the irregular surface of the OEP and the straight edge of the models hull. | 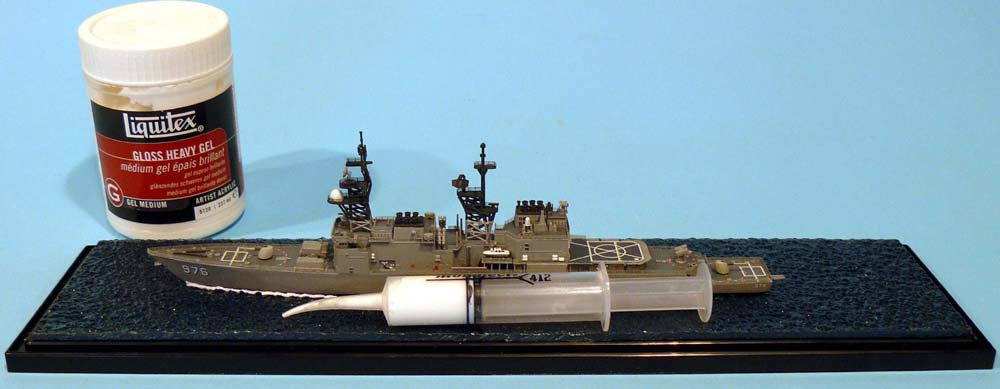 |
|||||||
 |
||||||||
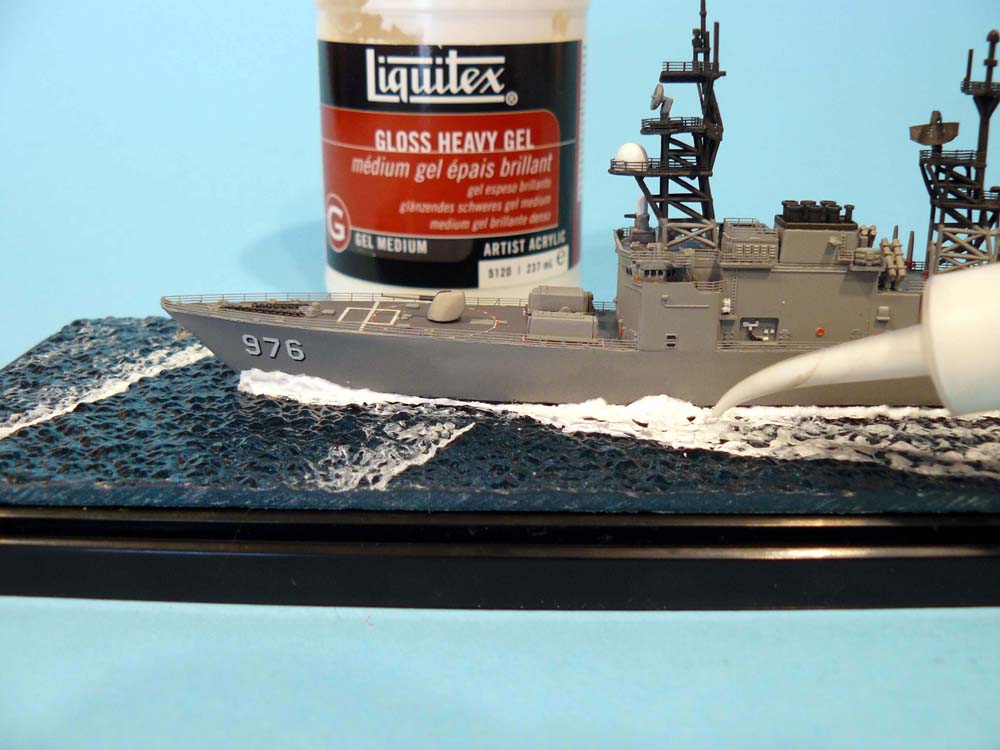
| During this same step, I apply the first layer of the bow wave. The bow wave needs a number of layers to build up its dimensions for a more realistic look. | 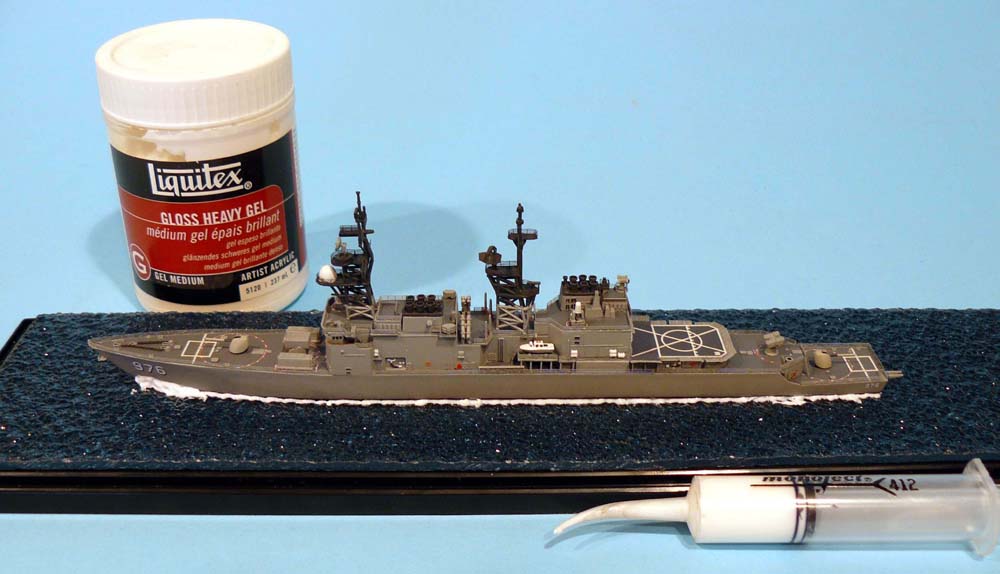 |
|||||||
 |
||||||||
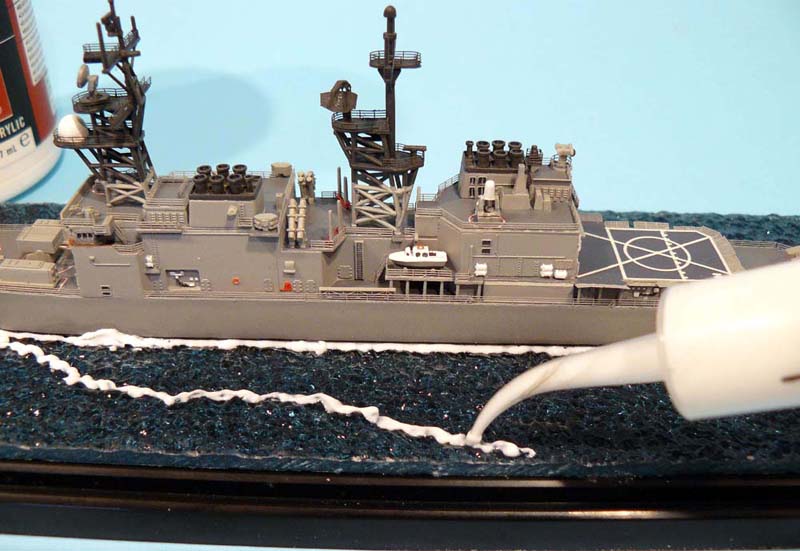
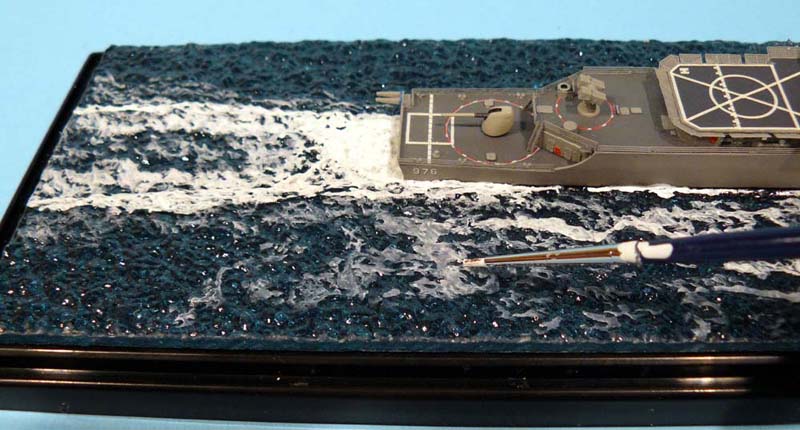
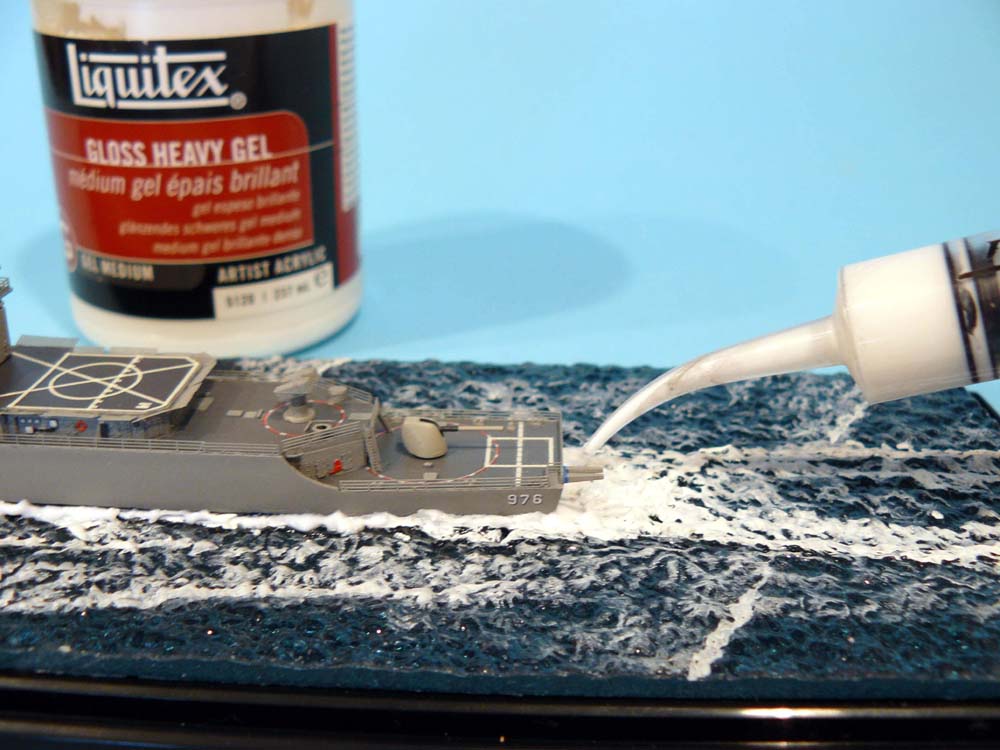
After setting the bow waves layout, I apply the acrylic
gel at the stern to build up the ships wake to add to the OEPs texture
in this area and outline the wakes edges. I also outline the ships side
wake with the acrylic gel.
|
||||||||
|
The LIQUITEX gel will dry clear. Once that the gel is dry you can begin painting the waves and wake. |
 |
|||||||
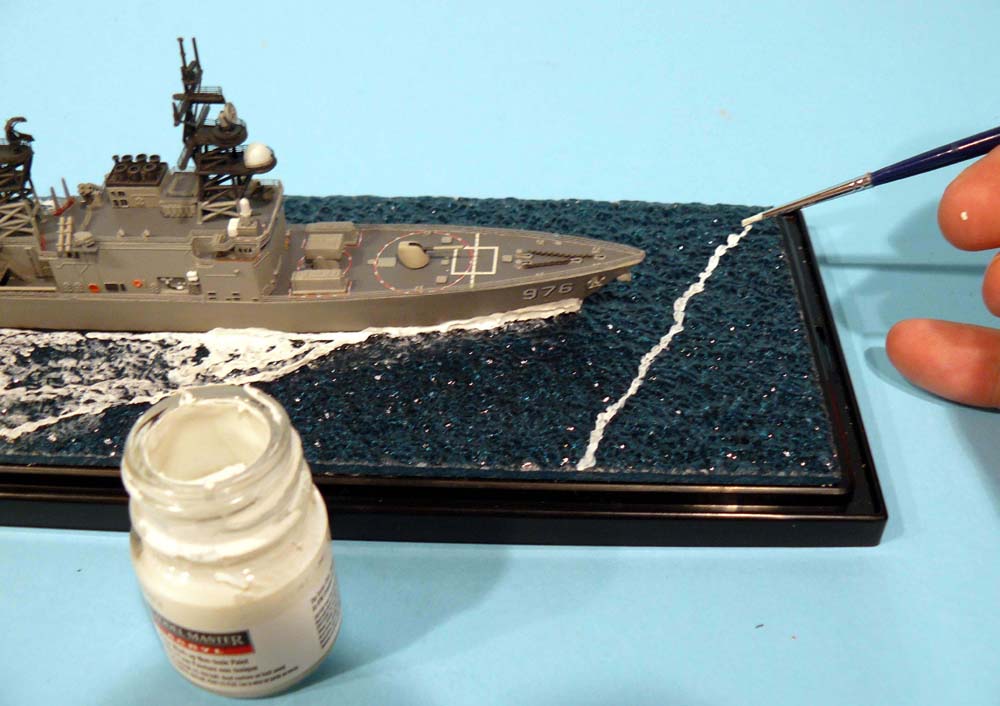
| Step 5: Painting the Wake and Waves. | ||||||||
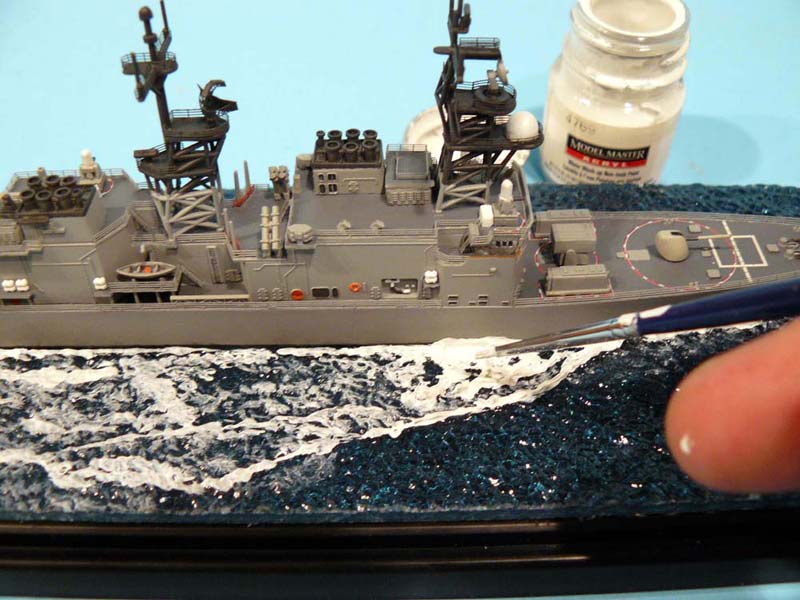
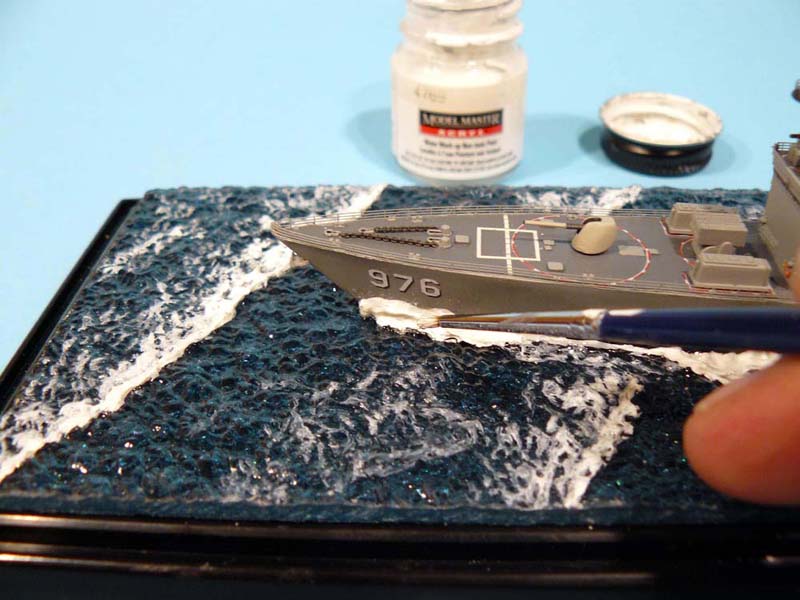
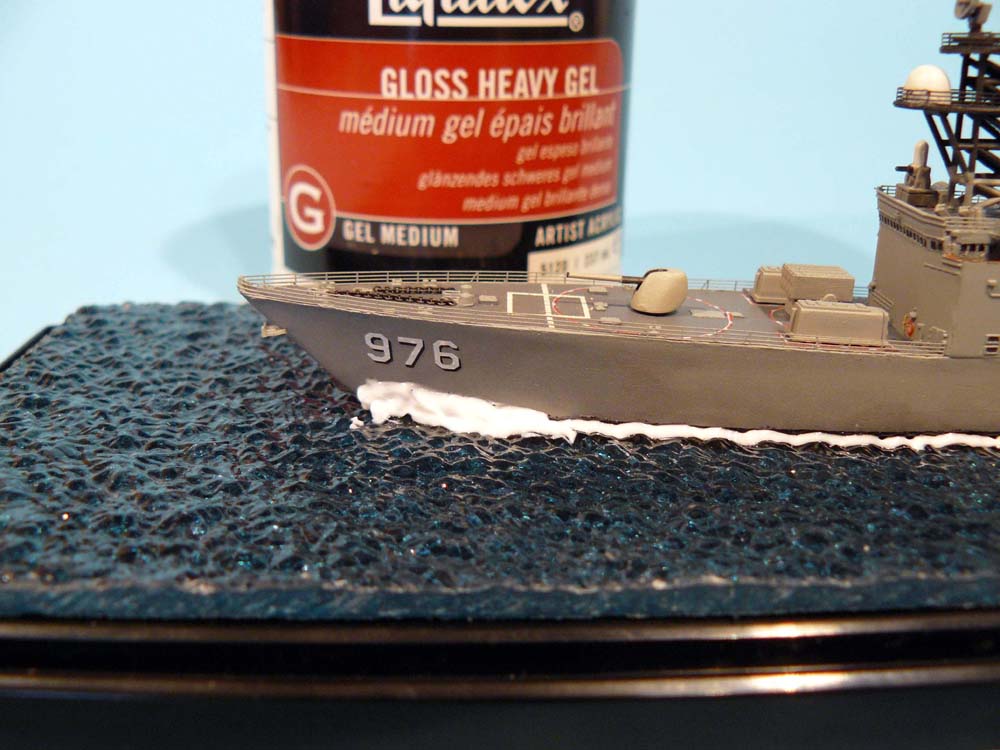
| I use MODEL MASTER Flat White acrylic enamel for the waves and wake. I will later apply an acrylic clear gloss coat to shine up the white paint as well as the entire OEP surface. | 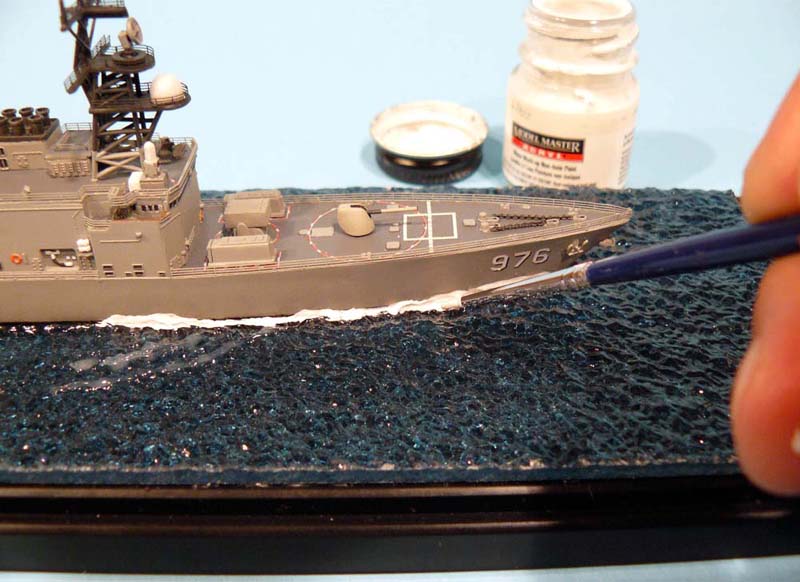 |
|||||||
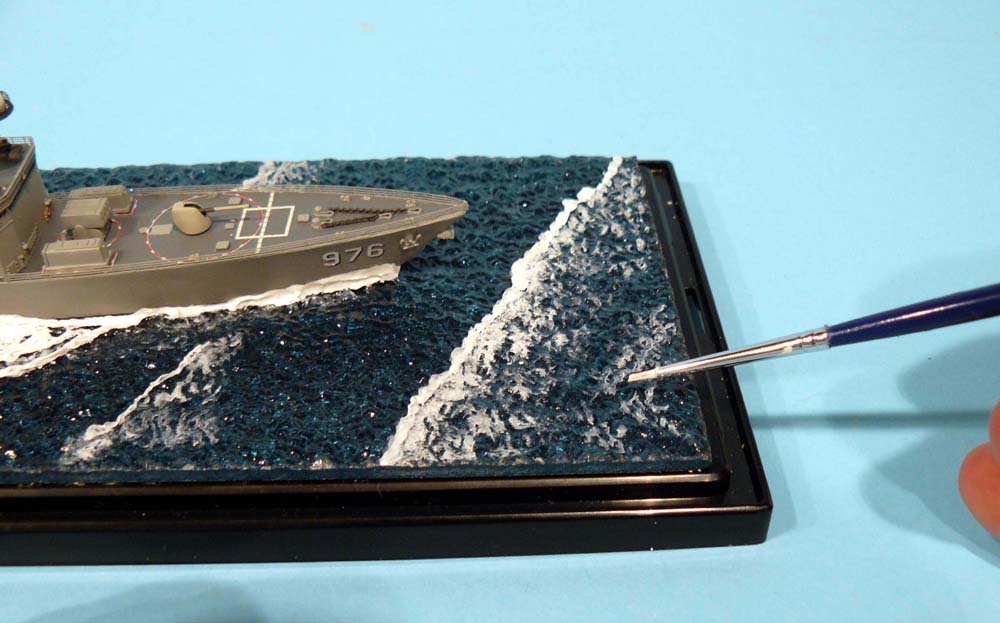
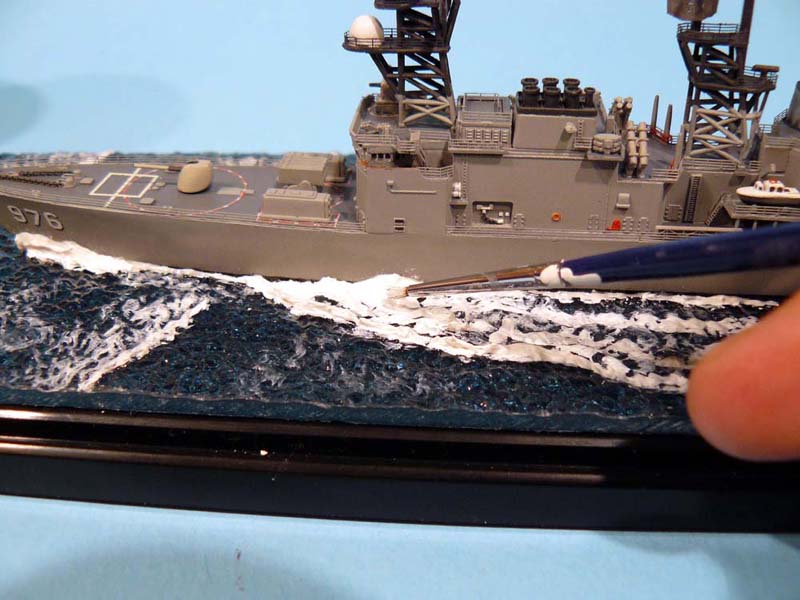
The edges and tops of the waves and wake I paint with a
solid white effect and I dry brush the white paint in the lower and less
agitated areas of the waves. I find that it is best to keep a lot of the
blue color of the waters surface throughout the wake area and not go overboard
(pardon the pun) with too much of the white waves and wake. It is the dark
areas that allow the details of the white parts to pop out.
|
||||||||
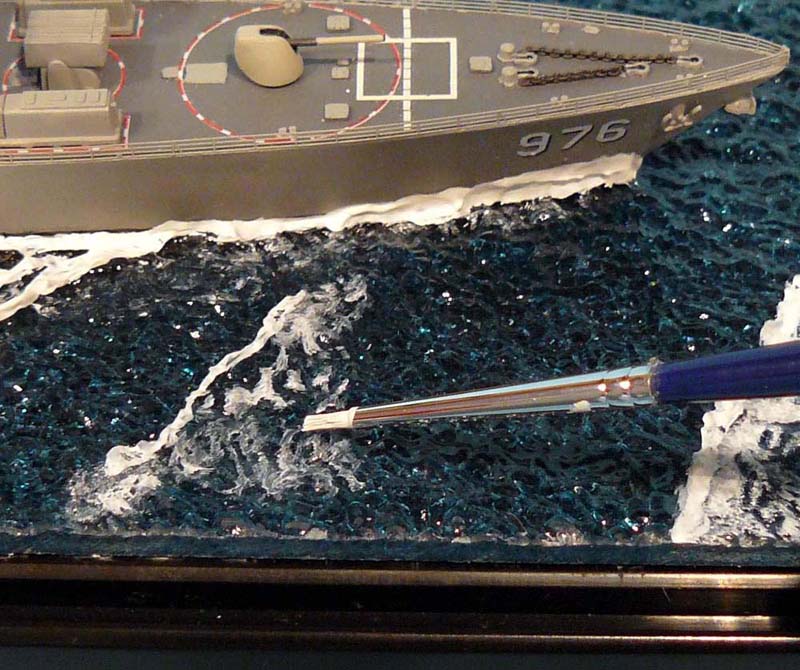
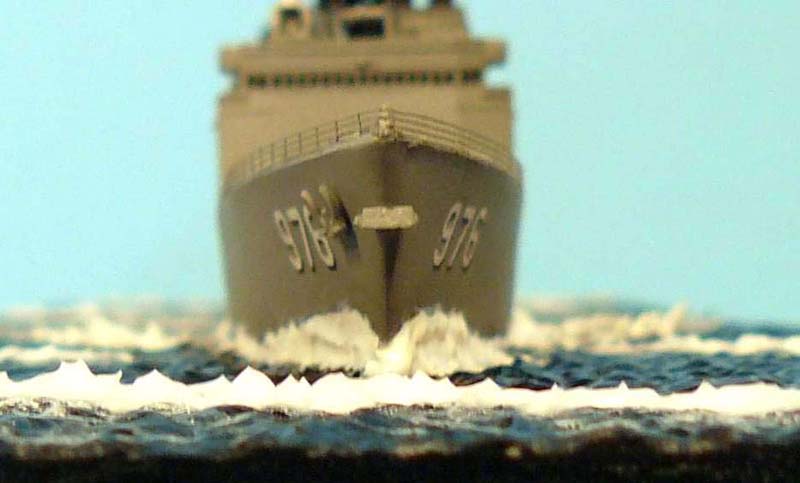
Sometimes I will add waves to the surface that existed
before the ship created its own wake and waves.
|
||||||||
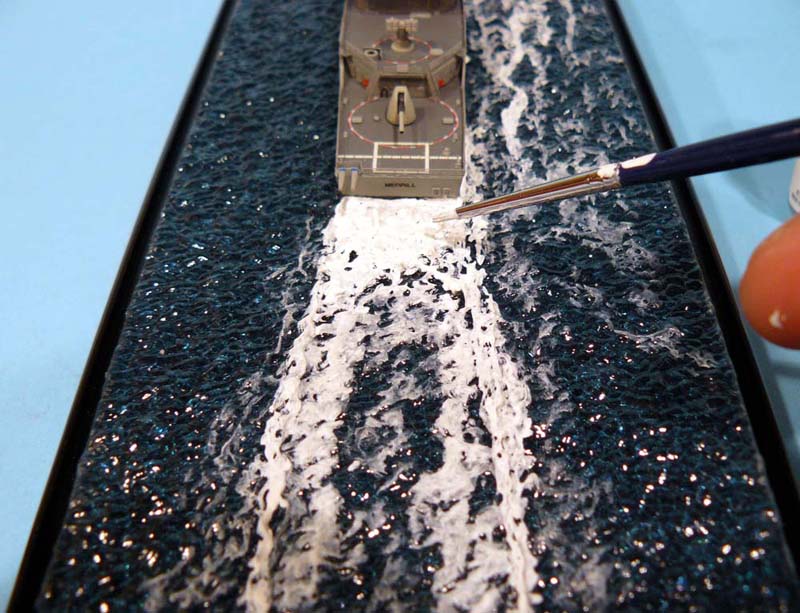
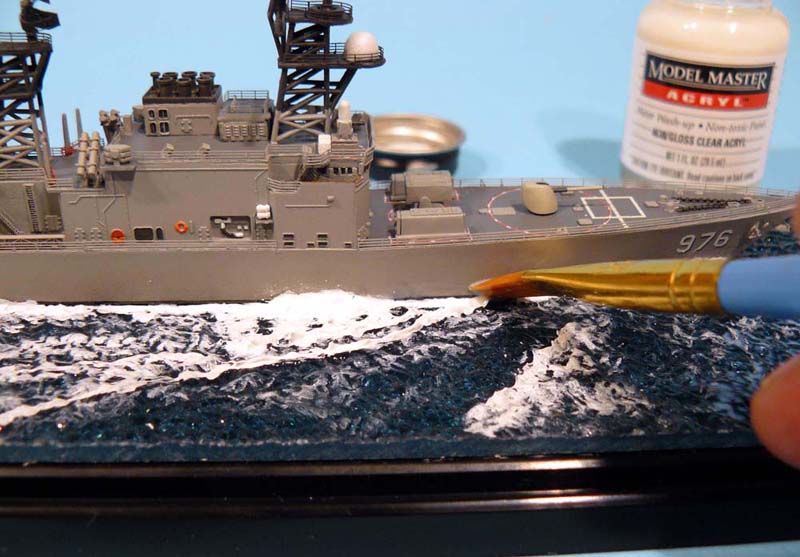
After applying the white paint to establish the look of
the entire wake and waves, I again use the hobby syringe and the LIQUITEX
gel to build up the bow wave, the stern wake, and some waves along the
sides of the ships. The leading edges of the wake, farther out from the
ship, may be built up, as well.
|
||||||||
After these second layers of acrylic gel have dried, I
then paint over them with the white paint.
|
||||||||
| As I mentioned previously, when the white paint has dried I apply an acrylic gloss clear coat to the waves, wakes, and the entire OEP surface. I will also apply a little gloss coat to the lower areas of the hull and a little higher around the bow, to depict a wet surface in these areas. | 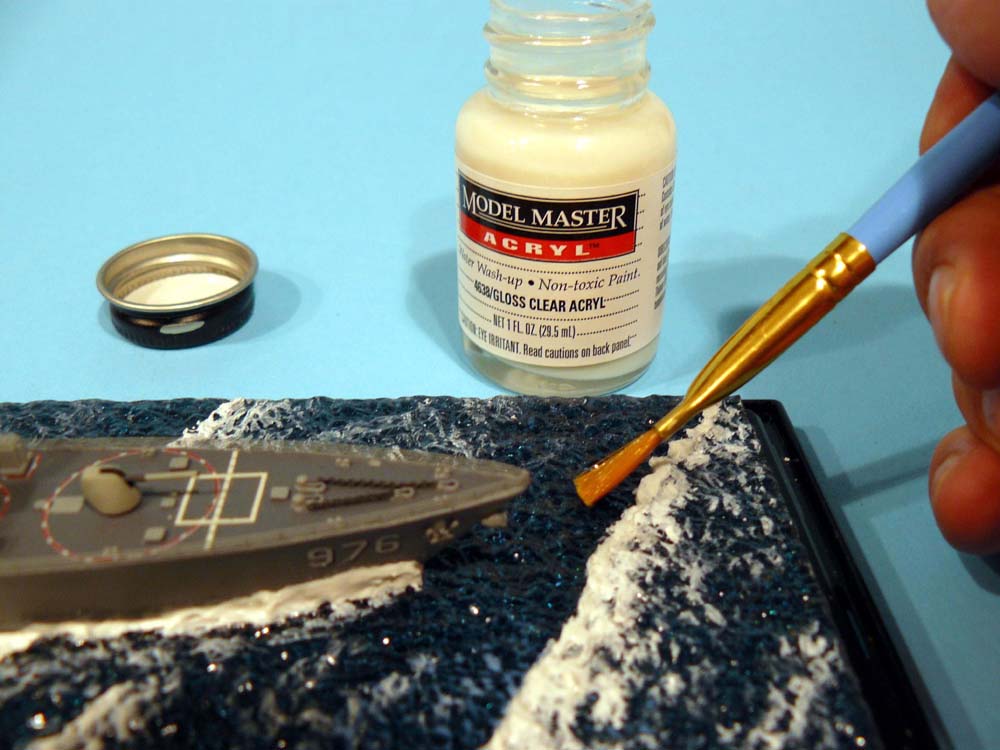 |
|||||||
 |
||||||||
| Step 6: Finishing the Display Base. | ||||||||
| My displays consist of mounting the IMEX display cases
base to an oak board that has been cut to size, routered, stained and protected
with a polyurethane finish coat.
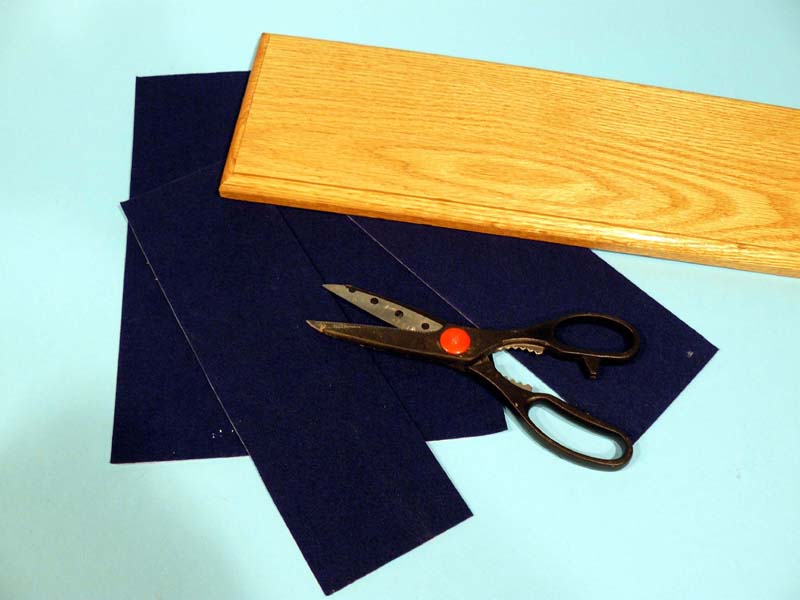
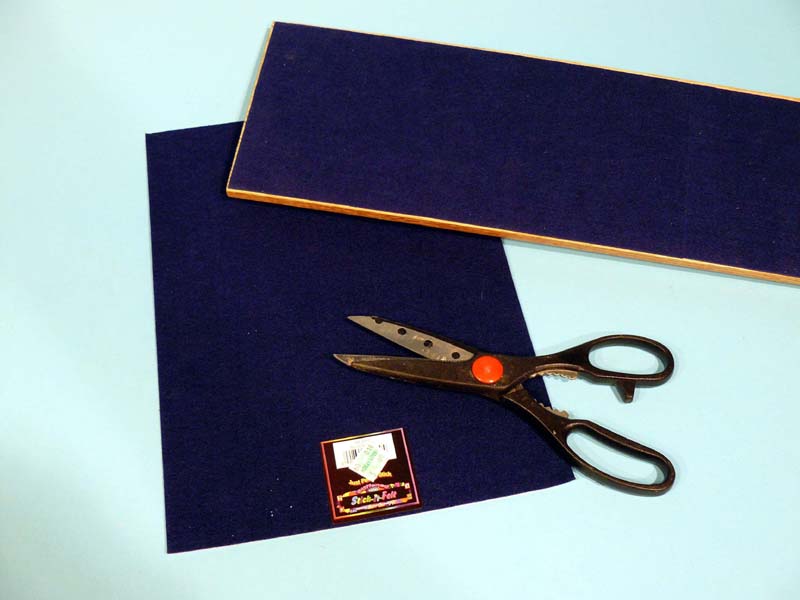
I also apply felt to the bottom of the base. I use STICK-IT-FELTs Stiffened Adhesive Backed Felt that I obtain from HOBBY LOBBY. I like this type of felt because it has a ridged, adhesive backing and its cuts easily without stretching or fraying. Just cut the felt sheets to size, peel away the paper backing and position it on the board and press down on it to adhere it permanently. Most often, you will need to apply more than one piece of felt to cover the entire bottom of the display board. The edges of this ridged felt allow for tight and almost invisible seams between the separate pieces of felt. |
 |
|||||||
 |
||||||||
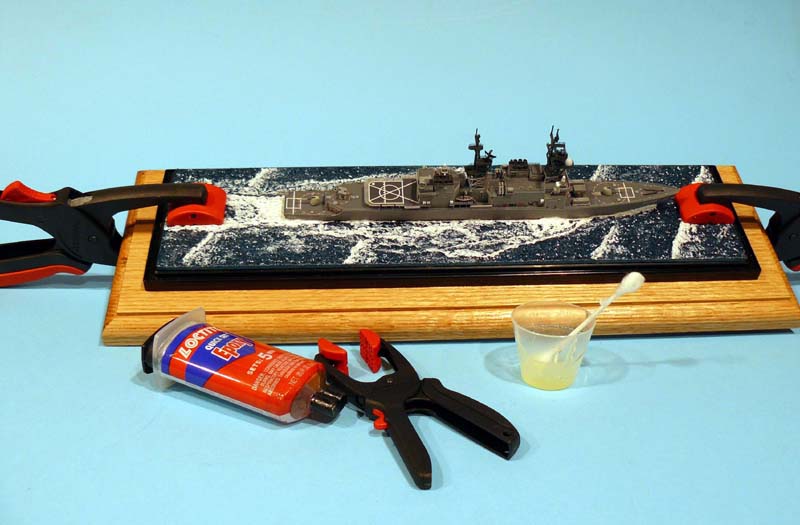
| With an epoxy glue and clamps, I attach the completed display case base to the prepared oak display board. I have found that the more glue the better, here. In my first attempts, I used thin coats of the epoxy and the display case later detached from the oak base. I havent had this problem since being more liberal with the epoxy in this step. | 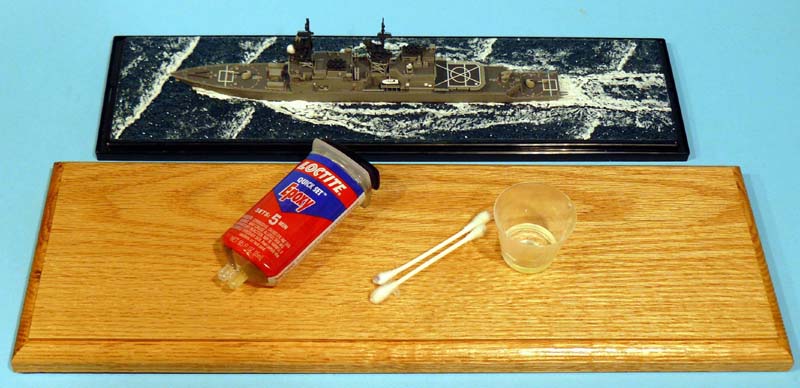 |
|||||||
 |
||||||||
| After the epoxy has set up, but not necessarily cured completely,
I remove the clamps and allow the epoxy to fully cure without them.
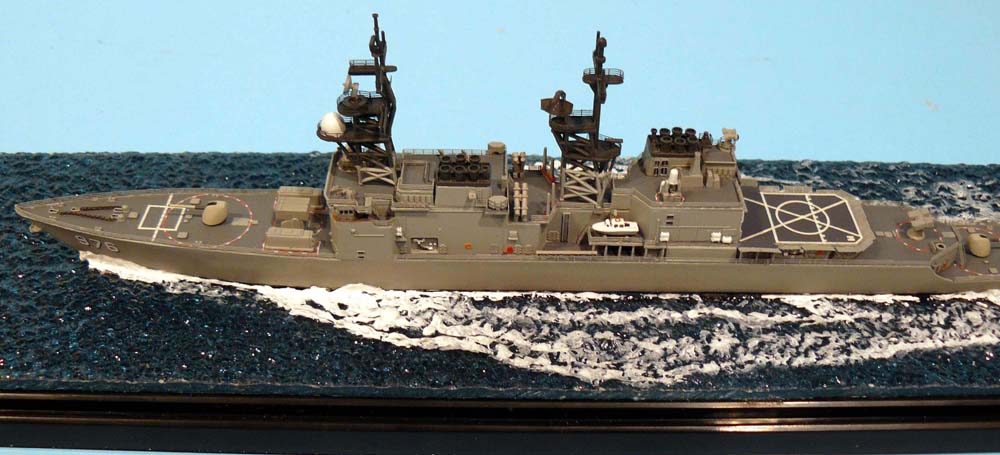
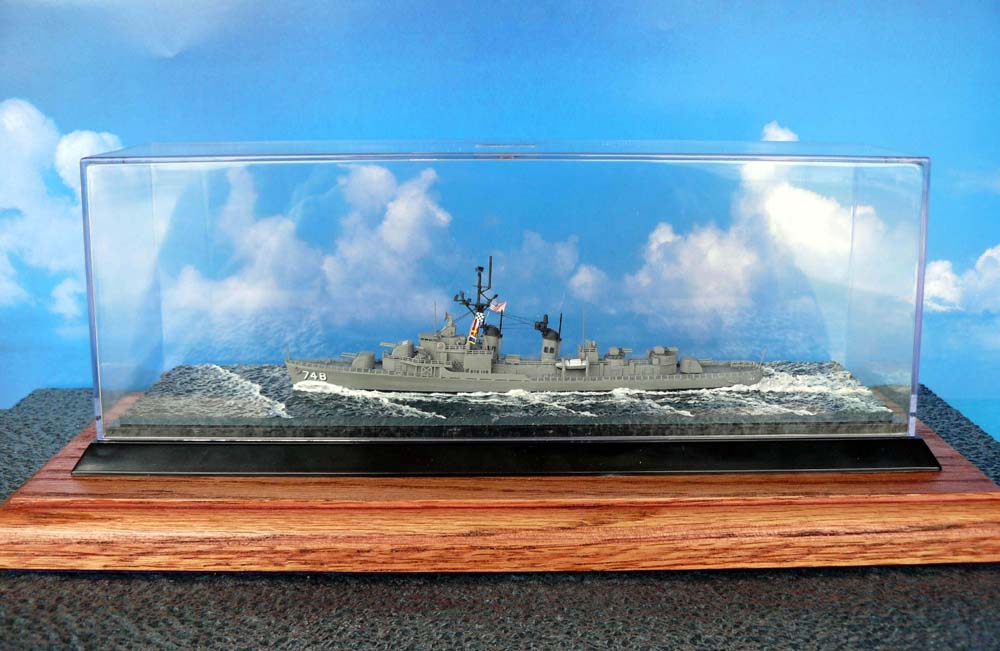
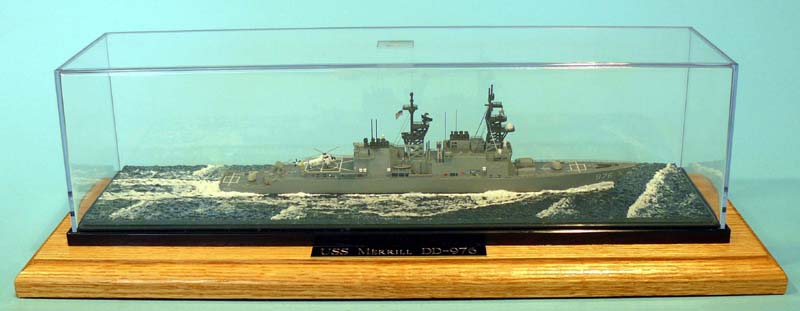
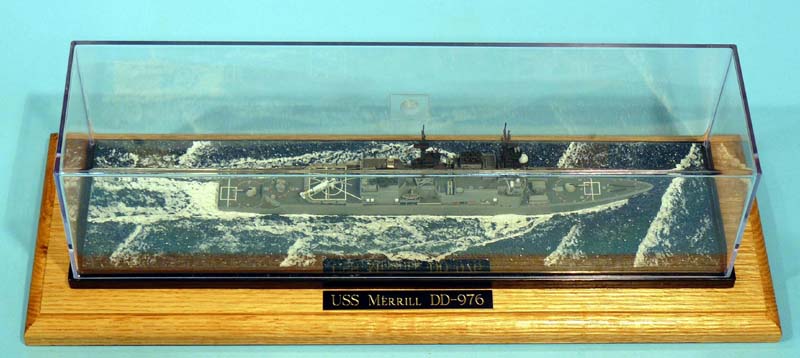
With the display case cover in place and the nameplate attached, my model is now ready for its new home in my display cabinet. |
 |
|||||||
 |
||||||||
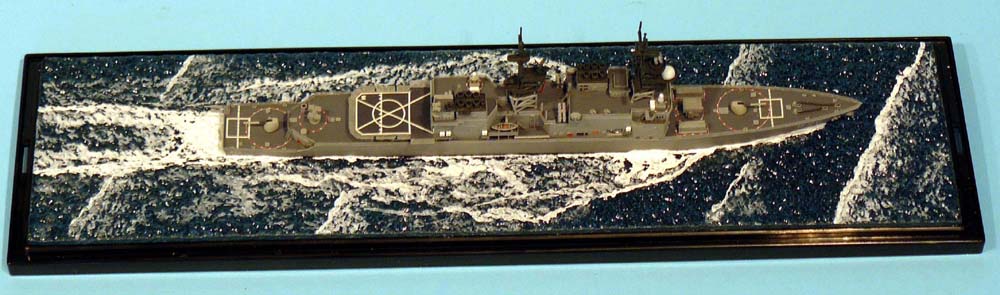
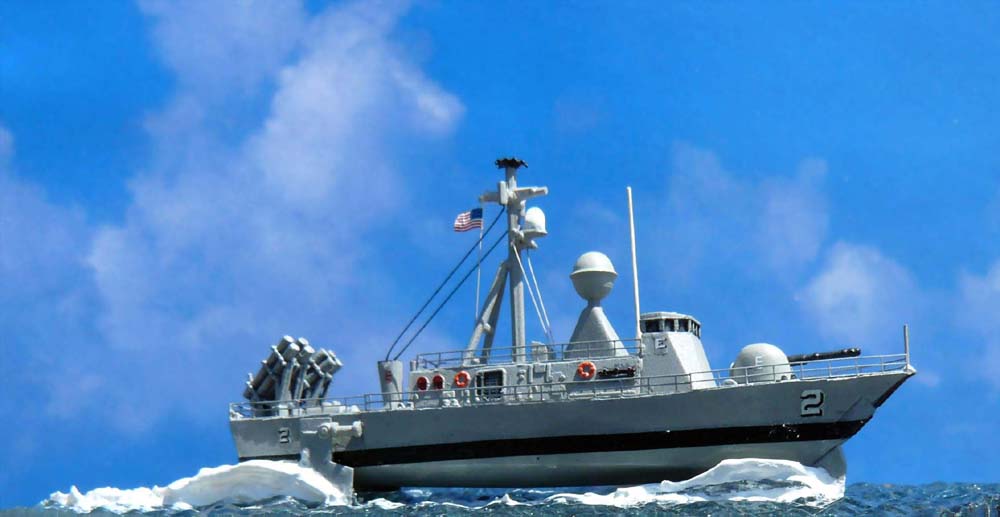
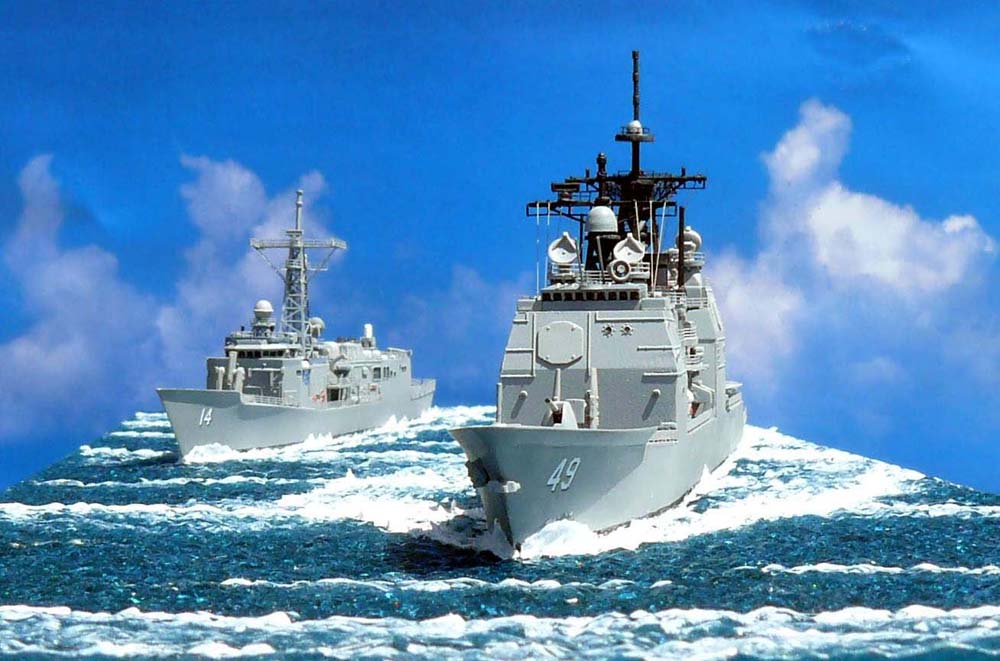
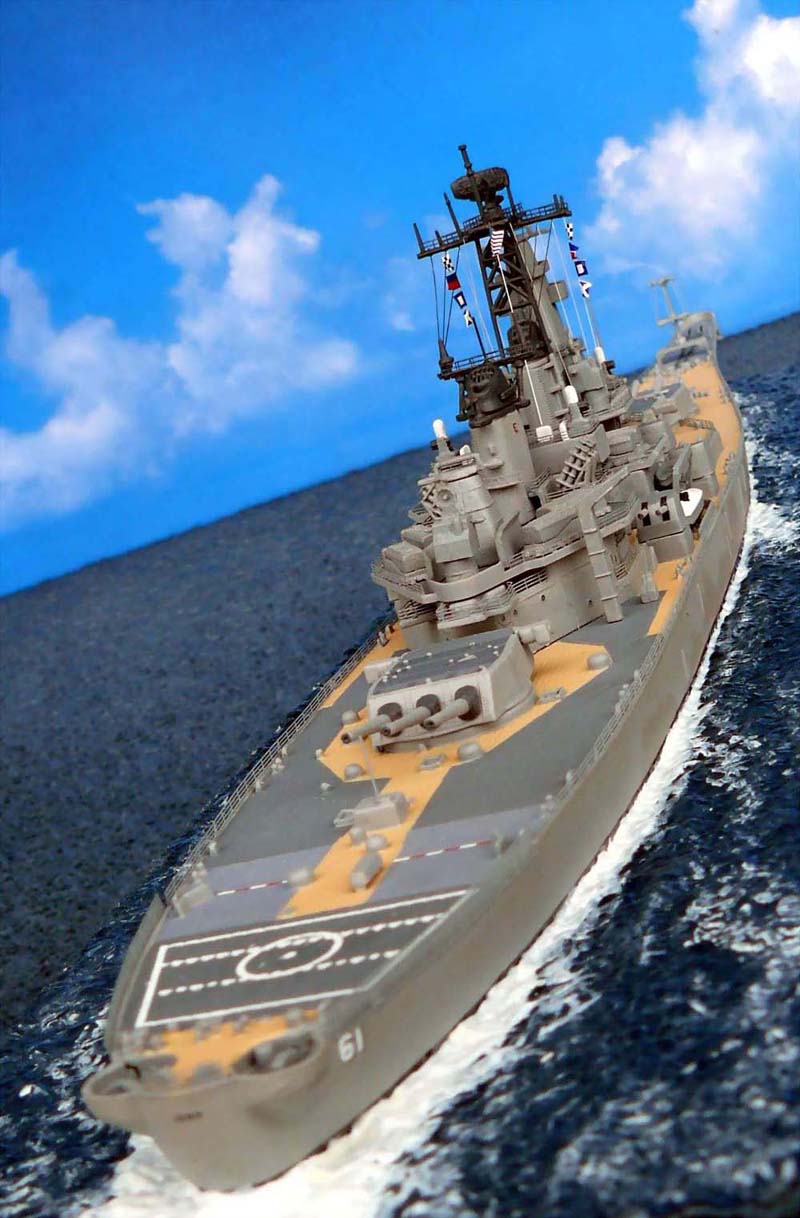
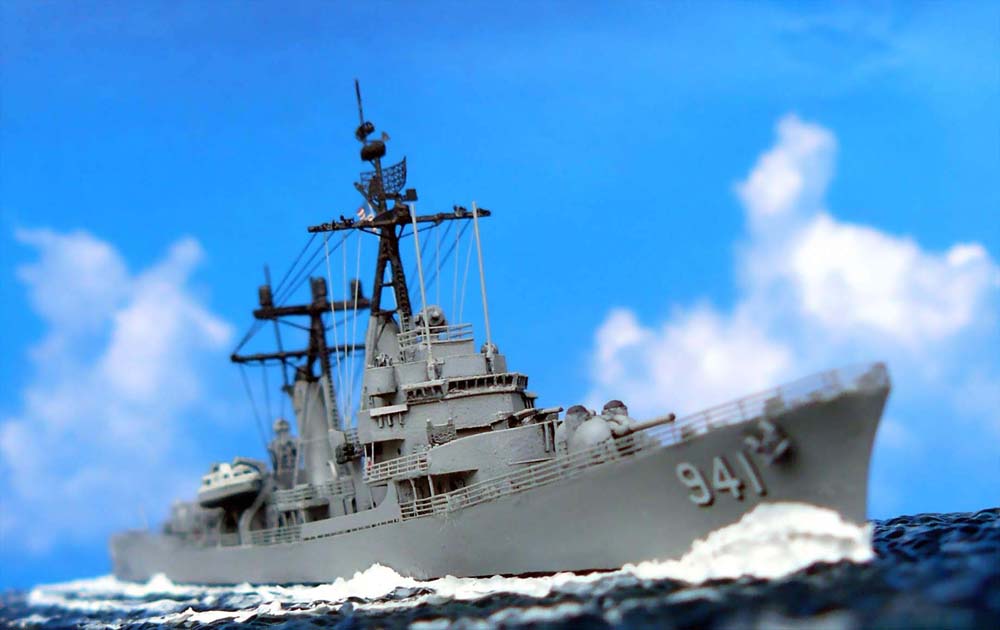
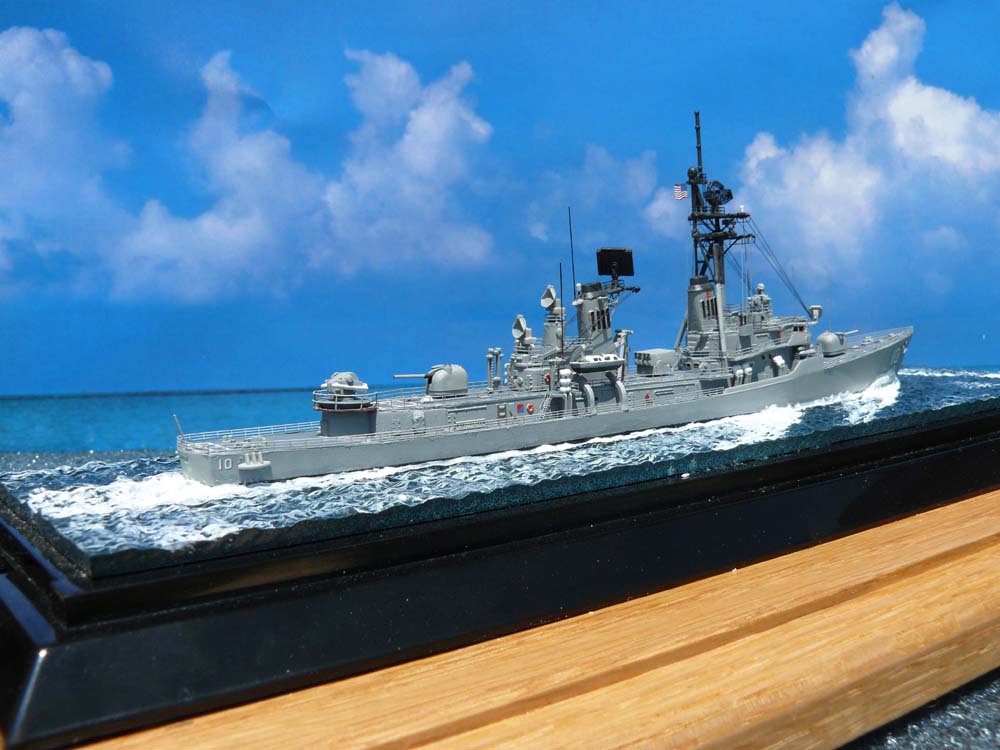
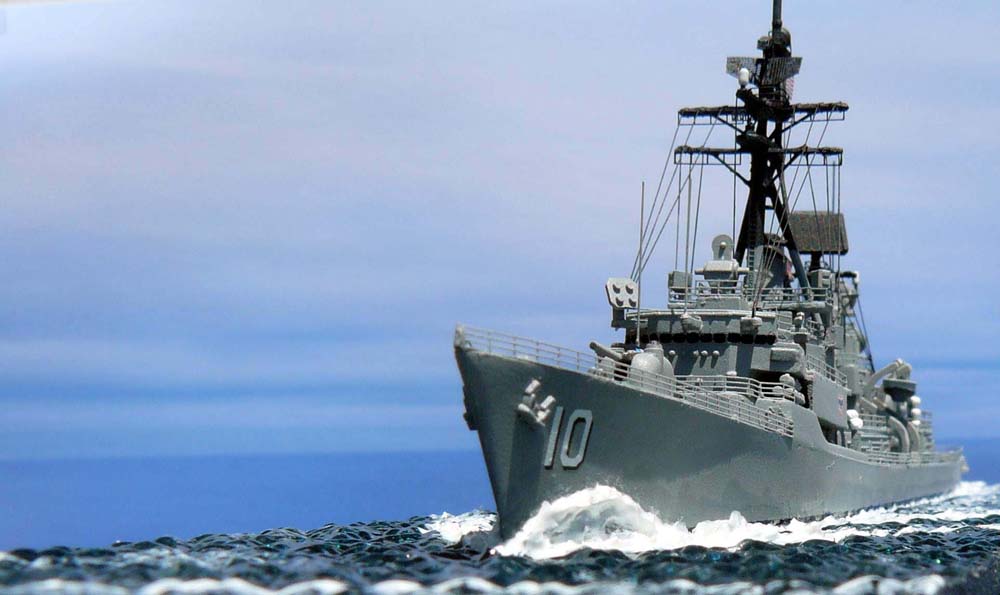
| Other Examples of this Technique: | ||||||||
|
||||||||
| You can see more of Carl's work on his ModelShipGallery page. | ||||||||