|
| Plating is one of the most challenging ship characteristics to replicate in miniature form. | |
| Three major factors contribute to this challenge.
One factor is the scale thickness. It is extremely difficult not to overdo
the thickness of the plating. Paper, litho plate, and sheet styrene all
seem to overwhelm the model, especially smaller scale models.
Another factor in model plating is compound curves. Ship hulls are complicated, three-dimensional shapes. The plating process, therefore, is labor intensive, with results not always satisfactory. A third negative aspect of plating by conventional techniques is whether or not the material used will adhere to the hull. Gluing dissimilar materials is unacceptable to most modelers' standards. Sooner or later the materials will separate due to the different rates of expansion and contraction, especially on areas as large as a model ship hull. These three factors contribute largely to the absence of hull plating on model ships. Dissatisfied with the results provided by known plating techniques, I sought a better process. While removing a mask from a model that had been painted, I studied the small ridge of paint caused by the tape separating the colors. It seemed feasible that I could control this ridge and produce the quality of plating I desired. |
|
| MATERIALS | |
|
The following materials are needed: #600 wet or dry sandpaper; Dupont 30 S Platinum Grey Hi-speed primer; Dupont 36085 Lacquer thinner; Dupont 30 S Platinum Grey Hi-speed primer; Dupont 3608S Lacquer thinner; Dupont 3919S Prep Sol Solvent; 3M Scotch Magic tape and #0000 steel wool. |
|
| STEP ONE Hull Preparation | |
| I primed the surface of my completed hull, and finished it smooth with #600 wet and dry sandpaper. Since the plating did not hide any defects in the hull, I had to be sure all blemishes were sanded out during the priming process. I prepared the hull as if I was going to add the final color coat. | |
| STEP TWO Layout | |
| It is critical that the plating layout is completed
precisely, With a soft lead pencil, I transferred plating lines to the
hull, being as accurate as possible. In order to accurately transfer lines, I used a copy of the actual builders' plating plan (pictures of the actual vessel were also helpful in complicated areas). In laying out the plating, built it into the hull from aft forward, so that all joints lap away from the forward movement of the ship. If the hull is correctly shaped it should coincide with the plating plan. If you have problems with the measurements not matching your hull, check your hull measurements to identify the problem. |
 |
| STEP THREE: Applying Inside Strake Plating | |
| Often one line of plates or strakes will be an inside
run and those on either side will be outside runs, producing the joggled
effect. For joggled plating, the inside strakes are applied first. Since
only the butt joints show, only these are applied. I usually started at
the top and worked toward the keel completing two or three full runs (bow
to stern), and applying port and starboard runs at the same time, alternating
between sides.
I laid down a mask covering the outside strakes from bow to stern, leaving the inside strake exposed. I masked off the butt joints with the tape on the stern side of the line. Using an airbrush, I applied two or three heavy coats of primer to the butt joint mask only. I did not spray the entire area inside the mask; applying paint only to the area of the butt joint mask, making sure to feather the paint away from the mask. I applied paint to all butt joint masks of the entire strake from bow to stern, and then proceeded to the next strake. |
 |
| Note: Some areas, especially around
the stern, were somewhat tricky to mask because of the extremely sharp
compound curves. If 3M Scotch Magic tape won't conform to these small curves,
cut regular masking tape into thin strips for these areas.
As I finished one side of the hull, I applied paint to the other side in the same manner. When I completed the second side, I went back and applied two more heavy coats to the first side, and then repeated it on the second side. This flip-flop technique in applying the paint helped to keep the lacquer from attacking the glue on the tape. After the paint had glazed over, I carefully removed the mask. The inside strake was now completed on the entire hull. Note: Think heavy when applying paint. It's difficult to go back and mask off areas that do not have enough depth, especially inside stakes. With an airbrush, it is almost impossible to apply too much paint. The plating will be wet sanded later, so even when you think you have too much paint, apply more. Allow the paint to fully glaze over (approximately thirty minutes to one hour); then remove the tape mask. After 24 hours, I cleaned up any tape residue left
from the mask with Prep-Sol and a cotton swab. I lightly dry sanded the
butt joints with #600 wet or dry sandpaper. I paid special attention to
the area around the butt joint. If you try this,
|
|
| STEP FOUR Applying Outside Strake Plating | |
| Under ideal conditions it usually takes lacquer
72 hours to completely cure. If you're careful, however, you should be
able to apply the outside strakes after 24 hours.
I masked off the outside strakes, applying the tape to cover the inside butt joints. Applying this mask proceeded fairly quickly, as the corners of the butt joints were a guide for the tape. The tape just touched the corners or be set back just a little, exposing a small portion of the butt joint corner. The result was a mask that exposed the full area of the outside strake. |
 |
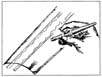
| I marked off the butt joints on the tape with a pencil
(after the next step these lines for the joints won't be visible). Inside
the mask, I applied three to four heavy coats on the full length of the
hull, building up the strake (Illustration Two). I did the same to the
other side. As the paint glazed over, I applied another heavy coat or two
so that this area was sufficiently thicker than the application of paint
completed in step three (applying inside strake plating). Before this area
had dried, I gently scraped away the overspray on the tape exposing the
marks for the butt joints. By the time you have uncovered your reference
marks for the butt joints, the paint should have glazed over enough for
a light sanding.
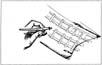
I lightly dry sanded the outside strake leaving the fine chalk on the hull. The chalk helped ensure that the tape for the butt joints didn't pull off the paint. I applied the masks for the butt joints with only enough pressure to hold the tape. I applied the paint to simulate the butt joints, lightly feathering away from the mask as in step three (Illustration Three). After this was completed, I carefully removed the masks. I waited at least 72 hours (one week is better), and with PreSol and a cotton swab, I gently removed the tape residue from the plating. Steel wool and Pre-Sol were also helpful to remove the unwanted residue. After I removed all residue, I lightly wet sanded the entire hull with #600 wet or dry sandpaper. |
|
| SUMMARY | |
| The results of using this relatively quick technique are a beautifully plated model with scale thickness hull plating and a material that will last the lifetime of the model. Ship models with full hull plating are impressive and capture much attention , especially from other modelers. | 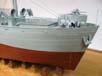 |
| Additional Information on Hull plating details | |
| Some ship hulls had additional strengthening features such as butt straps on critical areas of stress. From the models I have built I have included this feature on the hull of ships that required them. There are two design types I have seen used and these are a simple rectangular strip and a more complicated saw tooth or zig zag pattern. Both types are the width of the plate and the rectangular type is replicated by simply masking off the area with a 1/16 inch gap between the mask left to apply paint build up. (Note this is for a 1/192 scale model.) The zig zag pattern had me stumped on how to make a mask that would "transfer" this type of pattern to the ship hull. This was going to be a very time consuming mask to cut and the destroyer model had several of these type of butt straps. The solution came to me by accident. During the plating process of the model my eye was caught by the serrated edge of the tape as I was using it to plate the model. Eureka! It was a perfect pattern that matched the saw tooth style of the prototype. The ends of the tape as you cut with the serrated portion of the dispenser make a perfect pattern for 1/192 scale models. Simply apply them with ends over the seams of the plating with a 1/16 inch gap left between them for the paint build up. A simple, effective, perfectzig zag butt plate. | |
More
of John M Johnsey 's work.
Updated 3/21/2015

© ModelWarships.com