
By Mike Taylor
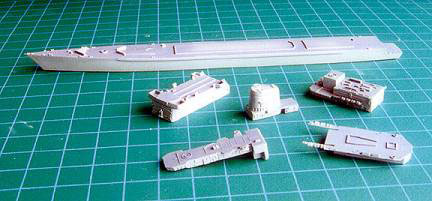
Construction of the Ark Royal began by Marking and cutting the
waterline then joining the hull halves and placing the deck. After consulting the photo
etched sheet’s instructions, to note any assembly problems and finding there were
none, the main superstructure was built.
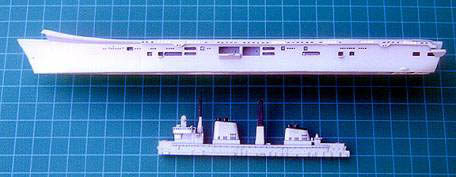
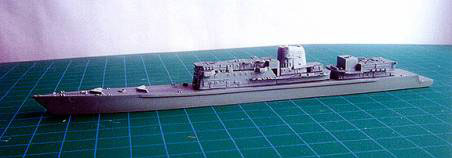
These sub assemblies were then painted aircraft gray with medium gray
decks and set aside to dry. Once dry they were given a coat of Future and all windows and
vents were filled in with blue and black washes. A wash was also applied around surface
details. After the wash had dried any extra wash was removed with a q-tip dampened with
thinner. The superstructure was then cemented in place. (Photo 2)
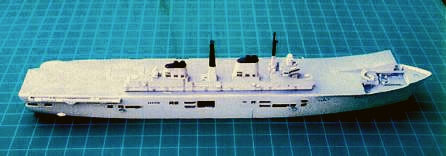
I found (much to my dismay) that the black stripe decal supplied with
Revell’s kit was much too short. I masked and sprayed the black line and used spare
white stripe decal from Accurate Miniature’s F3F kit to border it. All other decals
were added at this time.
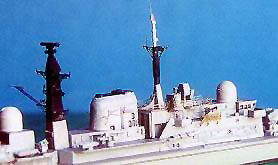
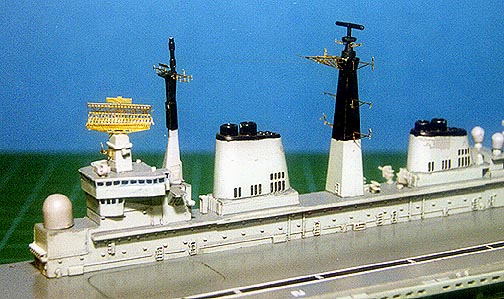
Most of the photo-etched parts supplied by WEM are used on the masts.
These include Antennae spreaders, radar, and yardarms (photo 3).
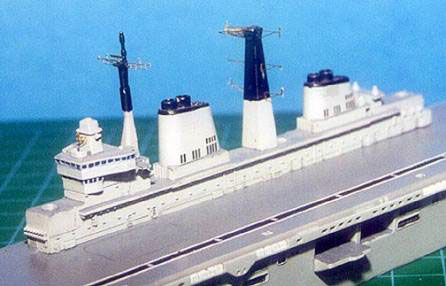
The yardarms really improve the look of the kit. Finely etched, they
include yardarm supports that are bent downward to be placed for and aft of the yardarms
themselves. These parts are easily as thin as attachments on other photo etched sets,
bordering on (dare I speak it?)…being tiddly. Well, tiddly or not I went for this
exercise in eyestrain and bent the supports (2 for each yardarm-16 total). The results are
impressive. Being used to modeling US warships I painted everything black at first but
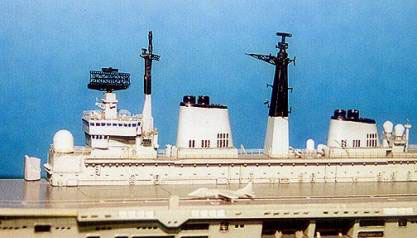
fixed it after looking at photographs later. Finely etched railings were added around the
superstructure decks (photo 4)
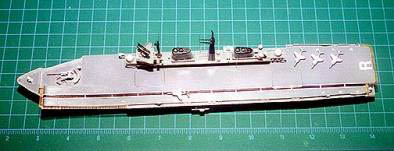
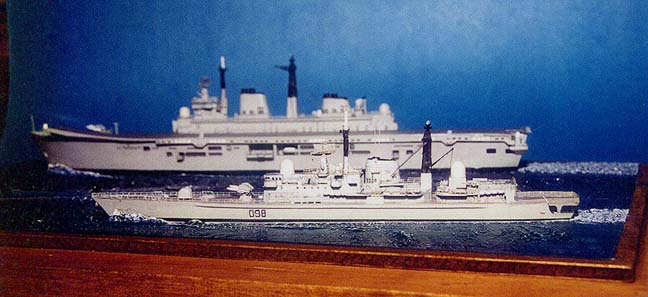
I have to say the British Type 42 batch 3 is a very sexy ship. It’s
long bow and sleek superstructure make it look fast standing still. As always I began by
assembling and painting the sub assemblies (photo 5).
The same colors and techniques were used as were used on the Ark
Royal with the exception that I tried to replicate the waffle pattern of the hull plates
by spraying a lighter shade of gray through some mesh (from a Tamiya M-1 kit). It worked
but the results are hardly noticeable in the photographs.
Again after consulting the photo etched instructions to ensure there
would be no assembly problems I began to work on detailing the superstructures. The masts
were assembled and painted, all molded on yardarms were removed and they were cemented in
place.
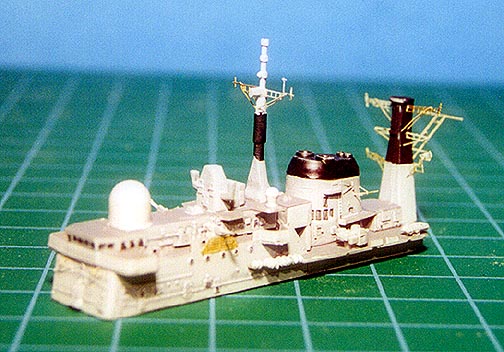
Photo 7 shows the photo etched yardarm supports quite well. WEM’s type 42 set includes parts for all 3 batches including arial spreaders, helo netting, rails, radars , air intake grills, flightdeck lighting gantry 20mm safety netting, and helo blades.
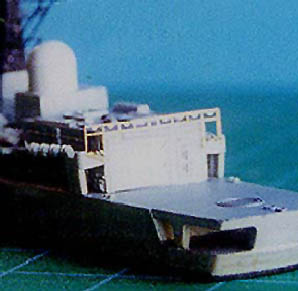
Photo 9 & 10 show the superstructure railing and
20mm safety net.
All armaments were added prior to adding the main deck
railings.
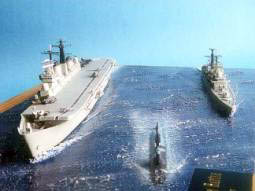
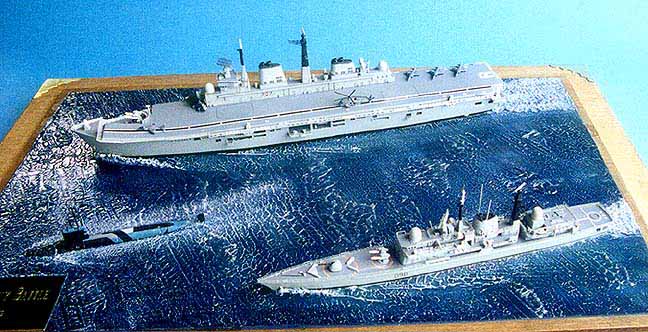
While all this shipbuilding was going on I was also working on the
base. The hull positions were marked by tracing them with an exacto knife onto masking
tape that was applied to the base roughly where the ships would be. This was done early on
prior to painting. The water was then created over the shapes and cut away, leaving a 1/16”
space for the hulls to fit. The hulls were then set in place and wakes were created from
celluclay and blended in to the surrounding water. At this time the safety nets were
applied to the Ark Royal (some surgery was required as the set is designed for WEM’s
resin kit of the Invincible (?) photo 11)
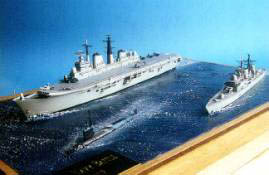
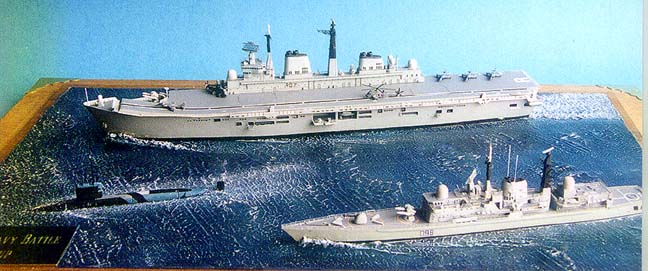
The carrier was then set in place using white glue and allowed to dry
pending the addition of aircraft and rigging. It was at this time that I noticed WEM’s
exquisitely rendered 1022 radar scanners needed to be gray and they were carefully
re-painted. The type 42 was placed the same way as the carrier and the Arii Trafalgar was
painted using WEM’s HMS Trenchant painting guide as a pattern and placed-don’t
forget to add the upper stern fin slightly behind!!
Whith the ships securely in place they were rigged and the aircraft
were added. WEM’s photo etched details added amazingly to the finished product.
My thanks to Caroline and the folks at White Ensign Models…Mike
Taylor